Introduction
Adding a gable porch roof to your house can be a fantastic way to enhance its curb appeal and provide a shaded outdoor space for relaxation. This step-by-step guide will walk you through the process of attaching a gable porch roof to your house. Whether you’re a seasoned DIY enthusiast or a beginner, this article will provide you with the knowledge you need to complete this project successfully.
Why Choose a Gable Porch Roof?
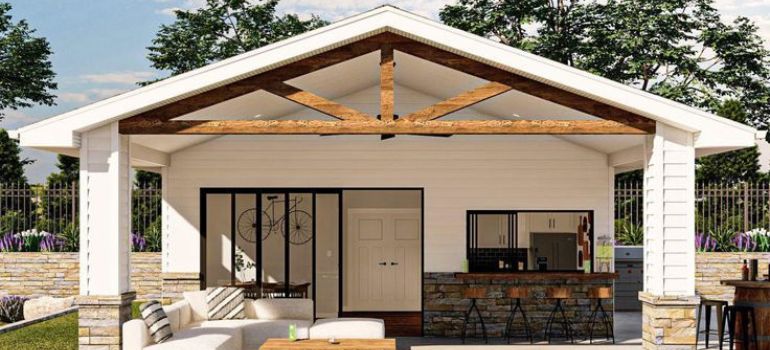
Before we dive into the installation process, let’s briefly discuss why you might want to opt for a gable porch roof design. Gable roofs are not only aesthetically pleasing but also highly functional. They provide excellent ventilation, maximize headroom, and shed rain and snow effectively.
Planning Your Project
Obtain Necessary Permits
Before you begin any construction work on attaching a gable porch roof to your house, it is essential to adhere to local regulations and obtain the required permits. Failing to do so can lead to legal complications and delays in your project. Here’s how to go about it:
- Check Local Building Codes: Start by checking your local building codes and regulations. These codes can vary from one area to another, and it’s crucial to understand what applies to your specific location. You can usually find this information on your city or county government’s website or by visiting the local building department.
- Consult with Authorities: Reach out to your local building authorities or permit office to discuss your project. They will be able to provide you with specific guidance on the permits you need, the application process, and any associated fees.
- Submit Permit Applications: Once you’ve identified the necessary permits, complete the required permit applications accurately. These applications typically include details about your project, such as the scope of work, construction plans, and estimated costs.
- Pay Permit Fees: Be prepared to pay permit fees as part of the application process. The fees can vary depending on the size and complexity of your project. Ensure you have the necessary funds to cover these expenses.
- Wait for Approval: After submitting your applications and fees, the local authorities will review your project to ensure it complies with safety and zoning regulations. This process may take some time, so be patient.
- Address Feedback: If the authorities require any modifications or additional information, promptly address their feedback to expedite the approval process.
- Receive Permits: Once your permit applications are approved, you will receive the necessary permits. These permits will outline the specific conditions and requirements for your project, including any inspections that may be needed during construction.
- Display Permits: It’s essential to display your permits prominently at the construction site. This helps ensure that inspectors can easily verify that your project is compliant with local regulations.
- Schedule Inspections: As you progress with your porch roof installation, you may need to schedule inspections at various stages of the project to ensure it meets safety standards.
Gather Your Materials and Tools
Before you begin attaching a gable porch roof to your house, it’s crucial to gather all the necessary materials and tools. Having everything ready will save you time and make the construction process smoother. Here’s a list of what you’ll need:
Materials:
- Lumber: Purchase high-quality lumber for framing, such as 2x4s, 2x6s, and 4x4s, depending on your project’s design and size. Ensure the wood is treated or suitable for outdoor use.
- Roofing Materials: Choose your preferred roofing material, which can include asphalt shingles, metal roofing, or other options. Calculate the required square footage based on your porch roof’s dimensions.
- Nails and Screws: Get a variety of nails and screws in different sizes to secure the frame and roofing materials. Galvanized or rust-resistant fasteners are ideal for outdoor projects.
- Concrete Mix: You’ll need concrete mix for setting the support posts. Make sure to follow the mixing instructions carefully.
- Roof Sheathing: Purchase plywood or oriented strand board (OSB) for the roof sheathing. Ensure it’s the right thickness and size to cover the trusses.
- Fascia and Soffit: These materials provide a finished look to your porch roof and protect it from the elements. Select materials that match your house’s design.
- Paint or Stain: If you plan to paint or stain the porch roof, buy the appropriate paint or stain in the color of your choice.
- Safety Equipment: Invest in safety gear, including helmets, gloves, safety glasses, and a harness if you’re working at heights.
Tools:
- Circular Saw: A circular saw is essential for cutting lumber and plywood accurately.
- Power Drill: A power drill with a variety of drill bits and screwdriver attachments will be indispensable for securing materials.
- Level and Square: Ensure your project is plumb and level with a carpenter’s level and a framing square.
- Measuring Tools: Have a tape measure, carpenter’s pencil, and a framing square for precise measurements and marking.
- Ladder: If your project requires working at heights, a sturdy ladder is essential for safety.
- Concrete Mixer: If you’re mixing your concrete for support post footings, a concrete mixer can save time and effort.
- Safety Gear: Don’t forget safety gear, including a hard hat, work gloves, safety goggles, and ear protection.
- Roofing Tools: Depending on your roofing material, you may need specialized tools such as a roofing nailer, roofing adhesive, and a utility knife.
- Sawhorses: Sawhorses provide a stable work surface for cutting and assembling materials.
- Extension Cords and Power Outlets: Ensure you have access to power outlets and suitable extension cords for your power tools.
Create a Detailed Blueprint
Sketch out a detailed blueprint of your porch roof, taking into account the dimensions and angles. A well-thought-out plan will save you time and ensure a more precise installation.
Building the Foundation
Determine Attachment Points
Identify the points on your house where you will attach the porch roof. Ensure they are sturdy and capable of supporting the additional weight.
Set the Posts
Dig holes for your porch roof support posts and set them in concrete footings. Make sure they are level and plumb.
Framing the Roof
Install the Ledger Board
Attach a ledger board to your house where the porch roof will connect. This board will provide crucial support for your roof.
Build the Roof Trusses
Construct the gable roof trusses according to your blueprint. These will form the basic framework of your porch roof.
Attaching the Roof
Raise the Trusses
With the help of a few friends, lift the roof trusses onto the ledger board and secure them in place. Ensure they are properly aligned and spaced.
Add Roof Sheathing
Install roof sheathing over the trusses to create a solid roof surface. Make sure it’s securely fastened.
Roofing and Finishing Touches

Apply Roofing Materials
Applying roofing materials is a crucial step in attaching a gable porch roof to your house. The choice of roofing material plays a significant role in the durability and appearance of your porch roof. Below, we’ll guide you through the process of applying roofing materials:
1. Prepare the Surface:
- Ensure that the sheathing on the porch roof is properly secured and free from any debris or protruding nails.
- Check for any damaged or rotten areas and repair them before proceeding.
2. Install Roof Underlayment:
- Start by installing a roofing underlayment, such as roofing felt or synthetic underlayment, over the sheathing.
- Overlap the underlayment according to the manufacturer’s instructions, typically around 2 to 4 inches.
3. Drip Edge Installation:
- Install a drip edge along the eaves of the porch roof. This metal flashing helps direct water away from the roof edge.
- Secure the drip edge with nails or screws, ensuring it overhangs the edge slightly.
4. Apply Starter Shingles:
- Begin at the lowest edge of the roof and install starter shingles. These are specialized shingles designed for the first row.
- Align them flush with the edge and secure them in place.
5. Roofing Material Installation:
- Depending on your chosen roofing material (asphalt shingles, metal roofing, etc.), follow the manufacturer’s guidelines for installation.
- Start from one side of the porch roof and work your way up to the peak.
- Overlap the shingles or roofing panels as instructed, usually around 1 to 2 inches.
- Use roofing nails or screws to secure the roofing material to the sheathing or trusses.
6. Hip and Ridge Installation:
- If your porch roof design includes hips and ridges, follow the manufacturer’s instructions for installing hip and ridge shingles or caps.
- These specialized shingles or caps provide protection along the angles and peaks of the roof.
7. Flashing and Ventilation:
- Install flashing around any roof penetrations, such as vents or chimneys, to prevent water infiltration.
- Ensure proper ventilation by installing ridge vents or other ventilation components as recommended for your roofing material.
8. Trim and Clean-Up:
- Trim excess roofing material as needed, making sure edges are clean and straight.
- Dispose of any debris properly and ensure the work area is clean and safe.
9. Inspection:
- Inspect your roofing installation for any visible defects or areas that may require adjustment.
- Address any issues promptly to prevent leaks or other problems.
Install Fascia and Soffit
Attach fascia boards and soffit to give your porch roof a finished look and protect it from the elements.
Paint or Stain
Add a coat of paint or stain to match your porch roof with the rest of your house.
Conclusion
By following these steps, you can successfully attach a gable porch roof to your house and create a beautiful outdoor space that adds value to your home. Remember to prioritize safety throughout the project, and don’t hesitate to seek professional help if needed.
FAQs (Frequently Asked Questions)
Yes, in most cases, you will need a building permit for this type of project. Check with your local authorities for specific requirements.
It’s possible, but it’s essential to assess the structural integrity of your chosen attachment point. Consult with a structural engineer if you have concerns.
The timeline can vary depending on your experience and the complexity of the design, but it may take several days to a couple of weeks to finish.
Gable roofs offer better ventilation, maximize headroom, and are visually appealing. They also shed rain and snow efficiently.
The cost varies widely depending on factors such as size, materials, and location. On average, it can range from a few thousand dollars to several thousand dollars. Get multiple quotes from contractors for a more accurate estimate.


