Introduction
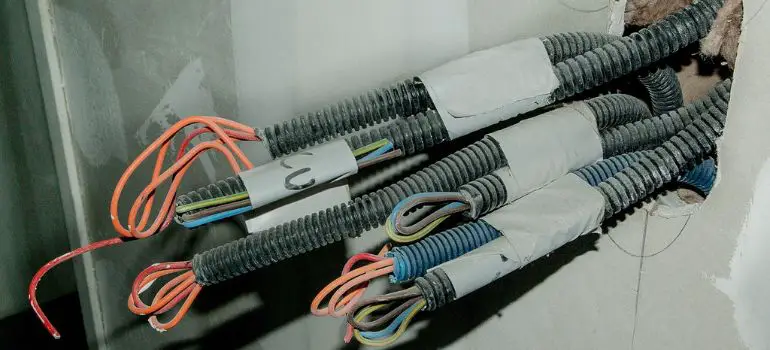
When it comes to electrical safety, one aspect that often gets overlooked is the proper protection of exposed Romex wiring. Romex, a brand of electrical wire commonly used in homes, is not meant to be left exposed to the elements or physical damage. In this article, we will discuss the importance of covering exposed Romex and provide you with a step-by-step guide on how to do it yourself.
Why Is Covering Romex Important?
Before we dive into the details of covering exposed Romex, let’s understand why it’s crucial in the first place.
Safety First
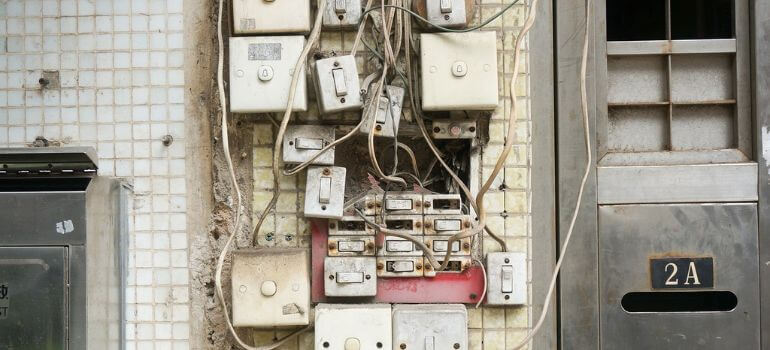
Exposed Romex wiring poses a significant safety hazard. It can be easily damaged, leading to electrical shorts, sparks, and even fires. Children and pets can also be at risk of coming into contact with the exposed wires.
Compliance with Electrical Codes
Most building codes require electrical wiring to be properly protected and insulated. Failure to comply with these codes can result in fines and even legal consequences.
Materials You’ll Need
Before you start covering your Romex wiring, gather the necessary materials. Here’s a list of what you’ll need:
- Electrical Conduit: This will serve as the primary protection for your Romex wiring.
- Conduit Fittings: These connectors will help secure the conduit in place.
- Screws and Screwdriver: To attach the conduit fittings.
- Hacksaw: For cutting the conduit to the required length.
- Wire Cutter and Stripper: To prepare the Romex wires.
- Conduit Benders: If you need to bend the conduit around corners.
- Measuring Tape: To ensure accurate measurements.
- Drill and Anchors: For securing the conduit to walls or ceilings.
Step-by-Step Guide to Covering Exposed Romex
Now that you have all your materials ready, let’s go through the process of covering your exposed Romex wiring.
Step 1: Turn Off the Power
Safety should always be your top priority. Before you begin any work, turn off the power to the circuit you’ll be working on. Locate the circuit breaker in your electrical panel and switch it off.
Step 2: Measure and Cut the Conduit
Measure the length of the exposed Romex wiring you want to cover. Use a hacksaw to cut the electrical conduit to the appropriate length. Make sure to add a few extra inches for fittings at each end.
Step 3: Prepare the Romex Wires
Strip the outer insulation from the Romex wires using a wire cutter and stripper. Be careful not to damage the individual wires inside. Leave about six inches of exposed wire at both ends.
Step 4: Attach Conduit Fittings
Secure conduit fittings to both ends of the conduit. These fittings will allow you to connect the conduit to the junction box and the electrical box.
Step 5: Thread Romex Wires
Carefully thread the Romex wires through the conduit, starting from one end and pushing them through to the other. Ensure that the wires are snugly fit inside the conduit.
Step 6: Mount the Conduit
Use a drill and anchors to secure the conduit to the wall or ceiling. Make sure it is securely in place and does not sag.
Step 7: Connect to Junction Box
Connect one end of the conduit to the junction box, ensuring a tight fit with the conduit fitting.
Step 8: Connect to Electrical Box
Similarly, connect the other end of the conduit to the electrical box, securing it with the conduit fitting.
Maintenance and Troubleshooting
Once you’ve successfully covered your exposed Romex wiring, it’s essential to perform regular maintenance and be aware of potential issues. Here are some tips for keeping your electrical system in top shape:
Regular Inspections
Make it a habit to inspect your covered Romex wiring periodically. Look for any signs of wear and tear, cracks in the conduit, or loose fittings. If you notice any issues, address them promptly to maintain the integrity of your electrical system.
Protect from Physical Damage
Be mindful of potential hazards that could cause damage to the covered Romex. This includes avoiding activities like drilling or nailing into walls without knowing the location of the wiring. Use caution when hanging heavy objects on walls where the wiring is concealed.
Temperature Considerations
Extreme temperatures can affect the performance of your electrical system. Ensure that the covered Romex is adequately insulated, especially in areas exposed to extreme cold or heat.
Troubleshooting
If you ever experience electrical issues, such as flickering lights or power outages, it’s essential to troubleshoot the problem carefully. Start by checking the covered Romex wiring for any visible damage or loose connections. If you can’t identify the issue, it’s best to contact a qualified electrician for further inspection and repairs.
Benefits of Properly Covered Romex Wiring
Protecting your Romex wiring offers several benefits beyond safety and compliance:
Enhanced Aesthetics
Covered Romex wiring creates a neater and more organized appearance in your home. It eliminates the unsightly sight of exposed wires running along walls or ceilings.
Longevity of Electrical System
By preventing physical damage and exposure to environmental factors, covered Romex wiring can extend the lifespan of your electrical system, reducing the need for costly repairs.
Increased Property Value
Well-maintained and compliant electrical systems add value to your property. When it comes time to sell your home, potential buyers will appreciate the safety and professionalism of concealed Romex wiring.
Conclusion
Covering exposed Romex wiring is a crucial step in ensuring the safety and compliance of your electrical system. By following the steps outlined in this guide, you can protect your Romex wiring from damage and potential hazards.
Now that you’ve learned how to cover exposed Romex, take action to make your home safer and more compliant with electrical codes.
FAQs (Frequently Asked Questions)
Yes, PVC conduit is a suitable option for covering Romex wiring. It provides excellent protection and is easy to work with.
While it’s possible to DIY, if you’re unsure or uncomfortable working with electrical wiring, it’s always best to consult a licensed electrician.
Electrical codes may vary by location, so it’s essential to check with your local authorities or a qualified electrician to ensure compliance.
Yes, you can paint the conduit to blend with your wall or ceiling. Use paint suitable for plastic or metal surfaces.
It’s a good practice to inspect your covered Romex periodically, especially after any construction or renovation work in your home. Any signs of damage should be addressed promptly.
Remember that electrical work should be done with caution and adherence to safety guidelines to avoid accidents or hazards. If in doubt, seek professional assistance.


