Sand swirl texture is a popular decorative technique used to add visual interest and depth to interior walls and ceilings. It creates a unique pattern reminiscent of swirling sand dunes, adding texture and character to any room. In this guide, we’ll walk you through the step-by-step process of achieving the sand swirl texture yourself.
Materials Needed
Before getting started, gather the following materials:
- Sand: Fine-grit sand is typically used for this technique.
- Joint compound: Also known as drywall mud, this will be the base for the texture.
- Plastic trowel: Used for applying the joint compound.
- Paint roller: For blending the texture.
- Paint tray: To hold the joint compound.
- Bucket: For mixing the joint compound.
- Water: Used to adjust the consistency of the joint compound.
Preparation
Before you begin applying the sand swirl texture, it’s essential to prepare the surface properly. Start by ensuring that the surface is clean, dry, and free from any dust, dirt, or debris. Use a damp cloth or sponge to wipe down the surface and remove any lingering particles.
Next, inspect the surface for any cracks, holes, or imperfections. Fill in any gaps with spackling compound and allow it to dry completely. Once the compound is dry, sand the surface lightly to smooth out any rough patches.
It’s also important to protect surrounding areas from splatters and spills. Cover floors, furniture, and fixtures with drop cloths or plastic sheeting to prevent damage.
Creating the Texture
Once the surface is properly prepared, you can begin creating the sand swirl texture. Here’s a step-by-step guide:
- Mixing the Joint Compound: Start by preparing the joint compound mixture. In a clean bucket, combine the drywall joint compound with water according to the manufacturer’s instructions. Use a mixing paddle or a drill attachment to ensure a smooth consistency.
- Applying the Joint Compound: Using a plastic trowel, scoop up a small amount of the mixed joint compound and apply it to the surface in a thin layer. Work in small sections to ensure even coverage.
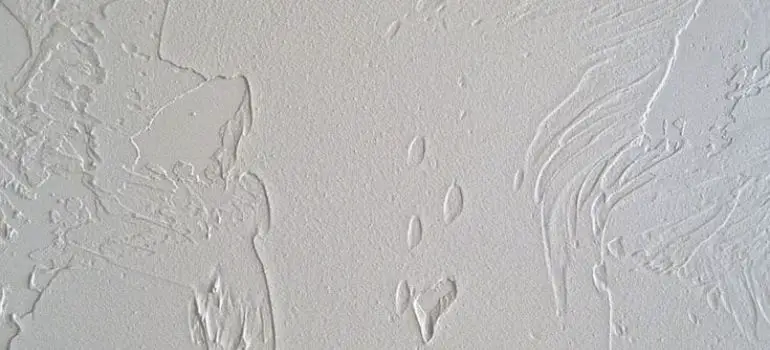
- Swirling the Sand: While the joint compound is still wet, use a paint roller or a texture brush to create swirl patterns. Gently roll or brush over the surface in a random, swirling motion, varying the direction and intensity of the swirls for a natural look.
- Adjusting the Texture: If desired, you can adjust the texture by lightly tapping the surface with a trowel or a sponge to create peaks and valleys. This will add depth and dimension to the texture.
- Allowing the Texture to Dry: Once the texture is applied, allow it to dry completely before proceeding to the next step. Drying times may vary depending on the humidity and temperature of the room, so be patient and avoid touching the texture until it is fully dry.
Drying and Sanding
Allow the texture to dry completely according to the manufacturer’s instructions. Once dry, lightly sand the surface to smooth out any rough edges or imperfections.
Priming
Before painting, it’s essential to prime the textured surface to ensure proper adhesion and durability. Choose a primer suitable for the material you’re working with and apply it evenly across the surface.
Painting
Select your desired paint colors and apply them using a paint roller or brush. Be sure to work in small sections and allow each coat to dry completely before applying the next.
Finishing Touches
Once the paint is dry, consider sealing the texture with a clear coat for added protection. Finally, clean up any tools or materials used during the process.
Maintenance Tips
To keep your sand swirl texture looking its best, regularly dust and clean the surface as needed. For minor touch-ups, use leftover joint compound and paint to blend any imperfections seamlessly.
Benefits of Sand Swirl Texture
Sand swirl texture offers several benefits that make it a popular choice for interior wall and ceiling treatments:
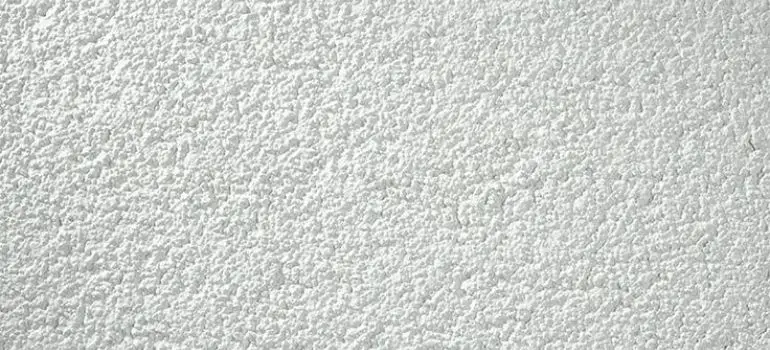
- Aesthetic Appeal: Sand swirl texture adds visual interest and depth to walls and ceilings, enhancing the overall look and feel of a room. The swirling patterns mimic the natural flow of sand dunes, creating a unique and artistic finish.
- Concealing Imperfections: One of the key advantages of sand swirl texture is its ability to conceal minor imperfections in the surface. The textured finish helps to camouflage small cracks, dents, and blemishes, resulting in a smoother and more uniform appearance.
- Versatility: Sand swirl texture can be customized to suit a variety of decorating styles and preferences. Whether you prefer a subtle, understated texture or a more dramatic and pronounced pattern, sand swirl texture can be adapted to meet your needs.
- Durable and Long-lasting: When properly applied and sealed, sand swirl texture is durable and resistant to wear and tear. It can withstand everyday use and is less prone to damage than flat, painted surfaces.
- Low Maintenance: Once applied, sand swirl texture requires minimal maintenance to keep it looking its best. Regular dusting and occasional cleaning with a mild detergent are typically all that’s needed to maintain the texture’s appearance.
Common Mistakes to Avoid
While creating a sand swirl texture can be a rewarding DIY project, there are some common mistakes that you’ll want to avoid to ensure the best results:
- Applying Too Much Pressure: When swirling the joint compound to create the texture, it’s essential to use a light touch. Applying too much pressure can flatten the texture and result in a less defined pattern. Instead, use gentle, sweeping motions to achieve a natural-looking swirl.
- Not Allowing Sufficient Drying Time: Rushing the drying process can lead to problems such as cracking, flaking, or uneven texture. Be patient and allow the joint compound to dry completely before proceeding to the next step. Depending on the climate and humidity levels, this may take several hours or even overnight.
- Overworking the Texture: While it’s tempting to keep refining the texture to achieve perfection, overworking it can actually detract from the finished result. Once you’ve applied the joint compound and created the swirl pattern, resist the urge to keep tinkering with it. Allow the texture to set and dry naturally for the best outcome.
- Skipping Surface Preparation: Proper surface preparation is crucial for a successful sand swirl texture application. Make sure the surface is clean, dry, and free from any dust, dirt, or debris before you begin. Failure to prepare the surface adequately can result in poor adhesion and an uneven finish.
- Neglecting to Seal the Texture: While not always necessary, sealing the sand swirl texture can help protect it from damage and extend its lifespan. Be sure to apply a clear coat sealer once the texture has dried completely to enhance its durability and resistance to wear and tear.
Variations of Sand Swirl Texture
Experiment with different techniques and customization options to create a unique look that suits your style and preferences.
Cost Considerations
Sand swirl texture is a cost-effective way to update the look of your home compared to more expensive remodeling options. However, the exact cost will depend on factors such as the size of the area and whether you choose to DIY or hire a professional.
DIY vs. Hiring a Professional
While sand swirl texture can be achieved as a DIY project, hiring a professional may be worth considering for larger or more complex spaces. Consider your skill level, time constraints, and budget when making this decision.
Conclusion
Sand swirl texture is a versatile and budget-friendly way to add texture and visual interest to your home’s interior surfaces. By following these steps and tips, you can achieve professional-looking results that enhance the aesthetic appeal of any room.
FAQs (Frequently Asked Questions)
The time required will vary depending on factors such as the size of the area and drying times but generally, it can be completed within a day.
Yes, sand swirl texture can be applied to most interior surfaces, including drywall, plaster, and wood.
While some DIY experience is helpful, beginners can achieve satisfactory results with practice and attention to detail.
Yes, existing sand swirl texture can be painted over to update the look of the room or change color schemes.
Minor damage can typically be repaired by applying additional joint compound and blending it into the existing texture.


