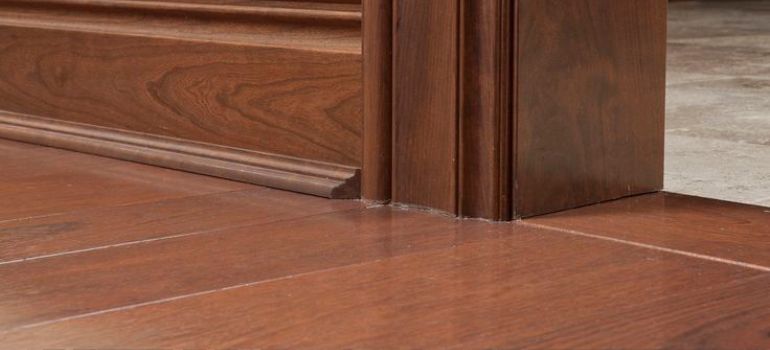
When it comes to interior finishing, attention to detail can make all the difference in the final look of your space. One common challenge that homeowners face is dealing with the gap between the quarter round molding and the floor. This gap can be unsightly and allow dust and debris to accumulate, undermining the overall aesthetics of your room. In this article, we will discuss how to effectively fill the gap between quarter round and the floor to achieve a seamless and polished finish.
Understanding the Quarter Round Molding
Before we delve into the solutions, let’s first understand what quarter round molding is. Quarter round molding is a type of trim used to cover the gap between the baseboard and the floor. It is often installed for both aesthetic and functional purposes, giving the room a finished look and also protecting the edges of the flooring.
Common Reasons for Gaps
There are several reasons why gaps may exist between quarter round molding and the floor. These include:
- Shrinkage: Over time, wood molding can shrink due to changes in temperature and humidity, creating gaps.
- Uneven Floors: If your floor is not perfectly level, it can result in gaps between the molding and the floor.
- Improper Installation: Poor installation techniques can also lead to gaps. It’s essential to ensure that quarter round molding is correctly fitted.
Tools and Materials Needed
Before you start filling the gap, gather the following tools and materials:
- Caulk Gun: To apply the filler.
- Paintable Caulk: Choose a caulk color that matches your quarter round molding.
- Putty Knife: For smoothing and shaping the caulk.
- Sandpaper: To sand any excess caulk for a smooth finish.
- Painter’s Tape: To protect the walls and molding from excess caulk.
- Safety Glasses and Gloves: For safety during the process.
Steps to Fill the Gap
Now let’s go through the steps to fill the gap between quarter round and the floor:
Step 1: Prepare the Area
Start by cleaning the gap and removing any debris or old caulk using a putty knife. Ensure the area is clean and dry before proceeding.
Step 2: Apply Painter’s Tape
Apply painter’s tape to the quarter round and the floor to protect them from excess caulk.
Step 3: Load the Caulk Gun
Load the caulk gun with paintable caulk. Cut the tip of the caulk tube at a 45-degree angle for a clean application.
Step 4: Fill the Gap
Gently squeeze the caulk gun’s trigger to apply a steady bead of caulk into the gap. Be sure to fill the entire space without leaving gaps.
Step 5: Smooth the Caulk
Use a putty knife to smooth and shape the caulk, ensuring it blends seamlessly with the quarter round and the floor.
Step 6: Remove Excess Caulk
While the caulk is still wet, remove any excess using a damp cloth or sponge. This will help achieve a clean finish.
Step 7: Let It Dry
Allow the caulk to dry completely as per the manufacturer’s instructions. This may take several hours.
Step 8: Sand and Paint (If Needed)
If the caulk is paintable, sand it lightly after it has dried and then paint it to match the quarter round molding.
Additional Tips for a Flawless Finish
While the steps mentioned earlier provide a basic guideline for filling the gap, here are some additional tips to ensure a flawless finish:
Choose the Right Caulk
Selecting the right type of caulk is crucial. For gaps between quarter round molding and the floor, it’s best to use a paintable latex or acrylic caulk. These types of caulk adhere well to both wood and flooring materials.
Check for Compatibility
Before applying any caulk, ensure that it is compatible with the materials you’re working with. Some caulks may not adhere well to certain types of flooring, so always read the product label for compatibility information.
Proper Caulk Application
When applying the caulk, maintain a consistent and steady pressure on the caulk gun trigger. This helps ensure an even distribution of caulk along the gap. Avoid applying too much pressure, as it can result in excess caulk.
Use a Caulk Smoother
Invest in a caulk smoother or tool specifically designed for smoothing caulk. This will help you achieve a neater and more professional finish. A putty knife or your finger wrapped in a damp cloth can also be used for this purpose.
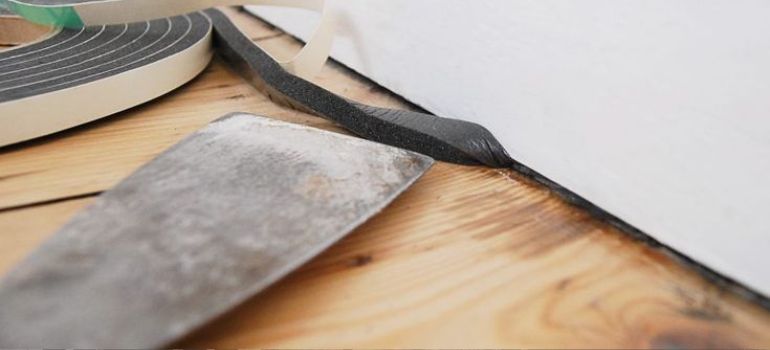
Mind the Gap Size
For larger gaps, it may be necessary to use a backer rod or foam rope before applying caulk. This provides additional support and prevents the caulk from sinking into the gap.
Be Patient
Allow the caulk to dry completely before removing the painter’s tape and touching up any paint if necessary. Rushing this step can result in a messy finish.
Preventing Future Gaps
To prevent gaps from reappearing in the future, consider these preventive measures:
Monitor Humidity Levels
Fluctuations in humidity can cause wood to expand and contract, leading to gaps. Maintaining a stable indoor humidity level can help reduce this issue.
Proper Installation
Ensure that quarter round molding is installed correctly in the first place. It should fit snugly against both the baseboard and the floor.
Inspect and Maintain
Regularly inspect your quarter round molding for any signs of gaps or shrinkage. Address any issues promptly to prevent them from worsening.
Conclusion
Filling the gap between quarter round molding and the floor is a simple yet effective way to enhance the appearance of your interior spaces. With the right tools and materials, along with proper technique, you can achieve a seamless and polished finish that not only looks great but also protects your flooring. Say goodbye to unsightly gaps and hello to a well-finished room!
FAQs
The drying time for caulk can vary depending on the brand and type you use. Generally, it takes a few hours to dry, but it’s best to check the manufacturer’s instructions for specific drying times.
It’s recommended to use paintable caulk that matches your quarter round molding. This ensures a seamless and aesthetically pleasing finish.
Painting the caulk is optional, but it can help achieve a more polished look and better blend with your molding.
If the gap reappears, it may be due to further movement in the wood or an underlying issue. You may need to repeat the filling process or consult a professional for a more permanent solution.
Silicone caulk is a flexible option and can be used, but ensure it is paintable if you plan to paint over it for a seamless finish.


