Introduction
Self-leveling compound is a versatile material used in construction and renovation to create a flat, even surface. However, sometimes it’s necessary to grind it down for a perfect finish. This article will guide you through the process of grinding down self-leveling compound, ensuring a professional outcome.
Understanding Self-Leveling Compound
This material is a blend of cement and polymers, ideal for evening out uneven floors. Grinding is often required to remove excess material or to prepare the surface for further treatment.
Tools and Materials Needed
Grinding down a self-leveling compound requires specific tools and materials to ensure the job is done safely and effectively. Here is a comprehensive list of the essential items you’ll need:
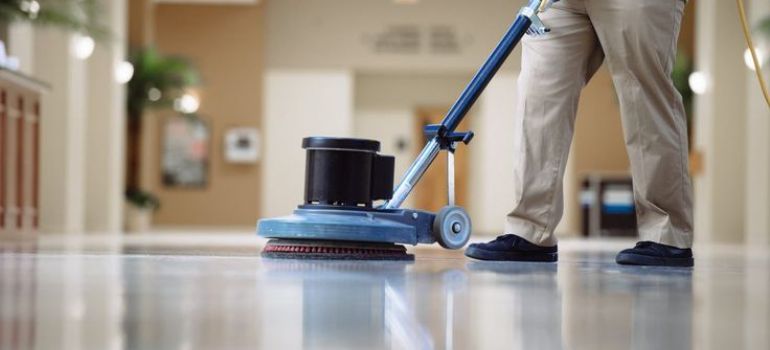
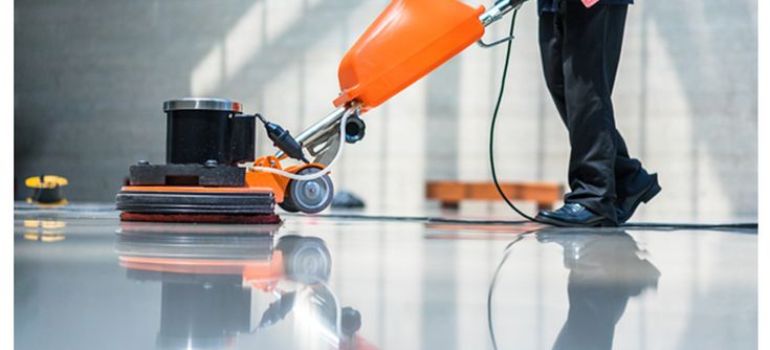
- Concrete Grinder: This is the primary tool used for grinding the compound. There are various types, including handheld grinders for small areas and walk-behind grinders for larger surfaces.
- Grinding Discs: Select the appropriate grinding disc based on the hardness of the compound and the desired level of grinding. Coarse discs are used for more aggressive grinding, while finer discs are for smoothing.
- Dust Mask or Respirator: Grinding produces a lot of dust, so it’s important to protect your lungs with a high-quality dust mask or respirator.
- Safety Goggles: Protect your eyes from dust and debris with safety goggles.
- Ear Protection: Grinding can be loud, especially with power grinders. Use earplugs or earmuffs to protect your hearing.
- Gloves: Durable gloves protect your hands from abrasion and improve grip on the grinder.
- Spirit Level: This tool helps ensure that the surface is even after grinding.
- Vacuum Cleaner or Dust Extractor: A vacuum cleaner or dust extractor is essential for cleaning up the dust and debris generated during grinding.
- Broom and Dustpan: For initial cleanup of larger debris before vacuuming.
- Protective Clothing: Wear long sleeves and pants to protect your skin from dust and debris.
- Knee Pads (optional): If you’re working on a small area and need to kneel, knee pads can provide comfort and protection.
- Extension Cord (if needed): If using an electric grinder, you might need an extension cord to reach the entire area you’re working on.
- Marker or Chalk: To mark areas that need more intensive grinding.
Preparation Steps
Before you begin the actual grinding process, it’s crucial to properly prepare the area and gather all necessary tools. Here’s a step-by-step guide to help you get started:
- Inspect the Area:
- Examine the floor where you will be grinding the self-leveling compound. Look for any cracks, bumps, or uneven areas.
- Determine the amount of grinding required and identify any specific high spots that need more attention.
- Clean the Surface:
- Sweep or vacuum the area thoroughly to remove all dirt, dust, and debris. A clean surface ensures better grinding efficiency and reduces the risk of clogging your grinding tools.
- If there are any greasy or oily spots, clean them with an appropriate degreaser.
- Gather Your Tools and Materials:
- Assemble all the tools and materials listed in the “Tools and Materials Needed” section. Make sure everything is in good working condition.
- Prepare your safety gear, including dust mask, safety goggles, gloves, and ear protection.
- Set Up Your Equipment:
- If using an electric grinder, ensure it’s properly plugged in, and if it’s a battery-operated model, make sure the battery is fully charged.
- Attach the appropriate grinding disc to your concrete grinder.
- Mark Areas for Grinding:
- Use a marker or chalk to highlight areas that require more intensive grinding.
- This will help you stay focused on specific uneven spots during the grinding process.
- Safety Check:
- Double-check that your work area is well-ventilated, especially if you’re working indoors. Open windows or use fans to disperse dust.
- Ensure that there are no tripping hazards, like loose cables or tools, around your work area.
- Wear Protective Gear:
- Put on your dust mask or respirator, safety goggles, gloves, and ear protection.
- If you are working on your knees, wear knee pads for added comfort.
- Test the Grinder:
- Before starting the grinding, test the grinder on a small, inconspicuous area to get a feel for the tool and ensure it’s working correctly.
- Adjust the handle and controls to a comfortable position that gives you maximum control over the machine.
- Plan Your Grinding Strategy:
- Decide whether you will grind the entire surface or just specific areas.
- Plan your movement across the floor – it’s best to start from one side of the room and gradually move to the other.
Grinding Process
After preparing your workspace and gathering the necessary tools and safety equipment, you can begin the grinding process. This step-by-step guide will help you grind down the self-leveling compound effectively and safely.
- Begin with a Test Area:
- Start with a small, inconspicuous area to get a feel for the grinder and the hardness of the compound.
- Adjust the grinder’s settings if necessary based on this initial test.
- Start Grinding in Sections:
- Divide the area into manageable sections, especially if you are working on a large surface.
- Begin grinding in one section before moving to the next. This ensures consistent work and helps you track your progress.
- Use Even and Controlled Motions:
- Move the grinder in slow, steady, and controlled motions. Rushing can lead to uneven grinding and might damage the surface.
- Apply gentle, consistent pressure—pushing too hard can wear down the grinder’s disc and the surface.
- Regularly Check the Surface:
- Frequently turn off the grinder and check the evenness of the surface with a spirit level or straight edge.
- Look for high spots that still need more grinding and mark them if necessary.
- Deal with Tough Spots:
- For particularly tough or thick spots, you might need to go over the area multiple times.
- Adjust the grinding intensity or disc if needed for these more challenging areas.
- Manage Dust and Debris:
- Continuously vacuum up dust and debris as you work, using a shop vac or built-in dust collector.
- Keeping the area clean as you go helps you see your progress and reduces cleanup later.
- Take Regular Breaks:
- Grinding can be physically demanding, so take regular breaks to prevent fatigue.
- Use this time to check your equipment and ensure everything is functioning properly.
- Inspect and Adjust:
- After completing each section, inspect the surface to ensure it’s even and meets your requirements.
- Make any necessary adjustments to your grinding technique for the next section based on your observations.
- Final Pass for Smoothness:
- Once the entire area has been ground down, make a final pass with a finer disc to smooth out the surface.
- This step is essential for preparing the surface for any subsequent flooring installations or treatments.
- Clean Up:
- After completing the grinding, do a thorough clean-up of the area.
- Remove all dust and debris to leave a clean, smooth surface.
Common Mistakes to Avoid
Grinding down a self-leveling compound can be a straightforward process, but certain common mistakes can lead to suboptimal results or even damage to your floor. Being aware of these pitfalls can help you achieve a smoother, more efficient grinding process.
- Over-Grinding One Area:
- Grinding too much in one spot can create dips or uneven surfaces.
- Keep the grinder moving in smooth, consistent motions to avoid focusing too long on one area.
- Applying Excessive Pressure:
- Exerting too much pressure on the grinder can wear down the grinding disc and damage the underlying surface.
- Let the weight of the grinder do most of the work, applying only gentle, consistent pressure.
- Ignoring Safety Precautions:
- Neglecting proper safety gear like dust masks, goggles, and ear protection can lead to health hazards.
- Always prioritize safety to protect yourself from dust, debris, and noise.
- Not Maintaining the Grinder:
- A poorly maintained grinder can lead to inefficient grinding or even accidents.
- Regularly check and replace worn-out grinding discs, and ensure your grinder is in good working condition.
- Failing to Control Dust:
- Allowing dust to accumulate can obscure your view and lead to respiratory issues.
- Use a vacuum or dust extraction system and clean the area as you work to manage dust effectively.
- Not Testing on a Small Area First:
- Starting to grind without testing your technique on a small, inconspicuous area can result in errors.
- Do a test run to get a feel for the equipment and the material you are working on.
- Grinding Unevenly:
- Inconsistent grinding can leave you with an uneven surface.
- Regularly check your progress with a level or straight edge and adjust your technique as needed.
- Skipping the Cleanup:
- Not properly cleaning up after grinding can leave hazardous debris and affect the adhesion of any subsequent floor treatments.
- Thoroughly clean the area after grinding to ensure it is ready for the next step in your project.
- Working in Poorly Ventilated Areas:
- Grinding in areas without adequate ventilation can increase the risk of inhaling dust particles.
- Ensure good airflow in your working area, especially indoors.
- Rushing the Process:
- Trying to complete the job too quickly can lead to mistakes and uneven grinding.
- Take your time and focus on achieving a smooth, even finish.
Post-Grinding Cleanup
After grinding, it’s crucial to clean up all debris and dust. Proper disposal is important for environmental safety.
Finishing Touches
Once grinding is complete, smooth out the surface for a flawless finish. Conduct a final inspection to ensure quality.
Maintenance Tips
To maintain the surface, regular cleaning and occasional inspections are recommended. Address any issues promptly to prevent major repairs.
Ensuring Even Grinding
To achieve a uniform surface, it’s essential to use consistent movements and regularly check your work. Use a spirit level to ensure evenness across the entire area. Small, circular motions often yield the best results, reducing the likelihood of creating grooves or uneven spots.
Dealing with Difficult Spots
Sometimes, you may encounter harder patches that require more effort to grind down. In these cases, use a more abrasive grinding disc and apply a bit more pressure, but always do so cautiously to avoid damaging the floor.
Adjusting Your Technique for Larger Areas
For larger areas, consider using a larger grinder or divide the space into smaller, manageable sections. This approach helps maintain consistency and manageability, especially for DIY enthusiasts.
The Importance of Dust Control
Dust control is crucial during grinding. Use a grinder with a built-in dust collector or attach an external one. Always wear a dust mask to protect your lungs from harmful particles.
Finishing Up
After grinding, sweep and vacuum the area thoroughly. If you’re preparing the floor for further treatments, such as tiling or carpeting, ensure that it’s completely smooth and free of any debris.
Safety Tips
Always prioritize safety. Wear protective gear, including goggles, gloves, and ear protection, especially when using power tools. Ensure proper ventilation in the work area to avoid inhaling dust particles.
Troubleshooting Common Issues
If you encounter issues like an uneven grind or a clogged grinder, stop and assess the situation. Clean your tools, adjust your technique, or seek professional advice if needed.
Conclusion
Grinding down a self-leveling compound can be a straightforward process if done correctly. With the right tools and techniques, you can achieve a professional, smooth surface.
FAQs
Sealing isn’t always necessary, but it can enhance durability and appearance, depending on the intended use of the space.
You’ve ground down enough when the surface is even and meets your desired level. Use a level tool to confirm.
It’s advisable to wait at least 24 hours before applying any coatings or adhesives to ensure the surface is completely dry.
Regular cleaning and avoiding heavy impact or abrasion will help maintain the integrity of the surface.
Yes, there are eco-friendly self-leveling compounds available that are made with sustainable materials and have lower VOC emissions.


