Introduction
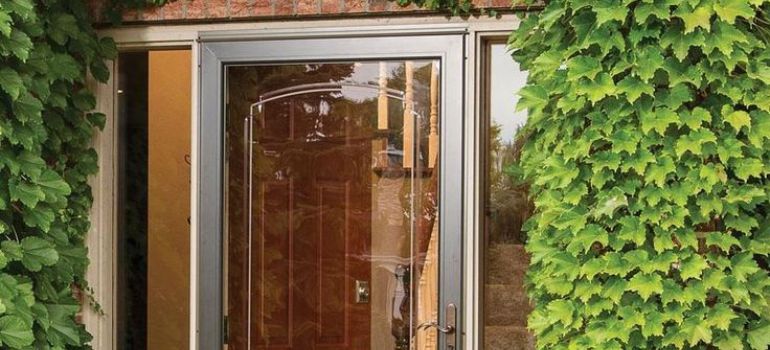
Storm doors provide an additional layer of protection to your home’s main entrance. They are designed to shield your primary door from the elements and can be a great energy-saving solution. While most storm door installations involve brick molding, we understand that not every doorway comes equipped with it. That’s why we’ve put together this step-by-step guide to help you install a storm door without brick molding.
Assessing Your Doorway
Before you begin the installation process, it’s essential to assess your doorway. Check if it is level and plumb, as a properly aligned doorway is crucial for a seamless installation. Inspect the frame and the area around the door to ensure there are no structural issues that need addressing.
Gathering Tools and Materials
To install a storm door without brick molding, you’ll need the following tools and materials:
- Screwdriver
- Tape measure
- Saw
- Drill
- Level
- Screws
- Storm door kit
- Shims
- Weatherstripping
Measuring and Sizing
To proceed with the installation of your storm door without brick molding, you’ll need to accurately measure and size the door. Follow these steps:
- Measure Width and Height: Begin by measuring the width and height of your doorway. Use a tape measure for precise measurements.
- Select the Right Size: Most storm door kits come in standard sizes. Choose a door kit that matches the measurements of your doorway. If necessary, you may need to trim the door to fit, following the manufacturer’s instructions.
Preparing the Door Frame
Before you can proceed with the installation of your storm door without brick molding, it’s important to prepare the door frame properly. Follow these steps:
- Clean the Door Frame: Start by thoroughly cleaning the area around the door frame. Remove any dirt, dust, or debris that may have accumulated over time. A clean surface will ensure a better seal and adhesion during installation.
- Remove Existing Door (if applicable): If you have an existing door on your doorway, carefully remove it. Follow the manufacturer’s instructions for removal. Be sure to save any hardware or parts that may be needed later.
- Inspect for Damage: Examine the door frame closely for any signs of damage, rot, or decay. If you notice any issues, such as rotting wood, it’s essential to address them before proceeding with the storm door installation. Replace or repair any damaged sections as necessary.
Installing the Hinges
Properly installing the hinges for your storm door is a crucial step in ensuring its functionality and security. Follow these steps:
- Position the Hinges: Begin by positioning the hinges on the storm door. Refer to the manufacturer’s instructions for the specific placement and alignment of the hinges. Typically, there are three hinges, with one positioned at the top, one at the bottom, and one in the middle.
- Secure the Hinges: Using the provided screws and a screwdriver or drill, securely attach the hinges to the storm door. Make sure they are fastened firmly but not overtightened, as this could affect the door’s ability to swing smoothly.
- Check Alignment: Verify that the hinges are aligned correctly and evenly spaced along the door. A level can be helpful in ensuring that the hinges are straight and level.
- Test the Movement: Open and close the door to test its movement. The hinges should allow for a smooth swinging motion without any resistance or binding.
Hanging the Door
With the help of a friend, lift the storm door into place. Insert shims as needed to ensure the door is level and plumb. Secure the door to the frame using screws, making sure it swings open and closed smoothly.
Attaching the Handle and Lock
Once you have prepared the door frame and installed the hinges, it’s time to hang the storm door in place. This step requires careful attention to ensure a secure and functional installation:
- Enlist Assistance: Storm doors can be heavy, so it’s advisable to have someone assist you with this step. Having an extra pair of hands will make the process smoother.
- Lift the Door: With your helper, lift the storm door and position it within the door frame. Be cautious not to damage the door or frame during this process.
- Insert Shims: To ensure the door is level and plumb, insert shims between the door frame and the storm door as needed. Shims help in adjusting the door’s position to achieve the desired alignment.
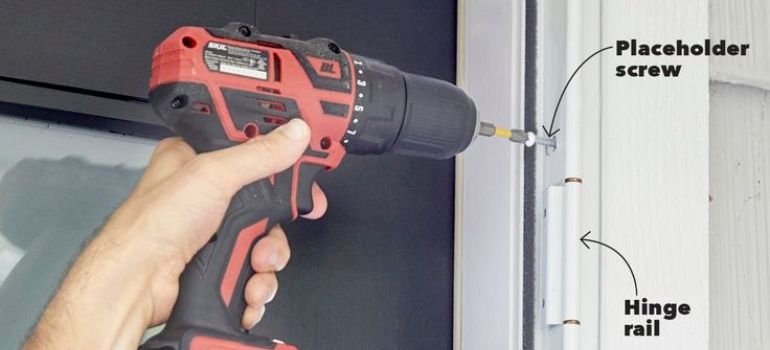
- Secure with Screws: Using screws provided in the storm door kit, securely fasten the storm door to the door frame. Start by attaching the top hinge, followed by the middle and bottom hinges. Ensure that the screws are tightened adequately but not over-tightened, as this could affect the door’s operation.
- Check for Smooth Movement: After securing the door, test its movement by opening and closing it multiple times. The door should swing smoothly and without any obstructions.
Weatherstripping and Insulation
Enhancing the energy efficiency and weather resistance of your storm door is essential. To achieve this, you’ll need to apply weatherstripping and consider insulation options:
- Apply Weatherstripping: Weatherstripping is a crucial element for preventing drafts and improving insulation. It typically comes in adhesive strips that you can apply around the edges of the storm door. Ensure that the weatherstripping creates a tight seal when the door is closed. Trim any excess material to ensure a neat and effective seal.
- Consider Insulation: Depending on your climate and specific needs, you may want to add additional insulation to the door frame. This can help with thermal protection and energy efficiency. Options include foam insulation or weather-resistant expanding foam, which can be inserted into gaps and cavities in the frame.
- Inspect for Gaps: After applying weatherstripping and insulation, carefully inspect the entire perimeter of the door frame to ensure there are no gaps or areas where air can escape. Address any issues promptly to maximize energy efficiency.
Testing the Door
Test the storm door by opening and closing it multiple times. Make any necessary adjustments to ensure it operates smoothly and seals properly.
Maintenance Tips
Maintaining your storm door is essential to ensure its longevity and continued functionality. Here are some valuable maintenance tips to keep in mind:
- Regular Cleaning: Periodically clean both the glass and frame of your storm door. Use a gentle glass cleaner for the glass panel and a mild detergent solution for the frame. This will keep your door looking its best.
- Lubricate Hinges and Lock: Apply lubricating oil to the hinges and lock mechanism to prevent rust and ensure smooth operation. Check these components regularly for any signs of wear or damage.
- Inspect Weatherstripping: Examine the weatherstripping around the edges of the door. If you notice any wear or gaps, replace the weatherstripping to maintain an effective seal.
- Paint and Finish: If your storm door is made of wood and has a painted or stained finish, inspect it for signs of peeling, chipping, or fading. Touch up any areas that need attention to protect the wood from the elements.
- Check for Loose Screws: Periodically check the screws that secure the storm door to the frame. Tighten any loose screws to ensure the door remains securely in place.
- Clear Drainage Holes: If your storm door has drainage holes at the bottom, make sure they are clear of debris. Blocked drainage holes can lead to water accumulation, which can affect the door’s lifespan.
- Inspect Glass Panels: Inspect the glass panels for cracks or damage. If you notice any issues, replace the damaged glass promptly to maintain the door’s integrity.
- Secure Hardware: Check the handle, lock, and other hardware components for security and functionality. Make any necessary adjustments or replacements to ensure proper operation.
- Annual Maintenance: Consider conducting a more thorough annual maintenance check. This may include resealing gaps, repainting or staining the door, and replacing worn-out components.
FAQs
While it’s possible to DIY this project, it’s recommended to have some experience with carpentry and door installations. If you’re unsure, it’s best to consult a professional.
Yes, you can install a storm door on various types of door frames, including wood and metal. However, the installation process may vary, so follow the manufacturer’s instructions.
Installing a storm door without brick molding can enhance your home’s security, energy efficiency, and curb appeal. It also allows for better ventilation and natural light.
Many storm doors come with a warranty. Check with the manufacturer for specific warranty details and duration.
Yes, most storm doors can be painted. Follow the manufacturer’s recommendations for the best results.
Conclusion
Installing a storm door without brick molding is a feasible DIY project that can significantly improve your home’s security and energy efficiency. By following the steps outlined in this guide and paying attention to detail, you can enjoy the benefits of a well-installed storm door for years to come.


