Congratulations on successfully harvesting a black bear! If you’re looking to create a unique bear hide rug for your home, you’ve come to the right place. In this DIY guide, we’ll walk you through the step-by-step process of making a bearskin rug. From skinning and preserving the hide to tanning and displaying the finished rug, we’ve got you covered.
Before we begin, make sure you have the necessary tools on hand. You’ll need a headlamp, hunting knife, thin-bladed knife, and a cutting table. These tools will help you work efficiently and effectively throughout the process.
Key Takeaways:
- Learn how to properly prepare a bear hide for making a bearskin rug.
- Follow a step-by-step guide to skinning a black bear and preserving the hide.
- Discover different techniques for tanning the bear hide.
- Get additional tips and precautions for DIY bearskin rug making.
- Consider seeking professional assistance from a taxidermist.
Step-by-Step Guide to Skinning a Black Bear
Before you start skinning a black bear to create a bearskin rug, it is essential to gather all the necessary tools. Having the right equipment will ensure a smooth and successful process. Here are the steps to follow:
- Step 1: Make the first cut
- Step 2: Work slowly and cautiously
- Step 3: Skin the paws and head
- Step 4: Follow a step-by-step process
Begin by carefully making the first cut along the belly of the bear. Use a sharp hunting knife to create an incision that runs from the anus to the neck. Take your time and make precise cuts to avoid damaging the hide.
Continue skinning the bear by gradually removing the hide from the underlying tissue. Use a thin-bladed knife to separate the hide from the body, ensuring that you preserve the integrity of the hide. Working slowly will minimize the risk of tearing or creating unnecessary holes in the hide.
Skinnning the paws and head requires expertise and precision. It is recommended to consult with a taxidermist for assistance in these areas.
Follow a step-by-step process to ensure you cover all areas of the bear hide. Work systematically, taking extra care around delicate areas such as the ears and nose. This will help you achieve the desired outcome in creating your bearskin rug.
By carefully following these steps, you will be able to successfully prepare the bear hide for the next stages of creating your bearskin rug.

“Skinning a black bear requires patience and attention to detail. Take your time and work slowly to avoid damaging the hide. Remember, the quality of your bearskin rug depends on how well you prepare the hide.”
Proper Preservation Techniques for the Bear Hide
Preserving the bear hide is crucial for crafting a high-quality bearskin rug at home. Follow these proper preservation techniques to ensure the longevity and aesthetic appeal of your homemade bear rug.
Thawing and Removing Tissue Matter
If the bear hide has been frozen, allow it to thaw completely before proceeding with the preservation process. Once thawed, use a fleshing knife to carefully remove any remaining tissue matter from the hide. Take your time and work slowly to avoid damaging the hide in the process. Ensure that all interior tissues are thoroughly removed to prevent unpleasant odors and potential degradation of the rug over time.
Salt Bath and Drying
After fleshing the hide, it’s time to salt it to draw out moisture and bodily fluids. Begin by generously applying salt all over the flesh side of the hide. This helps to dehydrate the tissue and prevents bacterial growth. Leave the hide in the salt for at least 24 hours to allow the salt to fully penetrate the hide.
Once the initial salting period is complete, shake off any excess salt and repeat the process with fresh salt. This ensures that all moisture is drawn out of the hide, resulting in a properly preserved bear skin. After the second salting, hang the hide in a well-ventilated area to air dry. The drying process may take several days to a week, depending on the size and thickness of the hide. Avoid direct sunlight, as it can cause fading and damage to the hide.
Rinsing and Final Steps
Once the hide is completely dry, it’s important to rinse it to remove any residual salt and grease. Fill a container with warm water and add a mild dish soap. Gently agitate the hide in the soapy water to remove any grease or dirt. Rinse thoroughly with clean water and squeeze out any excess moisture. Finally, hang the hide once again in a cool, dry place to fully air dry.
Following these proper preservation techniques will ensure that your bear hide is ready for the tanning process and subsequent transformation into a beautiful homemade bearskin rug.

Proper Preservation Techniques
| Technique | Description |
|---|---|
| Thawing and Removing Tissue Matter | Carefully thaw the bear hide and use a fleshing knife to remove any remaining tissue matter. |
| Salt Bath and Drying | Apply salt to draw out moisture and bodily fluids. Repeat the salting process and hang the hide to air dry. |
| Rinsing and Final Steps | Rinse the hide with warm water and dish soap to remove salt and grease. Hang the hide to air dry once more. |
Tanning the Bear Hide
Once the bear hide is preserved, it’s time to tan it. Tanning is a crucial step in the process of making a bearskin rug, as it transforms the hide into a durable and soft material. There are two options for tanning the bear hide:
- Make your own tanning formula
- Use a commercially made tanning solution
If you choose to make your own tanning formula, there are various recipes available online. These recipes typically involve combining ingredients such as alum, salt, and glycerin. Follow the instructions carefully to create the tanning solution.
Tip: Commercially made tanning solutions can be more convenient and produce consistent results. They are often formulated specifically for bear hides.
Once you have your tanning solution ready, you can start the tanning process:
- Put on protective gloves before handling the tanning solution.
- Using gloved hands or a paintbrush, apply the tanning formula to the flesh side of the bear hide. Ensure full coverage and massage the formula into the hide.
- Fold the bear hide flesh on flesh to allow the tanning solution to penetrate evenly. This will help in achieving an even tanning result.
- Let the hide sit for 12 to 16 hours to allow the tanning process to work.
- Unfold the hide and hang it to dry in a cool, well-ventilated area. Make sure to work the hide often during the drying process to maintain its softness and flexibility.
Once the bear hide is fully dry, it’s ready to be used for creating a beautiful bearskin rug.

| Tanning the Bear Hide | Pros | Cons |
|---|---|---|
| Make your own tanning formula |
|
|
| Use a commercially made tanning solution |
|
|
Additional Tips for DIY Bearskin Rug Making
When it comes to making a bearskin rug at home, attention to detail and proper technique are key. To ensure a successful project, here are some additional tips that will help you along the way:
1. Protect Your Hands
Wearing latex or surgical gloves throughout the bear hide preparation process is essential. Not only will gloves protect your hands from any potential contaminants on the hide, but they will also provide a better grip on your tools, preventing accidents.
2. Choose the Right Knives
Using the correct knives is crucial for creating clean and precise cuts. Make sure to use a sturdy hunting knife for initial skinning and a thin-bladed knife for delicate areas. This will ensure that you maintain the integrity of the hide and avoid unnecessary damage.
3. Optimal Lighting
A well-lit workspace is essential for a thorough and accurate skinning process. Working in a brightly lit area or using a reliable headlamp will allow you to see the details and contours of the hide more clearly, preventing any accidental slips or mistakes.
By following these additional tips, you’ll be well-equipped to successfully create a beautiful bearskin rug. Keep in mind that attention to detail and patience are crucial throughout the DIY process. With the right tools and techniques, you’ll be able to showcase your hunting accomplishments with pride.
Keep reading to learn more about the next steps in the DIY bearskin rug-making process.
Choosing a Taxidermist for Professional Assistance
If you’re not comfortable with the entire process of making a bearskin rug yourself, it’s always an option to seek the help of a taxidermist. They have the expertise and experience to properly skin and preserve the bear hide. Consider consulting with a taxidermist for the more intricate parts of the process, such as skinning the paws and head. This ensures that your bearskin rug will be of the highest quality.
When it comes to creating a bearskin rug, the assistance of a professional taxidermist can be invaluable. Not only do they possess the necessary skills to handle the delicate nature of the bear hide, but they also have access to specialized tools and materials.
A taxidermist will have the expertise to expertly skin the bear hide, ensuring that no unnecessary damage or holes are made. They will also know how to properly preserve the hide, utilizing methods that have been refined over years of experience. This results in a bear rug that not only looks beautiful but will also stand the test of time.
Skirting the paws and head of the bear can be particularly challenging, requiring a high level of precision and knowledge. For these critical areas, it is recommended to rely on the skills of a taxidermist. They know how to handle these sensitive areas with care, ensuring that the end result is flawless.
Choosing a taxidermist should not be taken lightly. It’s important to do your research and find a reputable professional with a proven track record. Look for taxidermists who have experience specifically with bear hides and can provide references or examples of their work.
When consulting with a taxidermist, be prepared to discuss your specific desires and preferences for the bearskin rug. They can help guide you in making important decisions regarding the size, shape, and style of the rug, as well as any additional customization options.
Remember, the goal is to create a bearskin rug that not only captures the essence of the bear but also complements your home decor. By enlisting the help of a taxidermist, you can ensure that the final product meets your expectations and becomes a cherished piece in your household.
Advantages of Choosing a Taxidermist for Bear Rug Making
“Working with a taxidermist for bear rug making offers numerous benefits. Their expertise and knowledge of the craft ensure that your bearskin rug will be professionally and expertly handled. They will handle the most intricate parts of the process, such as skinning the paws and head, while preserving the hide’s integrity. By entrusting a taxidermist with your bear hide, you can have confidence in the quality and longevity of the final product.”
| Advantages of Choosing a Taxidermist: | Disadvantages of Choosing a Taxidermist: |
|---|---|
| Professional expertise | Additional cost |
| Access to specialized tools and materials | Lack of complete control over the process |
| High level of precision and skill | Reliance on the taxidermist’s timeline |
| Preservation of the hide’s integrity | Potential variation in taxidermist quality |
Displaying and Maintaining Your Bearskin Rug
Once you’ve completed the bear hide rug making process, it’s time to showcase your masterpiece and ensure its long-lasting beauty. Properly displaying and maintaining your bearskin rug is essential in preserving its rustic charm for years to come.
Choose a Suitable Location
When it comes to displaying your bearskin rug, location is key. Select a space that complements the room’s ambiance and allows the rug’s beauty to shine. A living room, den, or cabin with wooden or stone flooring can provide the perfect backdrop for your bear hide rug.
Regular Cleaning
Regular cleaning is essential in maintaining the appearance and longevity of your bearskin rug. Here are some cleaning tips:
- Vacuum: Use a vacuum cleaner with a soft-bristle attachment or a handheld vacuum to gently remove dirt and dust from the rug’s surface. Avoid using a beater bar or brush roll as it may damage the delicate bear hide.
- Shake: Take the rug outside and gently shake it to remove any loose debris. This can help freshen up the rug and remove surface dirt.
Avoid Sunlight Exposure
Direct sunlight can cause fading and discoloration to your bearskin rug, so it’s important to avoid placing it in areas where it will be exposed to prolonged sunlight. Consider positioning the rug away from windows or use window coverings to protect it from harmful UV rays.
Protective Measures
To further safeguard your bearskin rug, consider these additional protective measures:
- Rotate: Periodically rotate the rug to ensure even wear and prevent specific areas from fading due to excessive foot traffic or direct sunlight exposure.
- Spot Clean: Should any spills or stains occur, promptly attend to them using a mild detergent and a clean cloth. Gently blot the affected area and avoid rubbing or scrubbing to prevent damage.
- Pet-Free Zone: Keep your bearskin rug away from pets to prevent it from becoming a scratching or chewing object.
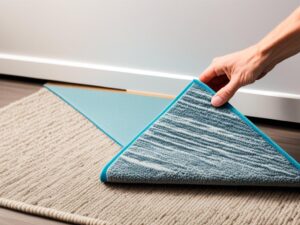
Pro Tip: Consider using a rug pad underneath your bearskin rug to provide cushioning, prevent slippage, and protect your flooring.
Proper Storage
If you need to store your bearskin rug temporarily or during warm seasons, follow these guidelines:
- Clean and Dry: Ensure the rug is completely clean and dry before storing it to prevent the growth of mold or mildew.
- Proper Folding: Fold the rug carefully, fur side in, to avoid creasing or damaging the hide. Avoid folding it too tightly to maintain its natural shape and softness.
- Breathable Material: Store the rug in a breathable material such as a cotton or muslin bag to prevent moisture buildup.
- Avoid Extreme Temperatures: Choose a storage area with a stable temperature and humidity level to prevent damage to the hide.
| Display and Maintenance Tips | Description |
|---|---|
| Choose a Suitable Location | Select a space that complements the room’s ambiance and allows the rug’s beauty to shine. |
| Regular Cleaning | Vacuum or gently shake the rug to remove dirt and dust. |
| Avoid Sunlight Exposure | Protect the rug from direct sunlight to prevent fading and discoloration. |
| Protective Measures | Rotate the rug, spot clean spills promptly, and keep it pet-free. |
| Proper Storage | Clean and dry the rug, fold it carefully, and store it in a breathable material. |
Conclusion
Crafting a bearskin rug at home is a rewarding DIY project. By following our step-by-step guide to preparing and tanning the bear hide, you can create a beautiful and unique decor piece that adds rustic charm to your home.
Whether you choose to do the entire process yourself or seek professional help, the final result will be a stunning bearskin rug that you can proudly display. The sense of accomplishment and the memories of your hunt will be woven into the fabric of the rug, making it a truly special and personal item.
Remember to take precautions during the process, using latex or surgical gloves to protect your hands and working in a well-lit area to ensure precision. Additionally, consider consulting with a taxidermist for more intricate tasks, such as skinning the paws and head.
Once your bearskin rug is completed, find a suitable location to display it and regularly maintain it by vacuuming or shaking off dirt and dust. Avoid placing the rug in direct sunlight to prevent fading and keep it looking its best for years to come.

