
Introduction
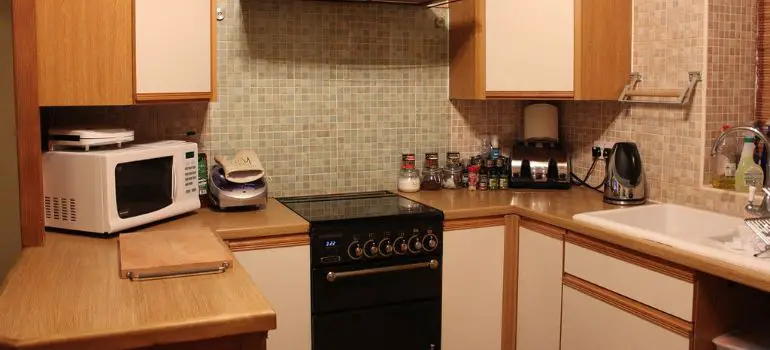
In today’s fast-paced world, appliances like microwaves have become essential in our daily lives. The GE Spacemaker Microwave, known for its compact design and functionality, is a popular choice in many kitchens. However, there may come a time when you need to remove it for maintenance or replacement. In this article, we will guide you through the step-by-step process of safely removing your GE Spacemaker Microwave without any hassle.
Step-by-Step Guide to Removing Your GE Spacemaker Microwave
1. Preparing for Removal
Before you begin the process of removing your GE Spacemaker Microwave, it’s crucial to take the necessary steps to ensure a safe and efficient removal process. Here’s what you need to do:
- Gather the Required Tools and Materials: Start by gathering all the tools and materials you’ll need for the removal. You’ll require a screwdriver, pliers, electrical tape, and ideally, a helper to assist you during the process. Having all these items ready will make the removal process much smoother.
- Choose a Safe Workspace: Select a suitable workspace where you can safely work on removing the microwave. Ensure that the area is well-lit, clean, and free from any obstacles or clutter. Having enough space to maneuver will be essential for a successful removal.
2. Turning Off the Power
Safety should be your top priority when dealing with electrical appliances. Start by turning off the power to the microwave by switching off the circuit breaker or unplugging it from the electrical outlet. Verify that there is no electricity flowing to the appliance.
3. Removing the Microwave Door
The first step in safely removing your GE Spacemaker Microwave is to detach the microwave door. Follow these steps to accomplish this:
- Open the Microwave Door: Begin by opening the microwave door fully. Ensure it’s wide open to provide easier access to the door’s hinges and release tabs.
- Locate the Door Hinges: On either side of the microwave door, you’ll find hinges that attach it to the main body of the microwave. These hinges are crucial for the door’s operation and removal.
- Press the Release Tabs: Look for small release tabs or levers located on the door hinges. These tabs are typically found on the upper part of the hinges. You may need to use a flathead screwdriver or a similar tool to press and hold these tabs down.
- Carefully Lift and Detach: While pressing the release tabs, gently lift the microwave door upwards. The release tabs should allow the door to detach from the hinges. Be cautious during this step, as microwave doors can be heavy.
- Set Aside the Door: Once the door is detached, set it aside in a safe and secure location. You may want to keep it upright to prevent any accidental damage.
4. Uninstalling the Mounting Plate
To proceed with the removal of your GE Spacemaker Microwave, you’ll need to uninstall the mounting plate that holds it securely in place. Follow these steps carefully:
- Locate the Mounting Plate: The mounting plate is typically situated on the back wall or underside of your microwave. It is designed to support the weight of the microwave and keep it in position.
- Identify the Mounting Screws: Look for the screws securing the mounting plate to the wall or cabinet. These screws are essential for keeping the microwave in place and must be removed.
- Use a Screwdriver: With a suitable screwdriver, begin to loosen and remove the screws that attach the mounting plate. Ensure you keep track of all screws and any accompanying brackets or hardware.
- Detach the Mounting Plate: Once all the screws are removed, carefully detach the mounting plate from the wall or cabinet. Be cautious when handling it, as it may still be supporting some of the microwave’s weight.
- Set Aside Securely: Place the removed mounting plate in a safe and easily accessible location. You’ll need it when you decide to reinstall the microwave or if you’re replacing it with a new one.
5. Disconnecting the Wiring
With the mounting plate removed, you can now access the wiring behind the microwave. Most microwaves have a plug and a few wires connecting to the control panel. Carefully disconnect all wiring, and use electrical tape to secure the exposed wires and prevent any accidents.
6. Detaching the Microwave
Now that you’ve prepared, disconnected the power, removed the microwave door, and uninstalled the mounting plate, it’s time to detach the microwave itself. Follow these steps carefully to ensure a safe removal process:
- Prepare for Lifting: Before attempting to remove the microwave, ensure you have a helper available to assist you. Microwaves can be heavy and cumbersome to handle alone. Both you and your helper should wear appropriate clothing and footwear to prevent accidents.
- Lift the Microwave: Stand in front of the microwave and firmly grip it from both sides. Ensure you have a secure hold, and with the assistance of your helper, slowly lift the microwave upwards.
- Lift It Straight: Lift the microwave vertically and away from the wall or cabinet. Avoid any tilting or twisting motions, as this could cause strain on the microwave and its mounting bracket.
- Place It Safely: Once the microwave is fully detached, carefully set it down on a stable and secure surface. Make sure it is well-supported to prevent it from falling or tipping over.
- Store the Microwave: If you plan to reuse the microwave, store it in a safe and clean area until you are ready to reinstall it. If you are replacing it, make arrangements for disposal or recycling following local regulations.
7. Cleaning and Maintenance
After successfully removing your GE Spacemaker Microwave, it’s an excellent opportunity to clean and perform some basic maintenance to ensure it’s ready for reinstallation or replacement. Here’s what you should do:
- Exterior Cleaning: Start by cleaning the exterior of the microwave. Use a soft, damp cloth or sponge and a mild cleaning solution to wipe down the surfaces, including the control panel, door, and handle. Pay attention to any stains, fingerprints, or spills.
- Interior Cleaning: Open the microwave door and carefully clean the interior. Remove any food particles, spills, or stains from the microwave’s walls, turntable, and ceiling. You can use a microwave-safe cleaning solution or simply warm, soapy water.
- Turntable Maintenance: Remove the turntable and its support ring (if applicable). Wash them with warm, soapy water, and rinse thoroughly. Make sure they are completely dry before placing them back inside the microwave.
- Ventilation Grille: Check the ventilation grille on the microwave’s underside. Clean it if you notice any dust or debris buildup. A vacuum cleaner with a brush attachment can be helpful for this task.
- Control Panel and Buttons: Wipe down the control panel and buttons gently to prevent any dirt or residue buildup that can affect the microwave’s functionality.
- Inspect for Damage: While cleaning, inspect the microwave for any signs of damage, such as loose parts or cracked components. If you notice any issues, it’s best to address them before reinstalling or replacing the microwave.
- Safety First: Ensure that all components, including the turntable and ventilation grille, are securely in place before using the microwave again.
Conclusion
Removing your GE Spacemaker Microwave may seem like a daunting task, but with the right guidance and safety precautions, it can be done smoothly. Always prioritize safety by disconnecting the power and taking your time during the process. By following these steps, you’ll have your microwave removed and ready for maintenance or replacement in no time.
Frequently Asked Questions (FAQs)
It’s a good practice to clean your microwave at least once a week to prevent food residues and odors from building up.
While it is possible, it’s recommended to seek professional help for reinstalling the microwave to ensure safety and proper installation.
If you face any issues during the removal process, consult the user manual or consider seeking assistance from a technician.
Yes, microwaves contain electronic components that should be disposed of properly. Contact your local recycling center for guidance on recycling old appliances.
You can contact the manufacturer or visit their official website to find genuine replacement parts for your GE Spacemaker Microwave.


