
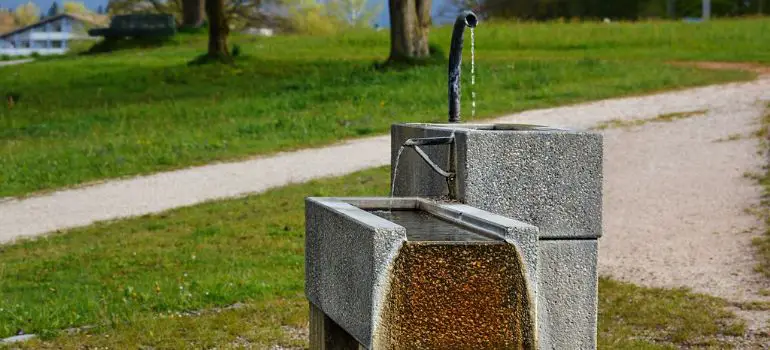
Assessing the Damage
Before you begin the repair process, carefully inspect your concrete fountain. Identify all the cracks, chips, or any other damage that needs attention. Assess the severity of the damage to determine whether it’s something you can repair or if you should seek professional help.
Gathering the Necessary Tools and Materials
To repair your concrete fountain, you’ll need tools and materials such as safety goggles, gloves, a wire brush, a chisel, a concrete bonding agent, concrete patching compound, mixing tools, a trowel, and protective coatings. Make sure you have everything ready before starting the repair.
Preparing the Work Area
Clear the area around your fountain to create enough space to work comfortably. Lay down a plastic sheet or tarp to catch any debris or excess materials during the repair process.
Cleaning the Fountain
Use a wire brush and a chisel to remove loose debris and any old paint or sealer from the damaged areas. Thoroughly clean the surface to ensure proper adhesion of the patching material.
Filling Cracks and Holes
For smaller cracks and holes, use a concrete bonding agent to improve adhesion. Apply the bonding agent to the damaged areas and allow it to dry before proceeding.
Smoothing and Sanding
After the bonding agent has dried, use a trowel to apply the concrete patching compound to the damaged areas. Smooth the surface with the trowel and sand it down to match the surrounding concrete.
Applying a Concrete Bonding Agent
Apply a concrete bonding agent to the entire surface of the fountain to enhance the adhesion of the patching compound.
Mixing and Applying Concrete Patch
Follow the manufacturer’s instructions to mix the concrete patching compound. Apply the patching compound to the damaged areas and use a trowel to smooth it out. Ensure it’s level with the rest of the fountain’s surface.
Texturing and Blending
To create a seamless look, texture the repaired areas to match the existing texture of the fountain. Use a damp sponge or brush to blend the patch with the surrounding concrete.
Sealing the Fountain
Apply a concrete sealer to protect the repaired surface from moisture and weathering. Follow the sealer’s instructions for the best results.
Painting or Staining (Optional)
If desired, you can paint or stain the fountain to match your outdoor decor. Choose a paint or stain specifically designed for concrete surfaces.
Adding a Protective Coating
To further enhance the durability of your concrete fountain, consider adding a protective coating. This will help prolong its life and maintain its appearance.
Final Inspection and Cleanup
Inspect the repaired fountain to ensure that all repairs are satisfactory. Clean up your work area and dispose of any waste properly.
Maintenance Tips
Regularly inspect and clean your concrete fountain to prevent future damage. Keep an eye out for cracks and promptly repair any new damage that may occur.
Mixing and Applying Concrete Patch
The process of mixing and applying concrete patch is a crucial step in repairing your concrete fountain. This step ensures that the damaged areas are properly filled and blended with the surrounding surface. Here’s how to mix and apply concrete patch effectively:
Materials Needed:
- Concrete patching compound
- Mixing tools (bucket, trowel, or mixing paddle)
- Safety goggles and gloves
Steps:
- Safety First: Before you begin, make sure you’re wearing safety goggles and gloves to protect yourself from any potential splashes or contact with the patching compound.
- Read the Instructions: Refer to the manufacturer’s instructions on the concrete patching compound packaging. Different products may have specific mixing ratios and drying times, so it’s essential to follow these guidelines closely.
- Prepare the Mixing Area: Find a clean and sturdy surface to mix the patching compound. A large plastic bucket or a mixing paddle attachment on a drill can be helpful for larger repairs. Ensure the area is well-ventilated.
- Measure the Compound: Measure the required amount of concrete patching compound according to the manufacturer’s instructions. It’s crucial to mix only as much as you can work with within the specified time frame, as the compound can dry quickly.
- Add Water Gradually: Start by adding water to the dry patching compound. Follow the manufacturer’s recommended water-to-compound ratio. Typically, you’ll want to add water slowly while continuously mixing until you achieve a creamy, lump-free consistency.
- Mix Thoroughly: Mix the compound and water thoroughly to ensure all dry particles are fully hydrated. This process may take a few minutes of consistent stirring. The result should be a smooth and workable mixture.
- Apply the Patch: Once your patching compound is well-mixed, use a trowel to apply it to the damaged areas on your concrete fountain. Fill the cracks and holes evenly, making sure the patch is level with the surrounding surface. You can use a putty knife for smaller repairs or a larger trowel for bigger areas.
- Smooth and Blend: After applying the patch, use the trowel to smooth and blend the compound with the existing concrete. Feather the edges of the patch to create a seamless transition. Ensure that the patched area matches the texture of the surrounding surface as closely as possible.
- Allow to Cure: The drying time for concrete patching compound can vary depending on the product and environmental conditions. Follow the manufacturer’s instructions for the recommended curing time. It’s essential to keep the repaired area protected from moisture or rain during this period.
- Inspect and Touch Up: Once the patch has fully cured, inspect the repaired area. If there are any uneven spots or imperfections, you can lightly sand or reapply patching compound as needed.
Maintaining Your Repaired Concrete Fountain
Maintenance plays a crucial role in preserving the longevity and aesthetics of your concrete fountain. Here are some maintenance tips to help you keep your fountain in top condition:
- Regular Cleaning: Clean your fountain periodically to remove dirt, algae, and debris. Use a soft brush or sponge to scrub the surface gently. Avoid harsh chemicals that may damage the sealant or paint.
- Water Quality: Ensure the water in your fountain remains clean and free from algae growth. Consider using a water treatment product designed for fountains to prevent algae and scale buildup.
- Winter Care: If you live in a region with freezing temperatures, it’s essential to winterize your fountain. Drain the water to prevent freezing, which can cause cracks or damage. Cover the fountain with a waterproof cover to shield it from the elements.
- Inspect Regularly: Periodically inspect your fountain for any signs of damage or wear. Look out for new cracks or chips, and address them promptly to prevent further deterioration.
- Reapply Sealant: Reapply a concrete sealer every 1-2 years to maintain the protective barrier. This step will help safeguard your fountain against moisture and weathering.
- Adjust Water Flow: If your fountain has a pump, check the water flow and adjust it as needed. Proper water circulation ensures that the fountain functions efficiently.
Conclusion
Repairing a concrete fountain is a manageable DIY project that can save you money and extend the life of your beloved outdoor water feature. By following the steps outlined in this guide and conducting regular maintenance, you can enjoy the beauty and tranquility of your concrete fountain for years to come.
FAQs
While smaller cracks can be repaired by homeowners, it’s advisable to consult a professional for significant structural damage.
It’s recommended to reseal your fountain every 1-2 years to maintain its protective barrier.
Use paint or stain specifically formulated for concrete surfaces to ensure long-lasting results.
Texturing and blending help achieve a seamless appearance, but it’s optional depending on your aesthetic preference.
Regularly clean and inspect your fountain, and promptly address any minor issues before they worsen.


