Introduction
Shutters can be a lovely addition to your home, providing both aesthetic appeal and functional benefits. However, there may come a time when you need to take them down, either for maintenance, replacement, or cleaning. In this article, we will guide you through the process of how to take down shutters safely and efficiently.
Why Remove Shutters?
Before diving into the removal process, it’s essential to understand why you might want to take down your shutters. Here are a few common reasons:
Maintenance and Repairs
Over time, shutters may become damaged or require maintenance. Removing them allows you to inspect and address any issues properly.
Replacement
If you’re looking to upgrade or change the style of your shutters, you’ll need to remove the old ones first.
Cleaning
Dirt, dust, and grime can accumulate on your shutters, affecting their appearance. Taking them down for cleaning can breathe new life into your windows.
Getting Started
Gather Your Tools
Before you begin, ensure you have the necessary tools and equipment:
- Screwdriver
- Wrench or pliers
- Ladder or step stool
- Safety gloves and goggles
Ensure Safety
Safety should always be a top priority when working on home projects. Make sure to:
- Inform someone about your task in case of an emergency.
- Wear appropriate safety gear to protect yourself from potential hazards.
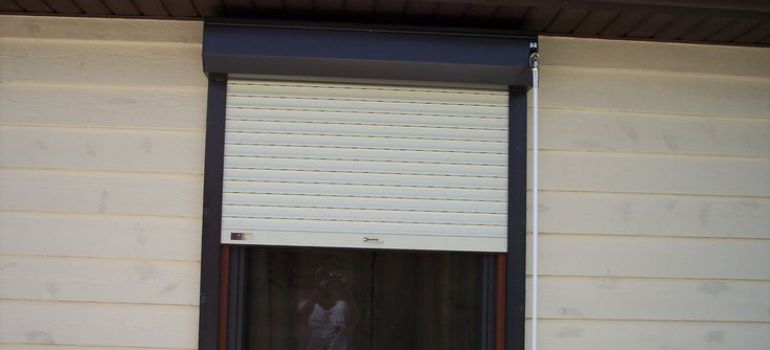
Removing Exterior Shutters
Exterior shutters are typically attached to the sides of your windows. Here’s how to remove them:
Identify Attachment Points
Locate the attachment points where the shutters are connected to the wall. These are usually screws or bolts.
Unscrew or Unbolt
Using your screwdriver or wrench, carefully remove the screws or bolts securing the shutters to the wall. Keep these fasteners in a safe place; you’ll need them for reinstallation.
Detach the Shutters
Once all the fasteners are removed, gently pull the shutters away from the wall. Be cautious not to damage the shutters or the wall during this process.
Store Properly
Store the removed shutters in a safe and dry place if you plan to reinstall them later.
Removing Interior Shutters
Interior shutters are usually hinged to the window frame. Follow these steps for their removal:
Open the Shutters
Fully open the shutters to access the hinges and attachment points.
Locate the Hinges
Identify the hinges that connect the shutters to the window frame. They are typically visible when the shutters are open.
Unscrew the Hinges
Using your screwdriver, carefully unscrew the hinges from the window frame. Be sure to support the shutters while doing this to prevent them from falling.
Remove the Shutters
Once the hinges are detached, gently remove the shutters from the window frame.
Store Safely
Store the interior shutters in a safe place to protect them from damage or dust.
Additional Tips for Taking Down Shutters
While we’ve covered the basic steps for removing shutters, here are some additional tips to ensure a smooth process:
Label the Parts
If your shutters have multiple components, such as louvers and frames, label them during disassembly. This will make reinstallation much easier.
Use a Drop Cloth
When working on interior shutters, place a drop cloth beneath them to catch any dust or debris. This will help keep your space clean.
Check for Hidden Fasteners
Some shutters may have hidden fasteners or clips that aren’t immediately visible. Be thorough in inspecting your shutters before removal.
Assess the Condition
While you have your shutters down, take the opportunity to assess their condition thoroughly. Are there any parts that need repair or replacement? Addressing these issues now can extend the lifespan of your shutters.
Consider Professional Help
If your shutters are particularly complex or if you’re uncomfortable with DIY projects, it’s wise to consult a professional. They can ensure the removal and reinstallation process is done correctly.
Reinstalling Your Shutters
Once you’ve completed your maintenance, cleaning, or replacement tasks, it’s time to reinstall your shutters. Reversing the removal process, secure them back in place using the screws, bolts, or hinges you kept safely stored.
Maintaining Your Shutters
Maintenance is a crucial aspect of ensuring your shutters remain in top condition over the years. Here are some essential maintenance tips:
Regular Cleaning
Regularly clean your shutters to prevent the buildup of dust and grime. A simple wipe-down with a damp cloth can do wonders to maintain their appearance.
Inspection
Perform routine inspections to check for any signs of wear, damage, or loose components. Catching issues early can prevent more extensive repairs down the line.
Lubrication
For shutters with movable parts, such as louvers, hinges, or tracks, apply a silicone-based lubricant to keep them operating smoothly.
Repainting
If your shutters are wooden and the paint is peeling or fading, consider repainting them. A fresh coat of paint not only enhances their appearance but also provides protection against the elements.
Pest Control
Inspect your shutters for any signs of termite or pest damage. If detected, take immediate action to address the infestation and repair any affected parts.
Reusing or Recycling Old Shutters
If you’ve decided to replace your shutters and the old ones are still in decent condition, consider giving them a new purpose:
Home Decor
Old shutters can be repurposed as decorative elements in your home. They can serve as unique wall art, room dividers, or even headboards for beds.
DIY Projects
Get creative and use old shutters for various DIY projects. They can become rustic shelving, garden trellises, or a charming backdrop for potted plants.
Donate or Sell
If you no longer have a use for your old shutters, consider donating them to a local charity or selling them online to someone who might want to repurpose them.
Wrapping It Up
Taking down shutters might seem like a daunting task, but with the right knowledge and tools, it’s a manageable project for homeowners. Whether you’re performing maintenance, replacing old shutters, or giving them a fresh look through cleaning and painting, following the outlined steps will help you achieve your goals safely and effectively.
Conclusion
Taking down shutters may seem like a daunting task, but with the right tools and careful execution, it can be a straightforward process. Whether you’re performing maintenance, replacing, or cleaning your shutters, following these steps will help you achieve the desired results.
Frequently Asked Questions (FAQs)
Yes, you can clean most shutters without removing them. However, taking them down allows for a more thorough cleaning.
If screws or bolts are difficult to remove, consider using penetrating oil to loosen them. If the problem persists, consult a professional.
It’s a good practice to clean your shutters at least once a year to maintain their appearance and prolong their lifespan.
Yes, removing shutters makes it easier to repaint or refinish them for a fresh look.
For basic shutter removal, you can do it yourself following these steps. However, if you’re unsure or have complex shutter systems, it’s advisable to seek professional assistance.


