Introduction
Welding aluminum at home can be a rewarding skill to acquire, allowing you to create and repair various items. Aluminum is a versatile material known for its lightweight and corrosion-resistant properties, making it ideal for a wide range of applications. In this comprehensive guide, we will walk you through the steps and techniques required to weld aluminum at home successfully.
Getting Started with Welding Aluminum
Before we dive into the welding process, let’s cover the essential tools and equipment you’ll need to get started.
Tools and Equipment
Before you begin welding aluminum at home, it’s essential to gather the necessary tools and equipment. Here’s a list of what you’ll need:
- Welding Machine: Choose a TIG (Tungsten Inert Gas) or MIG (Metal Inert Gas) welder suitable for aluminum welding.
- Aluminum Welding Rods: Select the appropriate filler rod based on the type and thickness of aluminum you’ll be working with.
- Safety Gear: Invest in welding gloves, a welding helmet, safety glasses, and a welding apron to protect yourself from sparks and UV rays.
- Work Area: Set up a well-ventilated workspace with a sturdy workbench and proper grounding for your welding machine.
Preparing the Aluminum
Properly preparing the aluminum surface is crucial for achieving a strong and clean weld. Follow these steps for effective aluminum preparation:
Cleaning and Surface Preparation
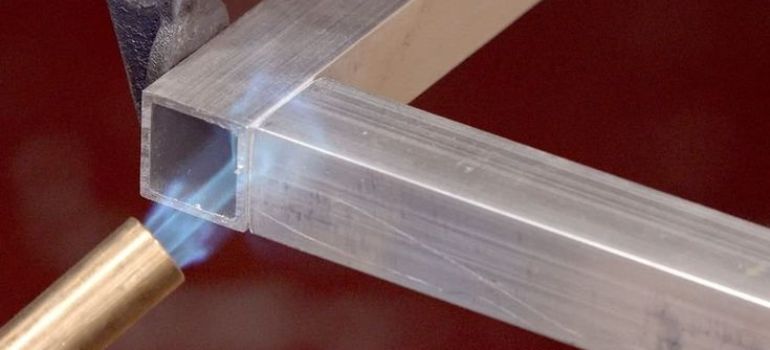
Before you start welding aluminum, it’s crucial to thoroughly clean and prepare the surface. Proper cleaning and preparation ensure a strong and clean weld. Follow these steps:
- Cleaning: Begin by removing any dirt, grease, or oxidation from the aluminum surface. You can use a wire brush, chemical cleaner, or a combination of both to ensure the metal is clean and free from contaminants.
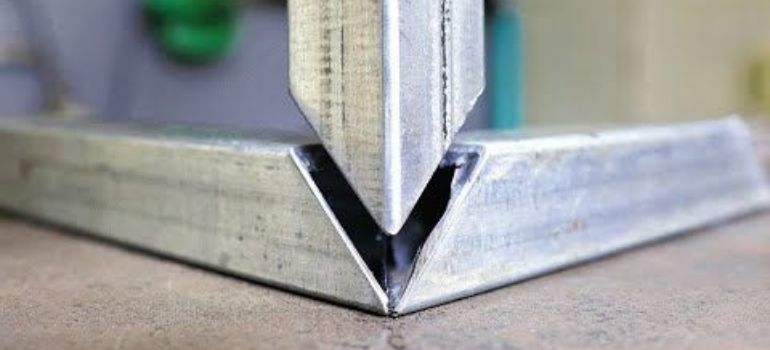
- Joint Preparation: Focus on the joint where you’ll be making the weld. It’s essential to have tight and clean joints for a successful weld. Use a saw, grinder, or file to remove any irregularities or burrs from the edges of the aluminum pieces that need to be joined.
Setting Up Your Welder
Properly configuring your welding machine is essential for successful aluminum welding. Follow these steps to set up your welder correctly:
Machine Settings
- Polarity: Depending on the welding method, set your welding machine to the appropriate polarity. For TIG (Tungsten Inert Gas) welding, use direct current electrode positive (DCEP). For MIG (Metal Inert Gas) welding, use direct current electrode negative (DCEN).
- Gas Selection: Choose the right shielding gas for your aluminum welding. For TIG welding, use 100% argon gas. For MIG welding, consider a mixture of argon and helium for better results.
- Wire Feed Speed (MIG Welding): If you’re using a MIG welder, adjust the wire feed speed according to the manufacturer’s recommendations. This adjustment ensures a smooth and controlled welding process.
Welding Techniques
Now, let’s explore the actual welding techniques for aluminum.
TIG Welding
- Arc Starting: Initiate the arc by gently tapping the tungsten electrode on the aluminum surface.
- Travel Speed: Maintain a slow and steady travel speed to prevent overheating and distortion.
- Filler Rod: Dip the filler rod into the molten pool to create a strong bond.
MIG Welding
- Trigger Control: Maintain control over the trigger to control the wire feed and maintain a consistent weld.
- Welding Angle: Hold the gun at a slight angle, typically around 15 degrees, to achieve better penetration.
Troubleshooting Common Issues
Welding aluminum can be challenging, and you may encounter issues such as burn-through or lack of fusion. Here are some common problems and their solutions:
Common Welding Issues
- Burn-Through: Burn-through occurs when you melt a hole in the aluminum due to excessive heat. To prevent this, reduce the amperage or increase your travel speed. This will help you maintain control over the heat input and prevent excessive melting.
- Lack of Fusion: A lack of fusion happens when the weld doesn’t bond properly with the base metal. To resolve this issue, ensure that you’ve thoroughly cleaned and prepared the joint. Also, adjust your welding technique to ensure proper penetration and fusion between the filler rod and the aluminum.
Conclusion
Learning how to weld aluminum at home opens up a world of possibilities for DIY enthusiasts and hobbyists. By following the steps and techniques outlined in this guide, you can master the art of aluminum welding and tackle various projects with confidence.
Frequently Asked Questions (FAQs)
Welding aluminum can be challenging for beginners, but with practice and the right guidance, it can be mastered.
Always wear appropriate safety gear, work in a well-ventilated area, and follow safety guidelines for your welding machine.
It is possible to weld different types of aluminum, but it requires careful selection of filler materials and proper technique.
Aluminum welding is used for various applications, including automotive repairs, boat building, and custom fabrication.
Quality welding supplies can be found at welding supply stores, online retailers, or local hardware stores. Be sure to choose reputable brands for the best results.


