Introduction
Lighting is a crucial aspect of any room’s design, not just for functionality but also for the ambiance it creates. In this guide, we’ll focus on can lights, a popular choice for their sleek and modern appearance, and how to determine the right number for a 12×20 room.
Understanding Room Dimensions
A 12×20 room, typically 240 square feet, can serve various purposes, from a living room to a spacious bedroom. The layout, including furniture and fixtures, plays a significant role in lighting decisions.
Can Lights Basics
Can lights, also known as recessed lights, are installed into openings in the ceiling. They come in various types, including LED, halogen, and incandescent, each with its unique characteristics.
Lighting Needs Assessment
The first step is to assess the room’s lighting needs. Consider factors like natural light, room color, and the purpose of the space.
Calculating the Number of Can Lights
Calculating the number of can lights needed for a room, especially a specific size like 12×20 feet, involves a few key considerations. Here’s a step-by-step guide to help you determine the right amount:
1. Understand the Room’s Purpose
- The function of the room greatly influences the lighting needs. For example, a kitchen or a study room might require more lighting compared to a bedroom.
2. Consider the Ceiling Height
- Higher ceilings may require more lights or lights with higher luminosity to adequately illuminate the space.
3. Determine the Foot-Candles Needed
- Foot-candles measure how bright the light is one foot away from the source. Different activities require different levels of brightness. For instance, a kitchen may need about 30-40 foot-candles, while a living room might need around 10-20.
4. Use a Standard Formula
- A common formula used is multiplying the room’s square footage by the foot-candles needed. For a 12×20 room (240 square feet), if you need 20 foot-candles for a living room, you would need 4800 lumens in total (240 sq ft x 20 foot-candles).
5. Calculate Based on the Lumens per Can Light
- If each can light emits 600 lumens, you would divide the total lumens needed by the lumens per light. In this case, 4800 total lumens divided by 600 lumens per light equals 8 lights.
6. Adjust for Natural Light and Room Color
- Rooms with ample natural light or lighter paint colors may require fewer lights. Conversely, darker rooms might need more.
7. Spacing for Uniformity
- Proper spacing is crucial for even lighting. A good rule of thumb is to place can lights approximately 2 to 3 feet away from the wall and 4 to 6 feet apart from each other.
8. Consider Dimmable Options
- Using dimmable lights gives you flexibility to adjust brightness as needed, which can be more energy-efficient.
9. Always Round Up
- If your calculation does not result in a whole number, it’s better to round up to ensure adequate lighting.
10. Consult with a Professional
- For the best outcome, especially in complex spaces or for specific lighting needs, consulting with a lighting expert or an interior designer is advisable.
Installation Tips
Proper placement is key to effective lighting. Ensure even spacing and consider focusing lights on key areas or features in the room.
Design Considerations
While functionality is important, so is the aesthetic appeal. Choose can lights that complement the room’s overall design and feel.
Energy Efficiency
When considering the energy efficiency of can lights in a 12×20 room, there are several factors to take into account. Energy-efficient lighting not only reduces your carbon footprint but also lowers electricity bills over time. Here’s how to approach this:
1. Choose LED Can Lights
- LEDs are significantly more energy-efficient than traditional incandescent or halogen bulbs. They use less electricity and have a longer lifespan, reducing both energy consumption and replacement costs.
2. Look for Energy Star Rated Products
- Lights that have the Energy Star certification meet strict energy efficiency guidelines set by the EPA and the U.S. Department of Energy.
3. Consider Lumens, Not Watts
- Lumens measure the amount of light produced, while watts measure energy consumption. Higher lumens with lower watts indicate better energy efficiency.
4. Dimmable Lights
- Using dimmable can lights allows you to adjust the brightness to your needs, saving energy when full brightness isn’t necessary.
5. Smart Lighting Systems
- Integrating smart lighting systems can further enhance energy efficiency. These systems can be programmed to turn lights off automatically when the room is unoccupied or adjust the lighting based on natural light availability.
6. Proper Installation and Insulation
- Ensure that the can lights are properly installed and insulated to avoid energy loss. Poor insulation can lead to heat loss in winter and increased cooling needs in summer.
7. Use of Motion Sensors and Timers
- Installing motion sensors or timers can help reduce energy usage by ensuring lights are on only when needed.
8. Color Temperature Consideration
- While not directly linked to energy efficiency, choosing the right color temperature for your needs can improve the environment’s quality, reducing the need for additional lighting sources.
9. Maintenance
- Regular cleaning and maintenance of can lights ensure they operate at maximum efficiency. Dust and dirt can reduce a bulb’s effectiveness.
10. Assess the Total Number of Lights Needed
- As discussed in calculating the number of can lights, using the right number of lights for your space is crucial. Over-lighting a room not only wastes energy but can also create an uncomfortably bright environment.
Cost Factors
When it comes to the cost factors involved in installing can lights in a 12×20 room, several elements contribute to the overall expense. Understanding these can help you budget more effectively and make informed choices. Here’s a breakdown of the primary cost factors:
1. Type of Can Lights
- The cost varies significantly depending on the type of can lights you choose. LED lights are generally more expensive upfront than halogen or incandescent bulbs, but they offer savings in the long run due to lower energy usage and longer lifespan.
2. Number of Lights
- The total number of lights needed for your room directly impacts the cost. More lights mean higher expenses, not only for the fixtures themselves but also for installation.
3. Quality and Brand of Fixtures
- Higher quality or brand-name fixtures usually come with a higher price tag. However, investing in quality can be cost-effective over time due to durability and better performance.
4. Installation Costs
- Professional installation costs can vary widely based on your location, the complexity of the job, and the electrician’s rates. This is often the most significant cost factor.
5. Wiring and Electrical Work
- If additional wiring or electrical work is needed to accommodate the can lights, this will add to the overall cost. Older homes may require more extensive electrical upgrades.
6. Dimmers and Controls
- Adding dimmers or advanced control systems, such as smart lighting controls, increases the cost but adds functionality and can improve energy efficiency.
7. Energy Efficiency
- Energy-efficient models may have a higher upfront cost but can lead to savings on your energy bill, offsetting the initial investment over time.
8. Maintenance and Replacement Costs
- Consider the long-term maintenance and replacement costs. LEDs, for instance, have a higher upfront cost but lower maintenance and replacement costs.
9. Insulation and Safety Features
- Proper insulation and safety features for your can lights are crucial, especially to prevent heat loss and fire hazards. These features might add to the initial cost but are essential for safety and energy efficiency.
10. Aesthetic Choices
- Custom or designer fixtures that match your room’s decor can be more expensive. The aesthetic appeal can be a significant factor in the overall cost if you’re aiming for a specific look.
11. Permits and Inspections
- In some areas, you might need permits for electrical work, and inspections might be required post-installation. These can add to the cost.
Maintenance and Upkeep
Regular cleaning and occasional bulb replacement are essential for long-term performance.
Alternative Lighting Solutions
Exploring alternative lighting solutions for a 12×20 room is essential, especially if you’re looking for options other than can lights. Each lighting type offers unique benefits and can significantly impact the room’s ambiance and functionality. Here’s a look at some alternative solutions:
1. Pendant Lights
- Ideal for focal points over areas like dining tables or kitchen islands. They come in various styles and can add a decorative touch to the room.
2. Track Lighting
- Versatile and adjustable, track lighting is excellent for highlighting artwork, bookshelves, or specific areas. It’s also a good option for rooms with limited ceiling space.
3. Chandeliers
- Perfect for adding a touch of elegance and drama. Chandeliers work well in living rooms or large bedrooms, providing a central light source with decorative appeal.
4. Ceiling Fans with Lights
- A two-in-one solution that offers both illumination and air circulation. Ideal for rooms where maintaining airflow is essential.
5. Wall Sconces
- Great for adding ambient or accent lighting. They can be used to frame a fireplace, highlight a hallway, or add soft lighting to a bedroom.
6. Table and Floor Lamps
- Offering portability and flexibility, lamps can be moved around to change the lighting scheme as needed. They’re perfect for creating cozy reading nooks or adding extra light to dark corners.
7. LED Strip Lights
- These are fantastic for creating mood lighting or accentuating architectural features. They can be placed under cabinets, along baseboards, or behind TVs.
8. Recessed Panel Lights
- Similar to can lights but with a more modern look. These are flat panels that can be recessed into the ceiling, offering a sleek and contemporary feel.
9. Skylights or Solar Tubes
- If natural light is an option, skylights or solar tubes can bring in sunlight, reducing the need for artificial lighting during the day.
10. Smart Lighting Systems
- These systems offer the ability to change the color temperature and intensity of lights and can be controlled remotely. They’re adaptable to various activities and times of the day.
11. Fluorescent Lights
- While not as popular in residential settings due to their harsh light, modern fluorescent lights are more energy-efficient and have improved in light quality.
12. Under-Cabinet Lighting
- In kitchens or workspaces, under-cabinet lighting provides excellent task lighting and adds a warm ambiance to the room.
When choosing alternative lighting solutions, consider factors like the room’s purpose, existing decor, energy efficiency, and the quality of light needed. Mixing different types of lighting can create a layered effect that enhances the room’s functionality and aesthetic appeal.
Common Mistakes to Avoid
When installing lighting in a 12×20 room, there are several common mistakes to avoid. These missteps can affect both the functionality and the aesthetic appeal of the room. Being aware of these pitfalls can help you create a more comfortable and efficient lighting setup. Here are some key mistakes to watch out for:
1. Over or Under Lighting the Space
- Too much lighting can make a room uncomfortably bright and increase energy costs, while too little can leave it dimly lit and unwelcoming. Finding the right balance is crucial.
2. Ignoring Task Lighting
- Focusing solely on ambient lighting and neglecting task lighting can lead to insufficient illumination for activities like reading, cooking, or working.
3. Poor Light Placement
- Incorrect placement of lights can lead to uneven lighting, shadows, or glare. Lights should be strategically positioned for optimal illumination and aesthetic balance.
4. Choosing the Wrong Color Temperature
- Using bulbs with a color temperature that doesn’t suit the room’s purpose can affect the mood and functionality. For instance, a cool white light might be too harsh for a cozy living room.
5. Neglecting Dimmers
- Not installing dimmers limits the flexibility to adjust lighting to suit different moods and occasions. Dimmable lights are especially useful in multi-purpose rooms.
6. Forgetting about Energy Efficiency
- Opting for non-energy-efficient lighting can lead to higher electricity bills and a larger carbon footprint. LEDs are a more sustainable choice.
7. Inadequate Wiring and Safety Measures
- Skimping on professional wiring and safety standards can lead to dangerous situations. Always ensure that lighting installations comply with local electrical codes.
8. Ignoring Aesthetic Integration
- Lighting should complement the room’s overall design. Ignoring the aesthetic aspect can result in a mismatched or uninviting atmosphere.
9. Not Planning for Maintenance
- Choose lighting solutions that are easy to maintain. Difficult-to-reach fixtures can make bulb replacement and cleaning a hassle.
10. Disregarding Natural Light
- Failing to consider the room’s natural light can lead to an over-reliance on artificial lighting. Use window treatments to balance and enhance natural light.
11. Overlooking Light Layering
- Relying on a single type of lighting (like only overhead lights) can make a room feel flat. Use a mix of ambient, task, and accent lighting for depth and character.
12. Not Consulting a Professional
- For complex lighting setups or large spaces, it’s wise to seek advice from a lighting designer or electrician.
Avoiding these common mistakes can greatly enhance the effectiveness and appeal of your room’s lighting. Good lighting design is about balancing practicality with aesthetics to create a harmonious and functional space.
Expert Advice
Seeking expert advice is crucial when planning the lighting for a 12×20 room. Professionals in lighting design and interior decorating can offer insights that not only enhance the functionality of your space but also its aesthetic appeal. Here are some key pieces of expert advice to consider:
1. Start with a Lighting Plan
- Before purchasing any fixtures, create a detailed plan. This should take into account the room’s layout, the activities that will take place there, and any existing natural light.
2. Consider the Room’s Function
- Tailor the lighting to the room’s specific use. For instance, a bedroom requires softer, more relaxing lighting compared to a home office that needs bright, focused lighting.
3. Layer Different Types of Lighting
- Experts recommend using a mix of ambient, task, and accent lighting to create depth and interest in the space. This approach also allows for flexibility in lighting different areas of the room.
4. Pay Attention to Color Temperature and CRI
- Color Temperature and Color Rendering Index (CRI) are important. Warmer lights (lower Kelvin) are ideal for living spaces, while higher Kelvin lights are better for workspaces. CRI indicates how accurately colors appear under the light, with a higher CRI being preferable for most indoor applications.
5. Use Dimmers for Versatility
- Dimmers are highly recommended for their ability to control light intensity, allowing for the creation of different moods and atmospheres in the room.
6. Invest in Quality Fixtures
- While budget is always a consideration, investing in high-quality fixtures can save money in the long run due to longer lifespans and better energy efficiency.
7. Incorporate Energy-Efficient Solutions
- Opt for LED lighting where possible. LEDs are more energy-efficient and have a longer lifespan, reducing the need for frequent replacements.
8. Consider the Scale and Proportion
- Ensure that the size of your lighting fixtures is in proportion to your room size. Oversized or undersized fixtures can disrupt the room’s harmony.
9. Seek Professional Installation
- For complex installations or when dealing with high ceilings and difficult angles, it’s wise to hire a professional. This ensures safety and optimal placement of fixtures.
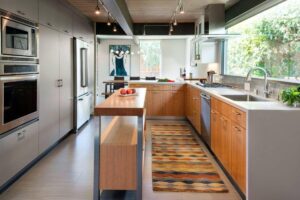
Case Study: A Real-life Example
Let’s look at a real-life case of a 12×20 room lighting project, highlighting practical insights and tips.
Conclusion
Choosing the right number of can lights for a 12×20 room involves careful consideration of various factors. With the right approach, you can achieve a well-lit, aesthetically pleasing space.
FAQs
Ideal color temperatures vary depending on the desired ambiance. For living spaces, a warm white (around 2700K to 3000K) is often preferred for its cozy and inviting feel.
Dimmability is quite important as it allows for flexibility in adjusting the light intensity to suit different moods and activities within the room.
Absolutely! Smart can lights offer convenience and customization, allowing you to control lighting through mobile devices or smart home systems.
While some may opt for DIY installation, hiring a professional is advisable for safety and ensuring proper installation, especially for complex layouts or wiring.
LED can lights are energy-efficient, have a longer lifespan, and offer better light quality, which can lead to cost savings and less frequent replacements in the long run.
