Introduction
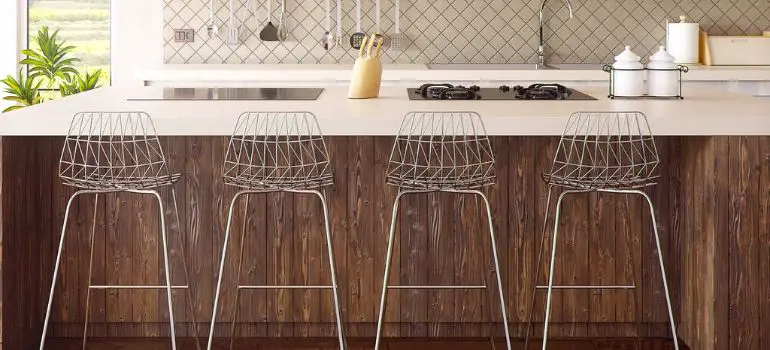
A kitchen peninsula is a versatile addition that can transform the way you use your kitchen space. It provides additional storage, workspace, and can even serve as a breakfast bar or a casual dining area. Before you embark on this DIY project, let’s delve into the planning and design phase.
Planning and Design
Selecting the Right Location
The first step is to choose the location for your kitchen peninsula. It should be strategically placed to optimize traffic flow and create a seamless connection between your kitchen and adjacent rooms.
Measuring and Marking
Accurate measurements are crucial for a successful build. Measure the dimensions of your chosen space carefully and mark the location of your peninsula.
Choosing Materials
Select high-quality materials for your peninsula frame and countertop. Consider factors like durability, aesthetics, and your budget when making your choices.
Preparing Your Space
Clearing the Area
Clear out the area where you’ll be building the peninsula. Remove any existing cabinets, appliances, or obstacles in your way.
Electrical and Plumbing Considerations
If your design involves adding electrical outlets or plumbing fixtures, ensure that you have the necessary expertise or consult a professional to handle these aspects safely.
Building the Frame
Assembling the Base Cabinets

Assemble your chosen base cabinets according to the manufacturer’s instructions. Make sure they are level and secure to create a sturdy base for your peninsula.
Securing the Frame
Attach the base cabinets together securely, ensuring they are level and plumb. This forms the foundation of your peninsula.
Countertop Installation
Choosing the Right Countertop
Select a countertop material that complements your kitchen’s style and meets your functional needs.
Measuring and Cutting
Measure the dimensions of your base cabinets and mark the countertop accordingly. Use appropriate tools to cut the countertop to size.
Attaching the Countertop
Secure the countertop to the base cabinets, ensuring a snug fit. Apply adhesive and fasten the countertop securely.
Adding Functional Elements
Installing Electrical Outlets
If you plan to include electrical outlets on your peninsula, hire a professional electrician to install them safely.
Incorporating Seating
If your design includes a seating area, choose comfortable and stylish barstools to complete the look.
Finishing Touches
Painting or Staining
Give your peninsula a polished look by painting or staining it to match your kitchen’s decor.
Adding Decorative Features
Personalize your peninsula by adding decorative elements such as corbels, molding, or a decorative backsplash.
Maintenance and Care
Cleaning Tips
Maintain the beauty of your kitchen peninsula by following the manufacturer’s cleaning recommendations for the countertop material.
Regular Inspection
Periodically check the stability and condition of your peninsula to address any maintenance issues promptly.
Additional Tips and Considerations
Lighting
Good lighting is essential for both functionality and aesthetics. Consider installing pendant lights above your kitchen peninsula to provide ample illumination. Pendant lights not only serve a practical purpose but also add a touch of elegance to your kitchen.
Storage Solutions
Maximize the storage potential of your kitchen peninsula by incorporating cabinets, drawers, or open shelving. This extra storage space can be used for storing kitchen appliances, cookware, or even your favorite recipe books.
Seating Arrangements
If you plan to use your kitchen peninsula as a dining area or a place for casual meals, pay attention to the seating arrangement. Ensure there is enough space between seats for comfortable seating and easy movement.
Color Coordination
Coordinate the colors and materials of your kitchen peninsula with the existing kitchen decor. A harmonious color scheme can create a cohesive look and make your peninsula blend seamlessly with the rest of the space.
Maintenance Tips
To keep your kitchen peninsula in top condition, here are some maintenance tips:
- Regularly clean and sanitize the countertop to prevent stains and bacterial growth.
- Tighten any loose screws or hardware on cabinets and drawers.
- Inspect for water damage and address any leaks promptly to prevent structural issues.
Cleaning Tips for Your Kitchen Peninsula
- Daily Wipe Down: Make it a habit to wipe down your kitchen peninsula daily with a damp, clean cloth. This will help remove any surface dust, crumbs, or spills before they have a chance to become stubborn stains.
- Use Mild Soap: For routine cleaning, mix a few drops of mild dish soap with warm water. Dampen a soft cloth or sponge in the soapy water, wring it out well, and gently wipe down the countertop and any other surfaces. Avoid abrasive cleaners or scouring pads that could damage the finish.
- Avoid Harsh Chemicals: Steer clear of harsh chemical cleaners, especially on natural stone countertops like granite or marble. These chemicals can degrade the sealant and cause discoloration over time. Stick to gentle, non-abrasive cleaning solutions.
- Rinse Thoroughly: After cleaning with soapy water, rinse the surface thoroughly with clean water to remove any soap residue. Soap residue can leave streaks and a dull finish.
- Specialized Cleaning Products: If you encounter specific stains, such as wine or coffee, there are specialized countertop cleaners available for different materials. Follow the manufacturer’s recommendations for these products.
- Disinfect Regularly: In light of recent health concerns, it’s essential to disinfect your kitchen peninsula regularly, especially if it’s frequently used for food preparation. Use a mild disinfectant solution or a mixture of water and vinegar to kill bacteria and viruses.
- Blot Spills Immediately: If you spill liquids or sauces on your countertop, blot them up immediately with a clean cloth or paper towel. Prompt action can prevent staining.
- Use Cutting Boards: While your kitchen peninsula can handle food preparation, using cutting boards is a good practice to avoid scratches and stains, especially if you have a sensitive countertop material.
- Regularly Check Seams: If your peninsula has seams where two countertop pieces meet, inspect them regularly for any signs of separation or moisture. Seal any gaps to prevent water from seeping in.
- Avoid Excessive Heat: While most countertop materials are heat-resistant, it’s a good practice to use trivets or hot pads when placing hot cookware or pots on the surface to prevent heat damage.
- Polish as Needed: Depending on your countertop material, periodic polishing may be necessary to maintain its luster. Follow the manufacturer’s guidelines for polishing products and frequency.
- Consult Manufacturer Guidelines: Always refer to the manufacturer’s cleaning and maintenance guidelines specific to your countertop material. Different materials have varying care requirements.
Measuring and Marking for Your Kitchen Peninsula
Accurate measurements and precise markings are critical to the success of your kitchen peninsula project. Follow these steps to ensure your measurements are spot-on:
Tools You’ll Need:
- Tape measure
- Carpenter’s square
- Pencil
- Level
- Masking tape
Step 1: Select Your Location Before you start measuring and marking, choose the exact location for your kitchen peninsula. Consider factors like traffic flow, access to utilities, and the overall layout of your kitchen.
Step 2: Measure the Available Space Using a tape measure, carefully measure the available space for your kitchen peninsula. Measure the length, width, and height of the area where you intend to build.
Step 3: Check for Obstacles Identify any obstacles that might affect your design, such as electrical outlets, plumbing fixtures, or vents. Measure the distance from these obstacles to your proposed peninsula location and account for them in your design.
Step 4: Mark the Floor Use a pencil and a carpenter’s square to mark the dimensions of your peninsula on the floor. Start by marking the corners of the peninsula’s footprint. Make sure the lines are straight and at right angles to each other for a square and symmetrical design.
Step 5: Verify Squareness Use a carpenter’s square to check that the corners are perfectly square. Adjust your markings as needed to ensure that all angles are 90 degrees.
Step 6: Mark Cabinet Positions If you’re using base cabinets for your peninsula, mark the positions of each cabinet on the floor. Measure the width and depth of the cabinets and mark their outlines on the floor. Leave space for any fillers or decorative features between cabinets.
Step 7: Check for Level Use a level to ensure that your markings are level and even. An uneven peninsula can lead to problems during installation.
Step 8: Mark for Electrical and Plumbing If your design includes electrical outlets or plumbing fixtures, mark their positions on the floor. Consult with a professional electrician or plumber to ensure accurate placements.
Step 9: Review and Double-Check Before proceeding with construction, review your measurements and markings carefully. Double-check all dimensions and positions to avoid any costly mistakes during the build.
Step 10: Use Masking Tape for Visualization To get a better sense of how your peninsula will fit in the space, consider using masking tape to outline the cabinet and countertop positions directly on the floor. This visual aid can help you visualize the final result and make any necessary adjustments.
Conclusion
Building a kitchen peninsula is a rewarding DIY project that can enhance both the functionality and aesthetics of your kitchen. With careful planning and execution, you can create a stunning focal point that transforms your kitchen into a more inviting space.
FAQs
- How long does it take to build a kitchen peninsula?
- The timeline can vary based on the complexity of the project, but it typically takes a few days to a week to complete.
- What materials are best for a kitchen peninsula countertop?
- Popular choices include granite, quartz, and butcher block for their durability and aesthetics.
- Can I install plumbing fixtures in my kitchen peninsula?
- Yes, but it’s essential to consult a professional plumber to ensure proper installation.
- Are there any design considerations for a small kitchen?
- In a small kitchen, opt for a slim-profile peninsula to maximize space while maintaining functionality.
- Can I repurpose existing cabinets for my kitchen peninsula?
- Yes, you can repurpose old cabinets to create a budget-friendly kitchen peninsula.


