Introduction
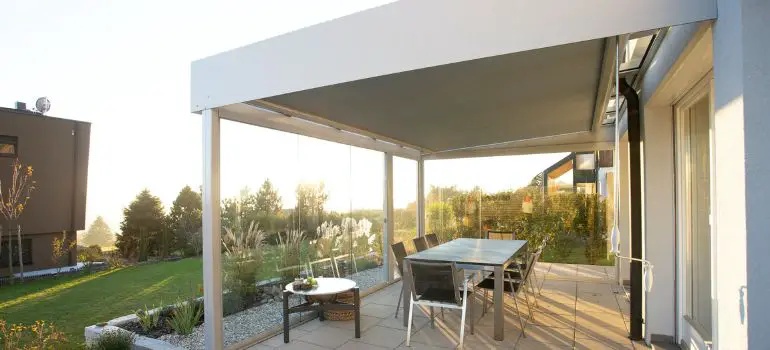
Are you looking to create a shaded oasis in your outdoor space? Building an outdoor canopy frame can be a rewarding DIY project that not only provides protection from the sun but also adds a touch of elegance to your backyard. In this comprehensive guide, we will walk you through the process of building a sturdy and stylish outdoor canopy frame. Whether you want to relax under it, host outdoor gatherings, or simply enhance your outdoor living area, this project will be a great addition to your home.
Materials and Tools You’ll Need
Before we dive into the construction process, let’s gather the necessary materials and tools:
Materials:
- Canopy Fabric: Choose a durable and weather-resistant fabric that suits your style.
- Wooden Posts: Select pressure-treated or cedar wood for the frame.
- Concrete Mix: For securing the posts in the ground.
- Screws and Nails: To join the frame components securely.
- Metal Brackets: For extra stability.
- Drill and Bits: Essential for making holes and attaching components.
- Measuring Tape and Level: Ensures precise measurements and alignment.
- Saw: To cut the wooden posts to the desired length.
- Paint or Stain: To finish and protect the wooden frame.
Tools:
- Hammer
- Shovel
- Wrench
- Safety Gear: Gloves, safety glasses, and ear protection.
- Ladder
Now that we have all the necessary materials and tools, let’s proceed with building the outdoor canopy frame.
Step 1: Choose the Location
Selecting the Ideal Spot
The first step is to choose the perfect location for your outdoor canopy frame. Consider factors like sunlight, wind direction, and proximity to your house or seating area. Once you’ve identified the spot, mark it with stakes or spray paint.
Step 2: Prepare the Ground
Preparing the Foundation
Now, it’s time to prepare the ground where the canopy will stand. Use a shovel to dig holes for the wooden posts. Make sure they are deep enough to provide stability and support for your canopy.
Step 3: Install the Wooden Posts

Setting Up the Frame
Place the wooden posts in the holes you’ve dug and fill them with concrete mix to secure them in place. Ensure the posts are level and properly aligned. Let the concrete dry according to the manufacturer’s instructions.
Step 4: Attach Crossbeams and Top Frame
Building the Frame Structure
Using your drill, attach crossbeams to the top of the wooden posts. These will provide support for the canopy fabric. Create a rectangular frame by adding horizontal beams between the vertical posts.
Step 5: Add the Canopy Fabric
Covering the Canopy Frame
Drape the canopy fabric over the frame and secure it using screws or hooks. Make sure it’s taut and wrinkle-free. Trim any excess fabric for a neat appearance.
Step 6: Finishing Touches
Adding the Final Details
To enhance the aesthetics and durability of your outdoor canopy frame, consider painting or staining the wooden components. This step also adds a layer of protection against the elements.
Step 7: Regular Maintenance
Keeping Your Canopy in Top Shape
To ensure your outdoor canopy frame remains in excellent condition for years to come, make sure to perform regular maintenance:
- Check for Loose Fasteners: Periodically inspect the frame for any loose screws or nails, and tighten them as needed.
- Clean the Fabric: Remove dirt and debris from the canopy fabric regularly to prevent mold or mildew growth. Use a mild detergent and a soft brush for cleaning.
- Inspect Wood for Decay: Examine the wooden posts and beams for signs of rot or decay. Replace any damaged components promptly.
- Reapply Finish: If you’ve stained or painted the wooden parts, consider reapplying the finish every few years to maintain their appearance and protection.
- Store During Harsh Weather: In extreme weather conditions, such as heavy snow or strong winds, it’s advisable to disassemble the canopy frame and store it to prevent damage.
Conclusion
Building an outdoor canopy frame can transform your outdoor space into a comfortable and stylish retreat. By following this step-by-step guide, you’ll create a structure that not only offers shade but also complements your outdoor decor. Get started today and enjoy the benefits of your DIY canopy frame.
FAQs
The time required depends on your experience and the complexity of the design. It can take anywhere from a day to a weekend.
Yes, you can use metal posts for a modern look and added durability.
Choose a fabric designed for outdoor use, such as polyester or canvas, for maximum durability.
Check with your local building department, as regulations vary by location.
Yes, if you use screws instead of permanent fasteners, you can easily disassemble and store the frame during the colder months.


