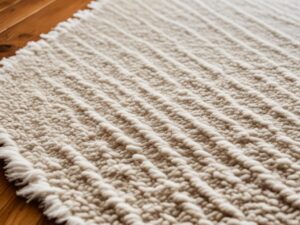
Dyeing a wool rug can be a fun and creative project that allows you to revitalize your space without breaking the bank. Whether you want to update the color of a worn-out rug or give an outdated pattern a fresh and modern look, dyeing can be the perfect solution. In this guide, we will take you through the step-by-step process of DIY wool rug dyeing, including the best dyes to use for wool rugs.
Key Takeaways:
- DIY wool rug dyeing is a cost-effective way to transform your rug and refresh your space.
- Only rugs made from natural materials like wool can withstand the dyeing process.
- Overdyeing vintage rugs can give them a fresh and vibrant look.
- Proper preparation, cleaning, and rinsing are essential before dyeing your rug.
- After dyeing, ensure proper drying and consider using a protective spray like Scotchgard.
Overdyeing: Giving Vintage Rugs a Fresh Look
Overdyeing has become a popular trend in recent years, allowing retailers to breathe new life into vintage rugs that are worn or outdated. This process involves soaking the rug, bleaching it, and dyeing it multiple times until the desired color is achieved. The result? A beautifully transformed rug that adds a pop of color and style to any space.
When it comes to upcycling vintage rugs, overdyeing offers endless possibilities. By choosing bright and vibrant colors, you can create a statement piece that becomes the focal point of your room. Whether you’re looking to add a touch of modernity to an old rug or reinvent its entire look, overdyeing is the perfect solution.
However, it’s important to note that overdyeing is not a quick or simple process. It requires patience, attention to detail, and a commitment to achieving the desired outcome. Each rug is unique, and the dyeing process can vary depending on factors such as the rug’s material, size, and condition. It’s crucial to approach overdyeing with realistic expectations and a willingness to invest the necessary time and effort.

Preparing the Rug for Dyeing
Before dyeing the rug, proper preparation is essential to ensure the best results. Follow these steps to prepare your rug for dyeing:
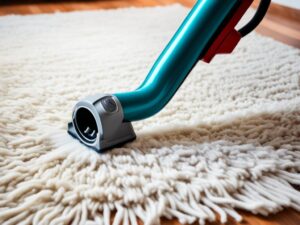
- Vacuum the Rug: Start by thoroughly vacuuming the rug to remove any dirt, dust, or loose fibers. This will help the dye adhere evenly to the rug’s surface.
- Clean the Rug: For optimal dye absorption, clean the rug using a mild rug cleaner or shampoo. Be sure to follow the instructions provided by the manufacturer for the best results.
- Wet the Rug: Once the rug is clean, wet it thoroughly with water. This will help the dye spread evenly and prevent any dry spots on the rug during the dyeing process.
- Outdoor Setup: To avoid creating a mess in your home, it is recommended to perform the dyeing process outdoors. Lay a plastic tarp on the ground and place the wet rug on top of it.
By following these preparation steps, you can ensure that your rug is clean, damp, and ready for the dyeing process. Now, let’s move on to the next section to learn how to dye the rug step by step.

Dyeing the Rug Step by Step
The dyeing process is the key to achieving vibrant, long-lasting colors on your wool rug. By following these step-by-step instructions, you can achieve beautiful results and transform the look of your rug.
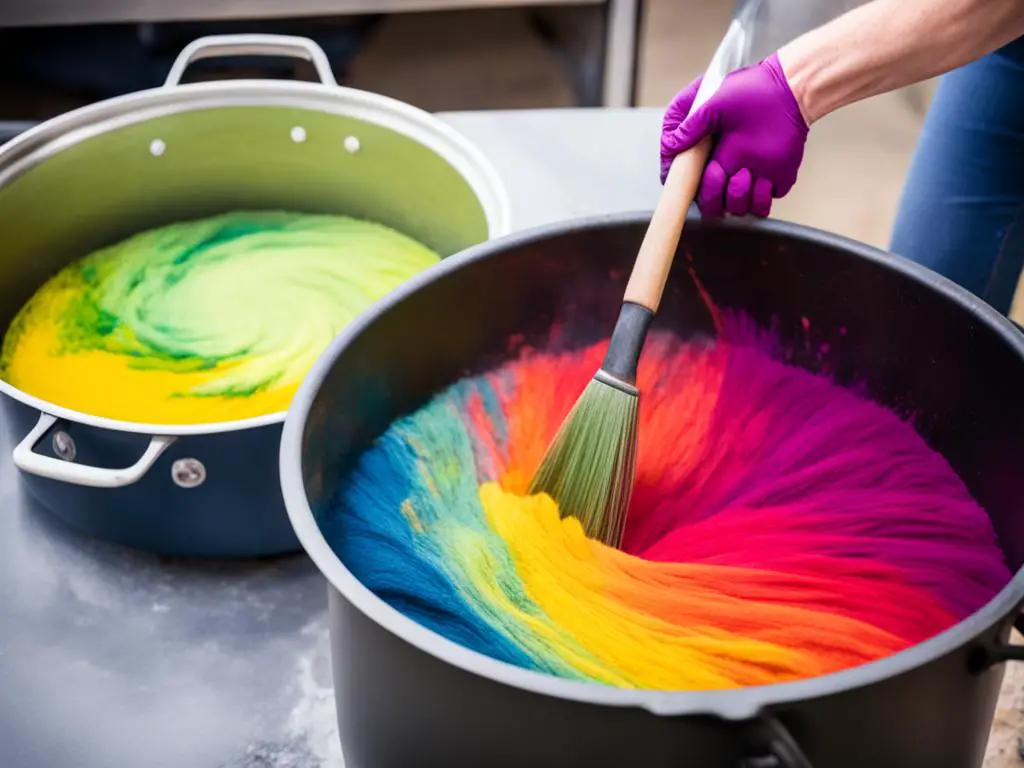
Mixing the Dye
The first step is to mix the dye according to the instructions provided on the bottle. Ensure that you have the necessary protective gear, such as gloves and a mask, to avoid direct contact with the dye. Use a container that is large enough to hold the dye mixture and allows for easy mixing.
- Measure the desired amount of dye powder or liquid dye, depending on the dyeing technique you are using.
- Follow the instructions on the dye packaging to determine the appropriate ratio of dye to water.
- Mix the dye and water thoroughly until the dye is fully dissolved.
Preparing the Spray Bottles
Pour the dye mixture into spray bottles for easy and controlled application. Having multiple spray bottles with different nozzle sizes can help you achieve different effects and control the amount of dye applied to the rug.
Dyeing Techniques
Now it’s time to bring color to your rug! Determine the dyeing technique you want to use. Some popular techniques include:
- Gradient Dyeing: Start with a lighter shade of dye and gradually move to a darker shade, creating a beautiful gradient effect on the rug.
- Patterned Dyeing: Use stencils or templates to create patterns on the rug by selectively spraying the dye in specific areas.
- Splatter Dyeing: Create a unique, abstract look by splattering the dye onto the rug using a brush or flicking motions with your fingers.
Applying the Dye
Ensure even coverage by spraying the dye onto the rug in a back-and-forth motion, starting from one corner and working your way across. Keep the spray bottle at a consistent distance from the rug to maintain uniform color saturation. Apply multiple layers of dye as needed to achieve the desired intensity of color.
Rinsing the Rug
After dyeing, it’s time to rinse the rug to remove any excess dye. Take the rug outdoors or to an area where it can be thoroughly rinsed without affecting other surfaces. Use a hose to rinse the rug, ensuring that the water runs clear. This step is crucial to prevent any color bleeding or staining once the rug is dry.
Final Thoughts
Dyeing your wool rug can be a rewarding process that allows you to unleash your creativity and add a personalized touch to your decor. Remember to follow the dyeing process carefully, experiment with different dyeing techniques, and take necessary precautions to protect yourself and your surroundings. With a little patience and practice, you can achieve stunning results and enjoy a rug that reflects your unique style.
Drying and Finishing
Once you’ve finished rinsing your rug, the next step is to ensure proper drying before bringing it back indoors. Drying the rug thoroughly is crucial to prevent any moisture-related issues and maintain its quality. Here’s what you need to do:
1. Hang the Rug: Find a suitable location, preferably outdoors, where you can hang the rug. Make sure you have enough space to fully extend and air-dry the rug.
2. Ensure Complete Dryness: Allow the rug to air-dry completely, which may take a few days depending on the weather conditions. It’s important not to rush this step to avoid any potential damage.
3. Protection with Scotchgard: Once the rug is dry, you can take an additional step to protect it. Apply a layer of Scotchgard or a similar product to add a barrier against stains and spills. This protective coating will help ensure your rug stays fresh and clean for longer.
If you prefer professional assistance or find the DIY process overwhelming, you can consider reaching out to reputable rug refinishing services. These services specialize in handling delicate rugs and can provide expert care and refinishing to restore the rug’s beauty.

Now that your rug is clean, refreshed, and fully dried, it’s time to bring it back inside and enjoy the transformed space.
Tips and Considerations
When it comes to dyeing your rug, there are a few tips and considerations to keep in mind. These factors can help ensure a successful DIY rug dyeing project and minimize potential risks.
Rug Size and Budget-Friendly Options
Before embarking on a rug dyeing project, consider the size of your rug. Larger rugs can be more challenging to dye due to their size and weight. It may be easier to dye smaller rugs, especially if you are new to rug dyeing. Additionally, smaller rugs require less dye, which can be more budget-friendly.
Rug Maintenance
Proper rug maintenance is crucial both before and after the dyeing process. Ensure that your rug is clean and free of dust or debris before starting the dyeing process. Vacuum the rug thoroughly to remove any dirt or particles that could affect the dye’s absorption. After dyeing, follow the manufacturer’s instructions for rug care and maintenance to prolong the color and quality of your newly dyed rug.
Potential Risks
While DIY rug dyeing can be a fun and cost-effective project, it is important to be aware of potential risks. One potential risk is that the dye may not be completely colorfast, meaning it may bleed or fade when exposed to moisture. This can be a concern, especially if you have pets or anticipate spills on your rug. It is essential to consider how the rug will be used and take precautionary measures to prevent any potential staining or damage to your floors.
Note: It’s always a good idea to test the dye on a small, inconspicuous area of the rug before proceeding with the full dyeing process. This way, you can assess the color saturation and check for any adverse reactions.
By keeping these tips and considerations in mind, you can make informed decisions and minimize any potential risks associated with DIY rug dyeing.
| Tips | Considerations |
|---|---|
| Dye smaller rugs for easier handling | Ensure proper rug maintenance before and after dyeing |
| Test the dye on a small area first | Be aware of colorfastness and potential staining risks |
| Consider the cost-effectiveness of the dyeing project | Take precautionary measures for pets and spills |
Conclusion
Dyeing a wool rug can be a fun and rewarding DIY project that allows you to transform the look of your space. By following this comprehensive guide, you can give your rug a new lease on life and add a stylish pop of color to your home decor. Whether you have a worn-out rug that needs a makeover or simply want to update the look of your space, rug dyeing can be a cost-effective solution.
However, it’s important to understand the process and consider any potential risks before embarking on this project. Make sure to choose the right type of dye for wool rugs, as only rugs made from natural materials like wool can withstand the dyeing process. Additionally, proper rug preparation and dyeing techniques are essential to achieve the desired results. Take the time to clean and vacuum the rug beforehand, and ensure even color saturation during the dyeing process.
While DIY rug dyeing can be a great option for budget-conscious individuals, it’s also worth considering professional rug refinishing services if you feel overwhelmed or want a more precise and expert finish. They can provide refinishing services and expert guidance to ensure your rug looks flawless.
In conclusion, rug transformation is within your reach with this DIY rug dyeing guide. With patience, attention to detail, and the right materials, you can create a stunning rug makeover that reflects your personal style and breathes new life into your space. So, roll up your sleeves and get ready to embark on this creative project!
