If you’re looking to enhance the appearance and functionality of your home, installing facia can be a great way to achieve that. Facia not only provides a polished look to the exterior of your building but also serves as a protective barrier against water damage and pests. In this guide, we’ll walk you through the step-by-step process of installing facia correctly to ensure long-lasting results.
Understanding Facia
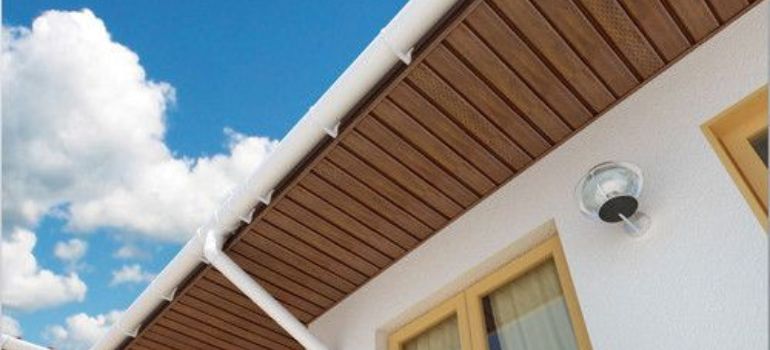
Facia, also known as fascia, is the vertical finishing edge connected to the ends of the rafters, trusses, or the area where the gutter is attached to the roof. It’s typically made of wood, PVC, or metal and plays a crucial role in protecting the roof and the interior of the building from weather elements. Facia also adds aesthetic appeal to the structure, giving it a clean and finished look.
Tools and Materials Required
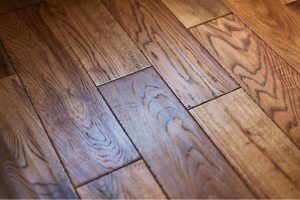
Before you begin the installation process, gather the necessary tools and materials. You’ll need a saw, hammer, nails or screws, measuring tape, level, safety goggles, gloves, and a ladder. Additionally, choose the appropriate facia material for your project, whether it’s wood, PVC, or metal, based on your preferences and budget.
Preparing for Installation
Start by assessing the condition of your existing facia, if applicable. Remove any damaged or rotten sections and ensure the surface is clean and free of debris. Take safety precautions by wearing protective gear and securing the ladder properly before climbing up to work on the facia.
Step-by-Step Installation Process
- Removal of Old Facia: If there’s existing facia, carefully remove it using a pry bar and hammer, taking care not to damage the surrounding areas.
- Measuring and Cutting: Measure the length of the fascia board needed and cut it to size using a saw, ensuring precise measurements for a snug fit.
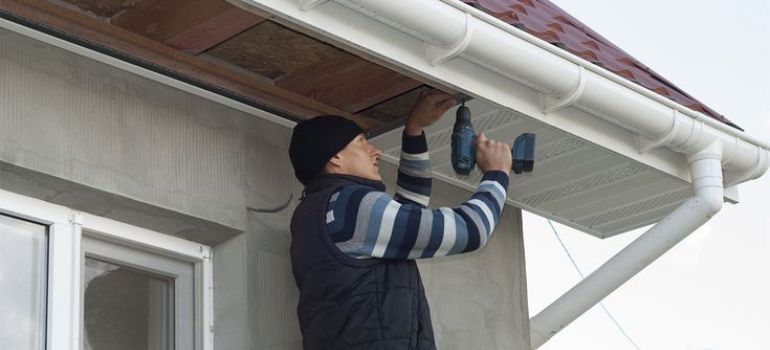
- Attaching the Facia: Position the facia board against the edge of the roof and secure it in place using nails or screws, spacing them evenly along the board.
- Securing in Place: Check for proper alignment and use a level to ensure the facia is straight and level. Make adjustments as needed before fully securing it.
- Finishing Touches: Once the facia is securely attached, apply caulk or sealant to fill any gaps between the facia and the roof, ensuring a weatherproof seal. Optionally, paint the facia to match the exterior of your building for a cohesive look.
Tips for Successful Installation
- Double-check measurements and alignments throughout the installation process to avoid costly mistakes.
- Invest in high-quality materials to ensure durability and longevity of your facia.
- Apply weatherproofing techniques such as sealing gaps and using waterproof paint to protect your facia from moisture damage.
Common Mistakes to Avoid
- Neglecting to measure accurately can result in ill-fitting facia, leading to potential leaks and instability.
- Improper attachment of the facia can cause it to come loose or sag over time, compromising its effectiveness.
- Failing to seal gaps properly can allow water to seep behind the facia, leading to rot and structural damage.
Maintaining Facia
Once you’ve completed the installation of your facia, it’s crucial to implement a regular maintenance routine to preserve its condition and prolong its lifespan. Proper maintenance not only ensures the aesthetic appeal of your home but also helps prevent structural damage caused by neglect or wear over time.
Regular Inspections: Schedule routine inspections of your facia at least twice a year, preferably in the spring and fall. During these inspections, visually examine the facia for any signs of damage, such as cracks, warping, or rot. Pay close attention to areas where the facia meets the roofline and around corners, as these areas are more prone to wear and tear.
Cleaning: Keep your facia clean by removing dirt, debris, and buildup regularly. Use a mild detergent and water solution with a soft-bristle brush to gently scrub the surface of the facia. Avoid using harsh chemicals or abrasive cleaners, as these can damage the facia material and compromise its integrity.
Upkeep: Address any issues or damage promptly to prevent further deterioration. If you notice any signs of damage during your inspections, such as rot or decay, take immediate action to repair or replace the affected sections of the facia. Ignoring minor issues can lead to more extensive damage and costly repairs down the line.
Weatherproofing: Ensure that your facia is properly sealed and weatherproofed to protect it from moisture damage. Check for any gaps or cracks in the caulking or sealant around the edges of the facia and reapply as needed to maintain a watertight seal. Consider applying a fresh coat of paint or sealant every few years to protect the facia from the elements and enhance its longevity.
Professional Maintenance: If you’re unsure about how to properly maintain your facia or if you encounter any significant issues during your inspections, don’t hesitate to seek professional assistance. A qualified contractor or handyman can provide expert advice and perform necessary repairs or maintenance tasks to ensure the continued integrity of your facia.
Conclusion
Installing facia is a rewarding project that can enhance the appearance and protection of your home. By following the steps outlined in this guide and avoiding common pitfalls, you can achieve professional-looking results that stand the test of time. Remember to prioritize safety and quality throughout the installation process, and don’t hesitate to seek professional assistance if needed.
FAQs
While installing facia can be a DIY project for those with experience and the right tools, it’s essential to assess your skills and comfort level before proceeding. If you’re unsure, consulting a professional can ensure the job is done correctly and safely.
It’s recommended to inspect your facia at least twice a year, preferably in the spring and fall, to check for any signs of damage or wear. Additionally, perform visual inspections after severe weather events or if you notice any changes in the appearance of your facia.
Signs of deteriorating facia include rot, mold, mildew, peeling paint, or visible damage such as cracks or splits. If you notice any of these issues during your inspections, it’s advisable to replace the facia promptly to prevent further damage to your home.
Yes, you can paint your facia to match the color scheme of your home’s exterior. Choose a high-quality exterior paint that is suitable for the facia material you’re using, and ensure the surface is clean and properly primed before painting for best results.
While it’s technically possible to install new facia over existing facia, it’s not recommended unless the existing facia is in good condition. Installing facia over deteriorating or damaged facia can exacerbate underlying issues and compromise the integrity of the installation. It’s best to remove the old facia and start with a clean surface for optimal results.

