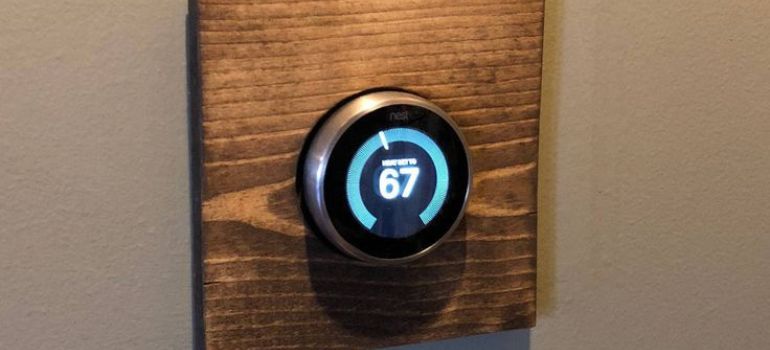
Nest Thermostat, developed by Nest Labs, is a smart thermostat that learns your heating and cooling preferences to help you save energy and money. With its sleek design and advanced features, installing a Nest Thermostat can significantly enhance your home’s comfort and efficiency.
Benefits of Installing a Nest Thermostat
Installing a Nest Thermostat offers several advantages, including:
Energy Savings: The Nest Thermostat learns your schedule and adjusts the temperature accordingly, leading to reduced energy consumption and lower utility bills.
Remote Access: You can control your Nest Thermostat from anywhere using the Nest app on your smartphone or tablet, allowing you to adjust the temperature even when you’re away from home.
Smart Learning: Over time, the Nest Thermostat learns your temperature preferences and automatically creates a customized schedule to suit your lifestyle, maximizing comfort while minimizing energy usage.
Preparation Before Installation
Before you begin the installation process, there are a few essential steps to take:
Checking Compatibility
Ensure that your current heating and cooling system are compatible with the Nest Thermostat. You can use the Nest Compatibility Checker tool on their website to verify compatibility.
Gathering Tools
Screwdriver: You’ll need a screwdriver to remove the old thermostat and to mount the Nest base to the wall.
Level: A level is necessary to ensure that the Nest base is mounted straight on the wall.
Power Drill (Optional): Depending on your mounting surface, you may need a power drill to help with mounting the Nest base securely.
Step-by-Step Guide to Install Nest Thermostat
Follow these steps to install your Nest Thermostat:
Turning Off Power
Before starting, turn off the power to your heating and cooling system at the circuit breaker to prevent any accidents.
Removing Old Thermostat
Turn Off Power: Before removing the old thermostat, turn off the power to your heating and cooling system at the circuit breaker to prevent any electrical accidents.
Remove Cover: Carefully remove the cover of the old thermostat to expose the wiring and mounting plate underneath.
Note Wiring Connections: Take note of how the wires are connected to the terminals on the old thermostat. You may want to take a picture or label the wires to ensure correct reconnection later.
Disconnect Wires: Using a screwdriver, loosen the screws or clips holding the wires to the terminals and carefully disconnect each wire from its corresponding terminal.
Remove Mounting Plate: Once the wires are disconnected, remove the mounting plate of the old thermostat from the wall. You may need to unscrew it or gently pry it off, depending on the type of mounting.
Check Compatibility: Take a moment to check the compatibility of your existing wiring with the Nest Thermostat using the Nest Compatibility Checker tool, if you haven’t done so already.
Prepare for Nest Installation: With the old thermostat removed, you’re now ready to proceed with the installation of your Nest Thermostat. Follow the manufacturer’s instructions for mounting the Nest base and connecting the wires.
Mounting the Nest Base
Choose Location: Select a suitable location on the wall for mounting the Nest base. It should be near your heating and cooling system and easily accessible for wiring.
Mark Holes: Use a pencil to mark the screw holes on the wall where you’ll mount the Nest base. Ensure the base is level by using a level tool.
Drill Holes (If Necessary): If your mounting surface requires it, use a power drill to create pilot holes for the screws. Be careful not to damage any wiring or plumbing behind the wall.
Attach Base to Wall: Align the Nest base with the marked screw holes and use screws to secure it to the wall. Make sure the base is firmly attached and level.
Connect Wires: Once the Nest base is mounted, proceed to connect the wires from your heating and cooling system to the terminals on the base.
Test Stability: After mounting the base and connecting the wires, gently tug on the base to ensure it is securely attached to the wall.
Connecting Wires
Identify Wires: Before connecting wires, identify which wires from your heating and cooling system correspond to the terminals on the Nest base. Common wire labels include R, Rc, Rh, C, W, Y, and G.
Turn Off Power: Turn off the power to your heating and cooling system at the circuit breaker to prevent any accidents while handling wires.
Match Wires to Terminals: Match each wire to its corresponding terminal on the Nest base. For example, the R wire goes to the R terminal, the W wire to the W terminal, and so on.
Secure Wires: Once the wires are inserted into the terminals, ensure they are secure and tightly fastened to prevent them from coming loose.
Double-Check Connections: Double-check your wire connections to ensure they are correct and properly seated in the terminals. Incorrect wiring can lead to system malfunctions.
Attaching Nest Display
Align Display: Hold the Nest display near the mounted base and ensure that it aligns correctly with the base.
Attach Display: Gently push the Nest display onto the base until it clicks into place. You should feel and hear a satisfying click indicating that the display is securely attached.
Check Connection: After attaching the display, give it a slight tug to ensure that it is firmly connected to the base. The display should not come loose or wobble.
Power On: Once the display is attached, restore power to your heating and cooling system at the circuit breaker. The Nest Thermostat will power on automatically and guide you through the setup process.
Follow On-screen Instructions: Follow the on-screen instructions displayed on the Nest Thermostat to complete the setup process. This may include selecting your language, connecting to Wi-Fi, and setting up your heating and cooling preferences.
Test Functionality: After setup is complete, test the functionality of your Nest Thermostat by adjusting the temperature settings and observing how it responds.
Powering On
Turn the power back on at the circuit breaker and follow the on-screen instructions on the Nest display to complete the setup process.
Configuring Nest Thermostat Settings
Once installed, you can configure the settings on your Nest Thermostat, including temperature preferences, scheduling, and energy-saving features.
Connecting Nest Thermostat to Wi-Fi
Connect your Nest Thermostat to your home Wi-Fi network using the Nest app on your smartphone or tablet for remote access and control.
Testing and Troubleshooting
After installation, test your Nest Thermostat to ensure it’s functioning correctly. If you encounter any issues, refer to the troubleshooting guide included with the device or contact Nest customer support for assistance.
Conclusion
Installing a Nest Thermostat is a straightforward process that can significantly improve your home’s energy efficiency and comfort. By following the step-by-step guide outlined above, you can enjoy the benefits of smart heating and cooling technology while reducing your environmental footprint and saving money on utility bills.
FAQs
Can I install a Nest Thermostat myself, or do I need professional help?
While some homeowners may feel comfortable installing a Nest Thermostat themselves, it’s essential to follow the instructions carefully and ensure compatibility with your existing system. If you’re unsure, it’s always best to consult a professional HVAC technician for assistance.
Does the Nest Thermostat work with all heating and cooling systems?
The Nest Thermostat is compatible with most heating and cooling systems, including gas, electric, oil, and forced air. However, it’s essential to check compatibility using the Nest Compatibility Checker tool before purchasing.
Can I control my Nest Thermostat when I’m away from home?
Yes, you can control your Nest Thermostat remotely using the Nest app on your smartphone or tablet. This allows you to adjust the temperature, view energy usage, and manage your thermostat settings from anywhere with an internet connection.
How does the Nest Thermostat learn my temperature preferences?
The Nest Thermostat uses advanced algorithms and sensors to track your temperature adjustments and daily routines. Over time, it learns your preferences and creates a customized schedule to optimize comfort and energy efficiency.
What should I do if I encounter issues during installation or setup?
If you experience any difficulties during installation or setup, refer to the troubleshooting guide included with your Nest Thermostat or contact Nest customer support for assistance.


