
Introduction
Joining 4×4 lumber at a 90-degree angle is a fundamental skill for carpenters, woodworkers, and DIY enthusiasts alike. It allows you to create strong, stable connections for various woodworking projects, ensuring your structures withstand the test of time.
Tools and Materials You’ll Need
Before you get started, gather the necessary tools and materials:
Tools:
- Circular Saw
- Miter Saw
- Chisels
- Carpenter’s Square
- Tape Measure
- Clamps
- Drill and Screws
- Wood Glue
- Sandpaper
- Safety Gear (Goggles, Ear Protection, Dust Mask)
Materials:
- 4×4 Lumber
- Wood Screws
- Wood Glue
- Sandpaper
Measuring and Marking
Accurate measurements are crucial for a successful 4×4 joint. Use your tape measure and carpenter’s square to mark the precise length and angle where you want to make the joint.
Cutting the 4x4s
Once you have your measurements and markings, use your circular saw or miter saw to carefully cut the 4x4s along the marked lines. Ensure the cuts are clean and precise.
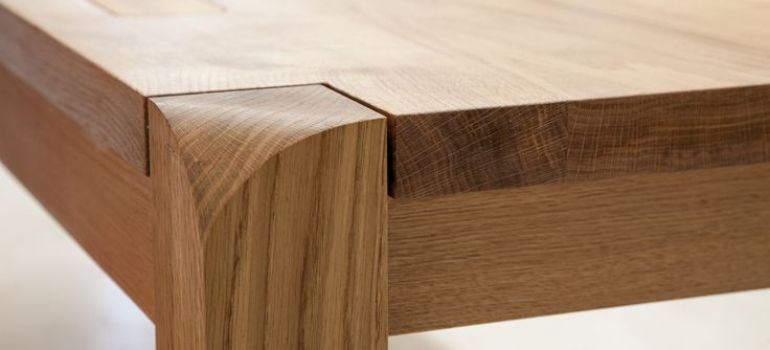
Creating the Lap Joint
To join the 4x4s at a 90-degree angle, you’ll need to create a lap joint. This involves removing a portion of one 4×4 to fit snugly against the other. Use your chisels and saws to carefully carve out the joint, ensuring a tight fit.
Preparing for Joining
Before you join the two pieces, make sure they fit together perfectly. Sand any rough edges and test the fit to ensure there are no gaps or misalignments.
Gluing the Joint
Apply wood glue generously to both sides of the joint. This will create a strong bond between the two pieces of lumber.
Securing with Fasteners
In addition to the glue, secure the joint with wood screws. Drill pilot holes to prevent splitting, and then drive the screws through the joint to hold it firmly in place.
Finishing Touches
After the joint is secure, inspect the entire assembly. Sand down any rough edges or imperfections to create a smooth finish.
Adding Reinforcements
For extra stability, consider adding metal brackets or corner braces to reinforce the joint further.
Ensuring Squareness
Use your carpenter’s square to check that the joint is perfectly square. This step is crucial for ensuring the structural integrity of your project.
Sealing the Joint
Apply a wood sealer or finish to protect the joint from moisture and the elements. This will extend the lifespan of your woodworking project.
Final Inspection
Before you consider your project complete, perform a final inspection to ensure all connections are secure, and the joint is strong and stable.
Additional Tips for Success
While you now have a solid understanding of how to join 4×4 lumber at a 90-degree angle, here are some additional tips to ensure your woodworking projects are a resounding success:
- Plan Your Project: Before you start cutting and joining lumber, create a detailed plan for your project. Having a clear blueprint will help you anticipate challenges and avoid mistakes.
- Practice Makes Perfect: If you’re new to woodworking, consider practicing the joint on scrap pieces of 4×4 lumber first. This will give you a chance to refine your skills and gain confidence.
- Safety First: Always prioritize safety when working with power tools. Wear appropriate safety gear, keep your workspace well-ventilated, and follow the manufacturer’s instructions for each tool.
- Wood Selection: Choose high-quality 4×4 lumber for your projects. Quality lumber not only looks better but also provides better structural integrity.
- Precision Matters: Take your time with measurements and cuts. Precision is key to achieving a clean and seamless joint.
- Experiment with Finishes: Consider experimenting with different wood finishes to achieve the look you desire. Stains, paints, and varnishes can add character and protection to your woodwork.
- Maintenance: Regularly inspect and maintain your finished projects. This will ensure they remain in excellent condition for years to come.
- Learn Continuously: Woodworking is a craft that you can always improve upon. Take the opportunity to learn new techniques, attend workshops, and seek advice from experienced woodworkers.
Conclusion
Joining 4×4 lumber at a 90-degree angle is a valuable skill for woodworking projects of all kinds. With the right tools and techniques, you can create sturdy and durable connections that will stand the test of time. So, go ahead and tackle your next project with confidence, knowing you have the knowledge to join 4x4s at a 90-degree angle like a pro!
FAQs
While screws provide better strength and durability, you can use nails, but make sure they are of the appropriate length and gauge.
Yes, using wood glue along with screws provides extra stability and ensures a strong bond.
The ideal thickness of wood screws will depend on the thickness of your 4×4 lumber. Consult your hardware store for the best options.
You can use a hand saw, but it may require more effort and precision to achieve clean cuts.
It’s recommended to apply a finish to the entire project to protect the wood and enhance its appearance.


