Making your own outdoor rug can be a fun and cost-effective way to add a personalized touch to your outdoor space. With a few simple steps and materials, you can create a unique and stylish outdoor rug that enhances the aesthetic of your porch or patio. In this DIY guide, we will show you how to make an outdoor rug easily and affordably.
Key Takeaways:
- Creating your own outdoor rug allows you to add a personalized touch to your outdoor space.
- With a few simple materials and steps, you can easily make a stylish outdoor rug.
- Cutting out a saying and using it as a stencil adds a unique element to your rug design.
- Securing the stencil with painter’s tape ensures accuracy during the spray painting process.
- Multiple coats of spray paint may be necessary for clear and readable letters.
Gather Your Materials
Before you begin making your outdoor rug, it’s important to gather all the necessary materials. For this project, you will need the following outdoor rug supplies:
| Materials | Description |
|---|---|
| Spray paint | A variety of colors to add a vibrant touch to your rug |
| Cardboard | To create a stencil for your rug design |
| Outdoor doormat | An ideal base for your custom outdoor rug |
| Utility knife | To cut out your rug design and stencil |
| Pencil | To outline your design on the cardboard |
| Painter’s tape | To secure the stencil in place while painting |
These materials are readily available and won’t break the bank, making this DIY project accessible to anyone who wants to create a personalized outdoor rug.
Now that you have your outdoor rug supplies gathered, let’s move on to the next step and learn how to cut out your chosen design.

Cut Out Your Saying
Now that you have gathered your materials, it’s time to add a personalized touch to your outdoor rug. In this step, you will cut out your chosen saying to create a unique design.
To begin, grab a piece of cardboard and a utility knife. Write your saying in bold block letters on the cardboard. This is your chance to get creative and express yourself, whether it’s a motivational quote, a funny phrase, or a simple welcome message.
Once you have written your saying, carefully cut through the cardboard along the outlines of the letters. Take your time to ensure precise cuts, as the shape of the letters will determine the final look of your personalized outdoor rug.
Remember, the saying you choose can be as long or as short as you desire. Whether it’s a single word or a full sentence, cutting out the letters will add an eye-catching element to your outdoor rug.

Add a Personal Touch with Open Block Letters
By cutting out the saying in block letters, you are creating open spaces that will allow the spray paint to shine through, giving your outdoor rug a personalized touch. Once you have finished cutting out the letters, your cardboard stencil is ready to be positioned on the outdoor doormat in the next step.
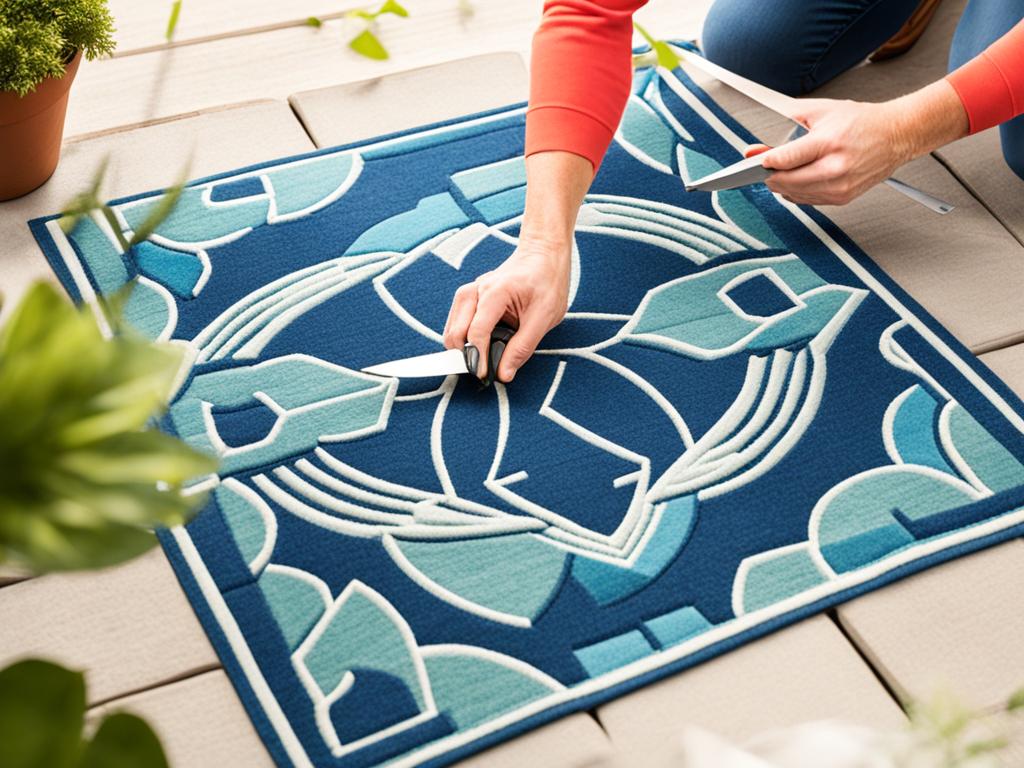
Tape Down the Cardboard
Once you have cut out your saying, it’s time to position the cardboard stencil on the outdoor doormat. This step is crucial to ensuring that your design is placed exactly where you want it. Follow these simple steps to secure the cardboard in place:
- Place the cardboard stencil over the outdoor doormat, aligning it with the desired position.
- Make sure the stencil is straight and centered on the mat.
- Once you are satisfied with the positioning, use painter’s tape to secure the cardboard in place.
- Apply the tape along the edges of the stencil, ensuring that it sticks firmly to the doormat.
- Double-check that the stencil is securely taped down, so it doesn’t move or shift while you work on the next step.
Securing the cardboard stencil is essential for accurate placement and to prevent any unintended smudging or blurring of your design. Taking the time to tape it down properly will ensure that your outdoor rug turns out beautifully.

Spray Paint
Now it’s time to add some color to your outdoor rug! Grab your spray paint and get ready to bring your design to life. Follow these simple steps to ensure a smooth and vibrant finish:
-
Hold the Cardboard Stencil: Using one hand, firmly hold the cardboard stencil in place over the outdoor rug. Make sure it is positioned correctly and aligns with your desired design.
-
Apply Steady Pressure: With the spray paint can in your other hand, apply steady pressure to release an even stream of paint. Holding the can a bit further away, begin spraying within the open block letters of the stencil.
-
Avoid Excessive Bleeding: To prevent excessive bleeding, make sure to hold the spray paint can at a proper distance from the rug. This will help you achieve clean and defined lines.
-
Multiple Coats, if Needed: Depending on the color and coverage you desire, you may need to apply multiple coats of spray paint. Allow each coat to dry before applying the next to ensure the letters are clear and readable.
Remember, take your time and enjoy the process of adding color to your outdoor rug. Once you’re finished, step back and admire your newly transformed creation.
Check Out Your Work
Now that the spray paint has dried, it’s time to examine your finished outdoor rug and assess the results. Carefully remove the cardboard stencil from the rug and take a step back to admire your handiwork. How does the design turn out? Is it exactly as you imagined it?
You have the option to leave the rug as it is, showcasing the subtle beauty of the spray-painted design. Alternatively, if you want to make a bolder statement, consider adding additional coats of spray paint. This will create a more vibrant and eye-catching effect, perfect for adding a pop of color to your outdoor space.
Don’t be afraid to get creative! Experiment with different colored spray paints to personalize your rug even further. Whether you want a harmonious blend of colors or a striking contrast, the choice is yours. Take this opportunity to make your outdoor rug truly unique and reflective of your personal style.
With the painting completed and your creativity unleashed, you’ve successfully transformed a plain outdoor doormat into a stylish and customized rug. It’s incredible how a few simple steps can elevate the aesthetic of your porch or patio, adding a personal touch that sets your outdoor space apart.
Whether you’re making this outdoor rug for yourself or as a gift for someone special, take pride in your creation. Admire the final product, assess the spray paint results, and revel in the satisfaction of a job well done!
| Benefits of Examining Finished Outdoor Rug | Benefits of Assessing Spray Paint Results |
|---|---|
|
|
Conclusion
Crafting your own outdoor rug is a fun and creative project that allows you to personalize your outdoor space. With just a few simple steps and materials, you can create a unique and stylish rug that perfectly complements your porch or patio. Whether you choose to showcase a quirky saying or a bold design, making your own outdoor rug adds a personal touch to your outdoor decor.
By following the DIY guide we’ve provided, you can easily create a homemade outdoor rug that reflects your individual style and taste. The best part is, you have complete control over the design and customization. With the option to choose different colors and patterns, you can ensure that your outdoor rug is tailored to your specific preferences.
So, gather your materials and get started on this enjoyable and rewarding DIY project today. Transform your outdoor space with a customized outdoor rug that will not only enhance the aesthetic appeal but also showcase your creative skills. With a little effort and creativity, you can create a standout piece of DIY outdoor decor that will impress your guests and make your outdoor area truly one-of-a-kind.

