Installing a humidifier in your home can greatly improve indoor air quality and overall comfort, especially during dry winter months. Aprilaire humidifiers are popular choices due to their effectiveness and ease of use. However, wiring them with a transformer might seem daunting for some. In this guide, we’ll walk you through the process step by step, making it easy for you to enjoy the benefits of a properly installed Aprilaire humidifier.
Understanding Aprilaire Humidifiers
Aprilaire offers several types of humidifiers, including bypass, fan-powered, and steam models. Each type serves a specific purpose and is suitable for different home setups. Understanding the type of humidifier you have will help in the wiring process.
Importance of Using a Transformer
A transformer is essential for powering the humidifier and ensuring it functions correctly. It converts the standard voltage from your home’s electrical system to the voltage required by the humidifier, typically 24 volts.
Materials Needed
Before you begin, gather the necessary materials to avoid interruptions during the installation process. You’ll need:
- Aprilaire humidifier
- Transformer
- Screwdriver
- Wire strippers
- Electrical tape
- Wire nuts
- Drill (if required)
Step-by-Step Guide
Preparation
Before starting the installation, turn off the power to your HVAC system to prevent any accidents. Familiarize yourself with the humidifier’s manual and wiring diagram for reference.
Installing the Transformer
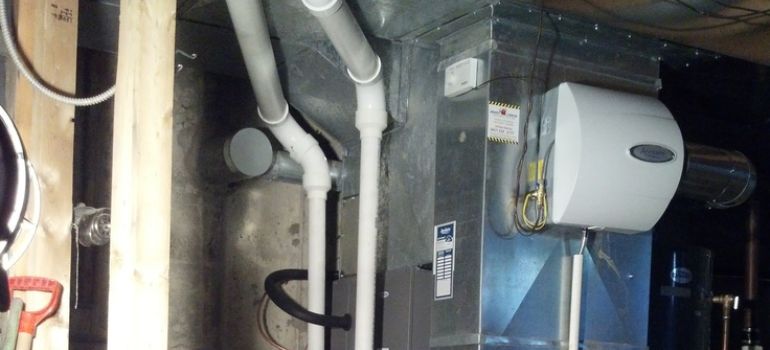
- Choose a Suitable Location: Begin by selecting a suitable location to mount the transformer near your HVAC system. The transformer should be installed in a dry, well-ventilated area where it will be easily accessible.
- Turn Off Power: Before you begin the installation process, turn off the power to your HVAC system at the circuit breaker to prevent any accidents or electrical shocks.
- Mount the Transformer: Securely mount the transformer to the wall or another suitable surface using screws or mounting brackets. Ensure that the transformer is mounted securely and level to prevent any issues with stability.
- Connect Power Source: Next, connect the transformer to a power source. Follow the manufacturer’s instructions to connect the transformer’s wires to the appropriate terminals on your home’s electrical system. It’s essential to match the voltage requirements of the transformer to the power source to avoid damage or malfunction.
- Check Connections: Once the transformer is securely mounted and connected to the power source, double-check all connections to ensure they are tight and secure. Loose connections can lead to electrical problems or failure of the transformer.
- Test the Transformer: After completing the installation, turn the power back on to your HVAC system and test the transformer to ensure it is functioning correctly. You can use a multimeter to check the voltage output of the transformer and verify that it matches the specifications provided by the manufacturer.
- Secure Wiring: Carefully route the wires from the transformer to the humidifier, ensuring they are protected from damage and secured in place with cable ties or clips. Avoid routing the wires near sharp edges or moving parts to prevent any accidents or damage to the wiring.
Wiring the Humidifier
- Review the Wiring Diagram: Before you begin, refer to the wiring diagram provided in the humidifier’s manual. Familiarize yourself with the different terminals and wire colors, ensuring you understand how the components are connected.
- Prepare the Wires: Cut the wires to the appropriate length, leaving some extra length for flexibility. Use wire strippers to remove the insulation from the ends of the wires, exposing the copper conductors.
- Identify Terminal Connections: Identify the terminals on the humidifier where the wires will be connected. These terminals are typically labeled with letters or symbols indicating their function, such as R (power), C (common), W (heat), and G (fan).
- Connect the Wires: Match the wires from the transformer to the corresponding terminals on the humidifier, following the wiring diagram. Typically, the red wire (hot) is connected to the R terminal, and the white wire (neutral) is connected to the C terminal. Use wire nuts to secure the connections, ensuring they are tight and secure.
- Secure the Wiring: Once all the wires are connected, use electrical tape or cable ties to secure the wiring and prevent it from coming loose or getting tangled. Ensure that the wires are routed neatly and away from any sharp edges or moving parts.
- Test the Connections: After completing the wiring, turn on the power to your HVAC system and test the humidifier to ensure it is receiving power and operating correctly. Check for any loose connections or issues with the wiring, and address them promptly if necessary.
- Verify Operation: Monitor the operation of the humidifier to ensure it is functioning as expected. You should hear the sound of water flowing through the unit, indicating that it is working correctly. Adjust the settings on the humidifier as needed to achieve the desired humidity level in your home.
Connecting to the Thermostat
- Identify Thermostat Terminals: Start by identifying the terminals on your thermostat where the humidifier will be connected. These terminals are typically labeled with letters or symbols indicating their function, such as HUM, HUMID, or H.
- Check Compatibility: Before proceeding, ensure that your thermostat is compatible with a humidifier. Most modern thermostats have dedicated terminals for connecting a humidifier, but older models may require additional wiring or an external humidistat.
- Locate Humidifier Terminals: Next, locate the terminals on your Aprilaire humidifier where the thermostat wires will be connected. These terminals are typically labeled with letters or symbols indicating their function, such as R (power), C (common), and H (humidifier).
- Connect Thermostat Wires: Match the thermostat wires to the corresponding terminals on the humidifier, following the wiring diagram provided by Aprilaire. Typically, the thermostat wires are connected to the R and C terminals on the humidifier, with an additional wire connected to the H terminal to activate the humidifier.
- Secure Connections: Use wire nuts or terminal screws to secure the connections between the thermostat wires and the humidifier terminals. Ensure that the connections are tight and secure to prevent any issues with connectivity or operation.
- Adjust Settings: Once the connections are made, you may need to adjust the settings on your thermostat to enable control of the humidifier. Refer to the thermostat’s manual for instructions on how to access and adjust the humidifier settings.
- Test Operation: After connecting the humidifier to the thermostat, test its operation to ensure everything is functioning correctly. Adjust the humidity settings on the thermostat and monitor the operation of the humidifier to verify that it responds accordingly.
- Fine-Tune Settings: Depending on your preferences and the humidity levels in your home, you may need to fine-tune the settings on your thermostat to achieve the desired level of comfort. Experiment with different settings until you find the ideal balance for your needs.
Testing and Troubleshooting
Testing the Humidifier
After completing the wiring, turn the power back on and test the humidifier to ensure it’s functioning correctly. Monitor the humidity levels in your home and adjust the settings as needed.
Common Issues and Solutions
- Low Humidity Output: If you notice that your Aprilaire humidifier is not producing enough moisture, check the water supply line for any obstructions. Ensure that the water panel is clean and free of mineral deposits, as these can impede water flow. If necessary, replace the water panel with a new one.
- Humidifier Not Turning On: If your humidifier fails to turn on, first check the power source and ensure that the transformer is receiving power. Verify that the wiring connections are secure and that the humidistat or thermostat is set correctly to activate the humidifier. If everything appears to be in order, consider testing the transformer or consulting a professional for further assistance.
- Water Leakage: Water leakage can occur if there are loose connections or damaged components in the humidifier. Inspect the water supply line, drain line, and any connections for signs of leaks or damage. Tighten loose connections and replace any damaged parts as needed. Additionally, ensure that the humidifier is level and properly installed to prevent water from leaking out.
- Excessive Noise: Excessive noise from the humidifier can indicate issues with the fan motor, water flow, or other components. Check for any obstructions in the fan or water distribution system and clean or remove them as necessary. If the noise persists, consider lubricating the fan motor or contacting a professional for further diagnosis and repair.
- Incorrect Humidity Levels: If your Aprilaire humidifier is not maintaining the desired humidity levels in your home, check the settings on the humidistat or thermostat. Adjust the humidity setpoint as needed and monitor the operation of the humidifier to ensure it responds accordingly. Additionally, consider factors such as outdoor humidity levels and airflow in your home that may affect humidity levels.
- Frequent Cycling: If your humidifier is cycling on and off frequently, it may be due to improper wiring or settings. Check the wiring connections to ensure they are secure and correctly configured according to the manufacturer’s instructions. Verify that the humidistat or thermostat is set to the appropriate humidity level to prevent unnecessary cycling.
Maintenance Tips
- Regular Cleaning: Clean your humidifier regularly to prevent the buildup of mineral deposits, mold, and bacteria. Follow the manufacturer’s instructions for cleaning and disinfecting the unit. Pay special attention to the water panel, water distribution tray, and any other components that come into contact with water.
- Replace Water Panel: The water panel, also known as the evaporator pad, should be replaced at least once a year, or more frequently if you notice significant mineral buildup or reduced performance. A clean water panel ensures optimal moisture output and prevents the growth of mold and bacteria.
- Inspect for Leaks: Periodically check the humidifier and its connections for any signs of leaks or water damage. Address any leaks promptly to prevent water damage to your home and ensure the humidifier operates safely.
- Adjust Humidity Levels: Monitor the humidity levels in your home and adjust the settings on your humidifier as needed. During the winter months, when indoor air tends to be drier, you may need to increase the humidity level. In the summer, when humidity levels are higher, you can reduce the output of the humidifier or turn it off entirely.
- Check Drain Line: If your humidifier has a drain line, ensure that it is clear and free of obstructions. A clogged drain line can prevent proper drainage and lead to water overflow or leaks.
- Inspect Filters: If your humidifier has a filter, such as a pre-filter or air filter, check it regularly and replace it according to the manufacturer’s recommendations. A clean filter helps maintain proper airflow and ensures that the humidifier operates efficiently.
- Monitor Performance: Keep an eye on the performance of your humidifier and watch for any changes in moisture output or unusual noises. Address any issues promptly to prevent further damage and ensure the continued operation of the unit.
Benefits of Using a Humidifier
- Improved Respiratory Health: Maintaining optimal humidity levels in your home can help alleviate respiratory issues such as dry throat, congestion, and coughing. Dry air can irritate the nasal passages and throat, making it easier for viruses and bacteria to enter the body. By adding moisture to the air, a humidifier can help soothe these symptoms and reduce the risk of respiratory infections.
- Relief from Dry Skin and Irritation: Dry air can cause skin to become dry, itchy, and irritated, especially during the winter months. A humidifier adds moisture to the air, helping to hydrate the skin and prevent dryness. This can be particularly beneficial for individuals with sensitive skin conditions such as eczema or psoriasis.
- Protection for Wooden Furniture and Flooring: Dry air can cause wood to crack, warp, or shrink over time. By maintaining proper humidity levels, a humidifier can help preserve the integrity of wooden furniture, flooring, and musical instruments. This is especially important in climates with cold, dry winters, where indoor heating systems can further exacerbate the problem.
- Improved Sleep Quality: Dry air can contribute to discomfort and irritation during sleep, leading to difficulty falling asleep and disrupted sleep patterns. By adding moisture to the air, a humidifier can create a more comfortable sleeping environment, promoting better sleep quality and overall well-being.
- Reduced Static Electricity: Dry air tends to increase the buildup of static electricity, leading to annoying static shocks and damage to electronic devices. By maintaining proper humidity levels, a humidifier can help reduce static electricity, making your home more comfortable and protecting your electronic equipment.
- Preservation of Houseplants: Many houseplants thrive in humid environments and can suffer in dry indoor conditions. A humidifier can help create a more hospitable environment for houseplants, promoting healthy growth and reducing the risk of wilting or drying out.
- Enhanced Comfort: Perhaps most importantly, using a humidifier can simply make your home feel more comfortable, especially during the dry winter months. Proper humidity levels can help maintain a cozy atmosphere, making it easier to relax, work, and spend time with family and friends indoors.
Conclusion
Wiring an Aprilaire humidifier with a transformer may seem intimidating at first, but with the right tools and knowledge, it can be a straightforward process. By following the steps outlined in this guide, you can enjoy the benefits of a properly installed humidifier in your home.
FAQs
While some homeowners may feel comfortable installing a humidifier themselves, it’s always best to consult a professional, especially if you’re unsure about wiring or HVAC systems.
Yes, most Aprilaire humidifiers require a transformer to power them properly and ensure they function correctly.
It’s recommended to replace the water panel at least once a year to maintain optimal performance.
While it’s possible, it’s not recommended. Using a transformer ensures proper power supply to the humidifier and prevents potential damage to your HVAC system.
Check for any obstructions in the water supply line, ensure the humidifier is wired correctly, and adjust the humidity settings as needed.


