Introduction to DIY Plumbing
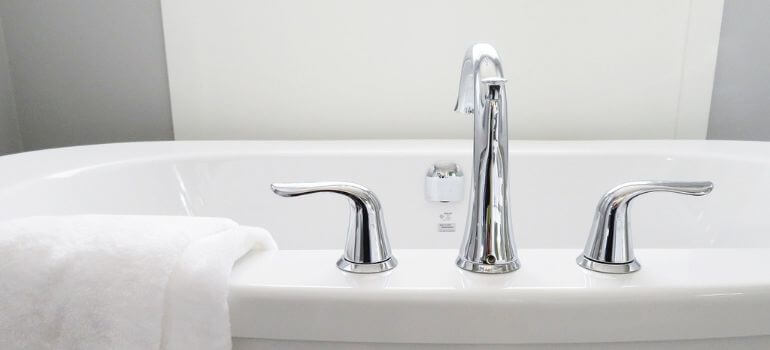
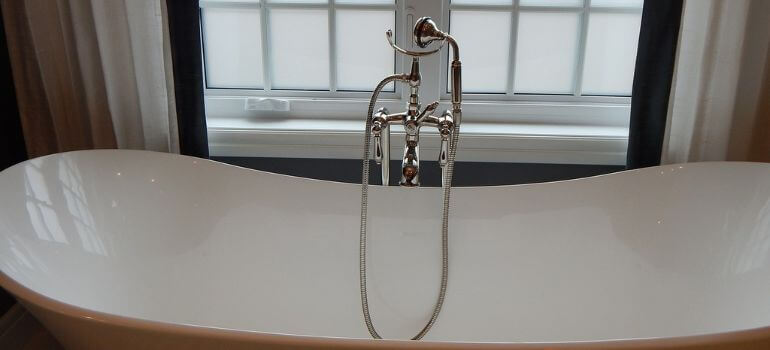
Have you ever faced the challenge of replacing a Roman tub faucet, only to find there’s no access panel? It might seem daunting, but with the right tools and a bit of know-how, it’s a task you can tackle yourself.
Tools and Materials Needed
When you’re preparing to replace a Roman tub faucet, especially without an access panel, it’s important to have the right tools and materials on hand. This ensures a smooth and efficient replacement process. Here’s a comprehensive list:
Basic Tools
- Adjustable Wrench: Essential for loosening and tightening nuts and bolts.
- Pliers: Useful for gripping and turning various components.
- Screwdrivers: Both flathead and Phillips-head screwdrivers in various sizes.
- Basin Wrench: Specifically designed for working in tight spaces, ideal for reaching nuts under the faucet.
- Pipe Wrench: Might be needed for larger connections.
- Allen Wrench Set: Often required for set screws on faucet handles.
- Plumber’s Tape (Teflon Tape): Used on threaded connections to ensure a watertight seal.
- Utility Knife: For cutting old sealant or gaskets, if necessary.
- Flashlight or Headlamp: Provides lighting in poorly lit work areas.
Materials for Installation
- Replacement Roman Tub Faucet: Ensure it’s compatible with your tub’s design and plumbing.
- New Supply Lines: If the existing ones are worn or not compatible with the new faucet.
- Gaskets or O-Rings: As required by the faucet model for sealing connections.
- Plumber’s Putty or Silicone Sealant: For creating a watertight seal around the faucet base, depending on the manufacturer’s recommendation.
Additional Handy Items
- Towels or Rags: For cleaning up water and protecting surfaces.
- Bucket: To catch any remaining water in the lines when disconnecting the old faucet.
- Gloves: To protect your hands during the process.
- Safety Glasses: To protect your eyes from debris or drips.
Preparatory Materials
- Instruction Manual for the New Faucet: Important for reference and to understand specific requirements.
- Pen and Paper: For noting down measurements or any specific steps during the removal of the old faucet.
Optional but Helpful
- Plumbing Grease: Useful for lubricating parts like O-rings and valve stems.
- Digital Camera or Smartphone: To take pictures of the old setup for reference.
- Multimeter: If dealing with a faucet that has electronic components or controls.
Having all these tools and materials prepared and easily accessible will help make the process of replacing your Roman tub faucet more efficient and less stressful. Remember to double-check the specific requirements of your faucet model as some may need special tools or materials not listed here.
Preparing for the Replacement
Safety First
- Turn Off the Water Supply: This is the most crucial step. Locate your home’s main water shut-off valve or the local shut-off valve for your bathroom and turn it off to prevent any water flow to the faucet.
- Electrical Safety: Ensure no electrical appliances or outlets are near your working area to avoid the risk of electric shock, especially in a wet environment.
Gathering Tools and Materials
- Essential Tools: Prepare an adjustable wrench, pliers, screwdriver, and possibly a basin wrench for tight spaces. A flashlight or a headlamp can provide extra visibility.
- Materials: Have your new faucet, Teflon tape (for sealing threads), and any specific connectors or extensions recommended for your faucet model.
- Additional Supplies: Keep towels, a bucket, and possibly a drop cloth or old blankets to protect the tub and surrounding area from scratches and water spills.
Workspace Preparation
- Clear the Area: Remove any toiletries, bath mats, or movable objects from around the tub to create a clean, unobstructed workspace.
- Protect Surfaces: Lay down towels or a protective cloth in and around the tub to safeguard against tool drops and scratches.
Understanding Your Faucet Configuration
- Research Your Faucet Type: Knowing whether your faucet is a compression, cartridge, ball, or disc type can help in understanding the replacement process.
- Identify Connection Points: Try to locate where the faucet connects to the water supply. This might involve checking under the tub or in adjacent areas if there’s no access panel.
Mental and Physical Preparedness
- Be Patient: Understand that this task may take longer than expected, especially without direct access.
- Physical Readiness: Be prepared for some awkward positioning or tight spaces when reaching for connections.
Document the Current Setup
- Take Photos: Before dismantling anything, take pictures of the existing setup. These can serve as a reference when installing the new faucet and ensuring everything is reconnected correctly.
Emergency Plan
- Know Your Limits: If at any point the task becomes too challenging or dangerous, be prepared to call a professional plumber. It’s better to seek help than to risk damage to your plumbing or injury.
Accessing the Faucet Without an Access Panel
Now, the tricky part – accessing the faucet. Sometimes, you might need to reach it from underneath or through a side panel. Be creative but cautious to avoid damaging your bathroom.
Removing the Old Faucet
With access sorted, it’s time to remove the old faucet. This will typically involve loosening nuts and disconnecting the water supply lines. If you encounter any stubborn parts, don’t force them – a bit of penetrating oil can work wonders.
Installing the New Faucet
Carefully align the new faucet with the mounting holes. Use Teflon tape on any threaded connections to ensure a watertight seal. Once everything is aligned, tighten the connections, but be careful not to overtighten.
Finalizing the Installation
Turn the water back on and check for leaks. A leak-free installation means you’re almost done. Wipe down your new faucet and the surrounding area for a polished look.
Maintenance Tips
Maintaining your Roman tub faucet is essential to ensure its longevity and functionality. Regular maintenance not only keeps the faucet looking good but also prevents common plumbing issues. Here are some effective maintenance tips:
Regular Cleaning
- Daily Wipe-Down: After use, quickly wipe the faucet with a soft, damp cloth. This prevents water spots and mineral deposits from building up.
- Deep Cleaning: Use a mild bathroom cleaner or a DIY solution of water and vinegar to clean the faucet thoroughly. Avoid harsh chemicals or abrasive materials that can damage the finish.
Preventing and Removing Mineral Build-Up
- Vinegar Soak: For faucets with significant mineral build-up, soak a cloth in vinegar and wrap it around the affected area for an hour before scrubbing gently. Vinegar is effective in dissolving calcium and lime deposits.
- Avoid Hard Water Stains: If you live in an area with hard water, consider installing a water softener to reduce mineral build-up.
Checking for Leaks
- Regular Inspections: Periodically check around the faucet and its handles for any signs of leaks or drips. Early detection can prevent more significant issues down the line.
- Handle Leaks Promptly: If you notice a leak, address it as soon as possible. Small leaks can lead to bigger problems like water damage or increased water bills.
Aerators and Filters
- Clean Aerators: The aerator at the tip of the faucet can get clogged with sediment. Unscrew it and soak in vinegar, then rinse and replace.
- Replace Filters: If your faucet has a built-in filter, follow the manufacturer’s guidelines for replacement intervals.
Operational Checks
- Smooth Operation: Ensure that the handles and the spout move smoothly. If they start to stiffen, consider applying a non-toxic lubricant.
- Check Seals and Washers: Over time, seals and washers can wear out. Replace them if you notice any decrease in performance or small leaks.
Seasonal Checks
- Winter Precautions: In colder climates, ensure that your bathroom is adequately heated to prevent freezing and bursting pipes.
- Summer Cleaning: In summer, when usage may be higher, conduct a thorough cleaning and check-up to ensure everything is functioning optimally.
Professional Inspection
- Annual Check-Up: Consider having a professional plumber inspect your plumbing system annually. They can spot issues you might miss and provide expert maintenance.
Advanced DIY Tips for Replacing a Roman Tub Faucet
Understanding Tub Faucet Mechanics
- Faucets are more than just spouts; they include valves, gaskets, and aerators. Familiarize yourself with these parts to better understand their functions and how they fit together.
Custom Solutions for Inaccessible Areas
- In cases where standard tools don’t work due to space constraints, consider using flexible hose clamps or extenders. These can help you reach tight spots without causing damage.
Dealing with Corrosion and Mineral Build-Up
- Over time, faucets may develop corrosion or mineral deposits. Treat these with a vinegar solution or a commercial cleaner before attempting to remove the faucet. This step can make the removal process smoother.
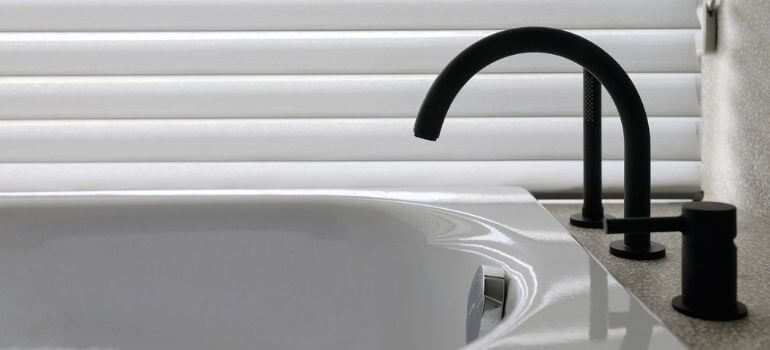
Aesthetic Considerations
- While functionality is key, don’t overlook aesthetics. Ensure your new faucet complements the style and color scheme of your bathroom. This attention to detail can significantly enhance the overall look of your space.
Emergency Preparedness
- Always be prepared for unexpected issues. Keep towels and a bucket handy to deal with potential water spills. Knowing where the main water shut-off valve is located in your home is also crucial.
Seeking Professional Advice
- If at any point you feel uncertain, don’t hesitate to consult with a professional. A quick consultation can provide valuable insights and prevent costly mistakes.
Eco-Friendly Options
- Consider installing a water-efficient faucet to reduce water usage. This not only helps the environment but can also lower your water bills.
Final Inspection
- After installation, conduct a thorough inspection. Check not just for leaks but also for proper water flow and temperature control. Ensuring everything works as expected is key to a successful replacement.
Wrapping Up the Project
Document Your Process
- Keep a record of the steps you took, including the type and model of your new faucet. This documentation can be invaluable for future maintenance or if you decide to upgrade again.
Disposal of Old Faucet
- Properly dispose of the old faucet. Check if it can be recycled or if there are local regulations for disposal of plumbing fixtures.
Share Your Experience
- Consider sharing your experience online or with friends. Your insights could be helpful to others facing similar challenges.
Reflect on Your DIY Journey
- Take a moment to appreciate your effort and the skills you’ve gained. DIY projects like these not only improve your home but also build your confidence and problem-solving abilities.
By following these advanced tips and techniques, you can successfully navigate the complexities of replacing a Roman tub faucet without an access panel. Remember, every DIY project is a learning opportunity and a chance to enhance your living space.
Conclusion
Replacing a Roman tub faucet without an access panel might seem like a challenge, but with patience and the right approach, it’s a satisfying DIY project.
FAQs
If the connections are out of reach, consider using a basin wrench or seeking assistance from someone with plumbing experience. Sometimes, creating a small access point in a discreet location can provide the necessary reach without major alterations.
It’s highly recommended to always turn off the water supply before beginning any plumbing work. Failing to do so can lead to water damage and a much more complicated project.
When selecting a replacement, consider the faucet’s style, finish, and the distance between the handles (if applicable). It’s crucial to choose one that fits your tub’s existing setup to avoid extensive modifications.
If you notice a leak, turn off the water supply and check the connections. Leaks often occur due to loose fittings or improper seals. Tighten connections and ensure all seals are properly placed.
Yes, the material of your tub can dictate certain considerations. For instance, acrylic and fiberglass tubs require more careful handling to avoid cracks, whereas cast iron tubs can withstand more pressure. Always consider the material when accessing and working on your tub.


