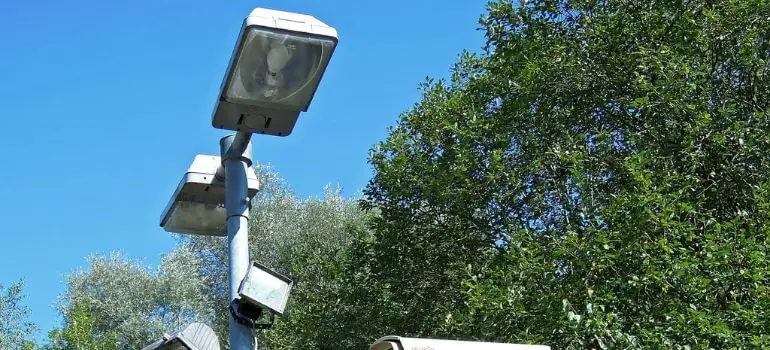
Security lights play a crucial role in safeguarding our homes and properties, providing illumination and deterring potential intruders. However, installing security lights involves more than just mounting them on walls or poles; proper wiring is essential to ensure they function effectively and safely. In this guide, we’ll discuss the step-by-step process of running wire for security lights to help you illuminate your surroundings with confidence.
Understanding Security Light Installation
Before delving into the installation process, it’s essential to understand the different types of security lights available. From motion-activated lights to dusk-to-dawn fixtures, each serves a specific purpose in enhancing security. Additionally, proper planning is crucial to determine the number of lights needed and their optimal placement for maximum coverage.
Gathering Necessary Tools and Materials
To begin the installation, gather the necessary tools and materials. You’ll typically need wire cutters, a wire stripper, electrical tape, junction boxes, outdoor-rated wire, and mounting hardware. Ensuring you have everything on hand before starting will streamline the process and minimize delays.
Choosing the Right Location
Selecting the ideal location for your security lights is paramount. Consider areas vulnerable to intruders, such as entry points or dark corners. Additionally, take into account factors like accessibility to power sources and the angle of illumination required for effective coverage.
Preparing for Installation
Prepare the area for installation by clearing any obstructions and ensuring a clean workspace. If necessary, mark the locations for mounting the lights and running the wire to guide the installation process.
Running Wire for Security Lights
When running wire for security lights, follow a systematic approach to ensure a tidy and secure installation. Begin by determining the most direct route from the power source to each light, minimizing unnecessary bends or loops in the wire. Use cable clips or conduit to secure the wire along the intended path, protecting it from damage and exposure to the elements.
Connecting Wires to Security Lights
Once the wire is in place, proceed to connect it to the security lights according to the manufacturer’s instructions. Use waterproof connectors to ensure a reliable and weatherproof connection, reducing the risk of shorts or malfunctions.
Testing the System
After completing the wiring, test the security light system to verify that it operates as intended. Check for proper illumination and responsiveness to motion or ambient light changes. Address any issues promptly to ensure the system is fully functional.
Common Mistakes to Avoid
- Inadequate Wire Protection: Failing to properly protect the wire can lead to damage from weather exposure or accidental impacts. Use conduit or cable clips to secure the wire and shield it from potential hazards.
- Improper Grounding: Neglecting to ground the wiring can result in electrical malfunctions or safety hazards. Ensure that the wire is correctly grounded according to electrical codes and standards.
- Overloading Circuits: Attempting to power too many lights or devices from a single circuit can overload the system and cause circuit breakers to trip. Distribute the load evenly across multiple circuits to prevent overload issues.
- Incorrect Wire Sizing: Using wire that is too thin for the intended load can lead to voltage drops and reduced performance. Refer to wire sizing charts and guidelines to select the appropriate gauge for your security light installation.
- Poor Wire Routing: Running wire in haphazard or inefficient paths can make future maintenance or troubleshooting difficult. Plan the wire routing carefully to minimize bends, loops, and obstructions, ensuring easy access for repairs or modifications.
- Neglecting Waterproofing: Outdoor wiring is exposed to moisture and weather elements, making waterproofing essential to prevent corrosion and electrical shorts. Use waterproof connectors and junction boxes to protect the wire connections from water infiltration.
- Skipping Testing Procedures: Failing to test the system after installation can leave potential issues undetected, leading to performance problems or safety hazards. Test the security light system thoroughly to verify proper operation and address any issues promptly.
Maintenance Tips
Regular maintenance is key to preserving the longevity of your security light system. Inspect the wiring periodically for signs of wear or damage, and promptly address any issues to prevent malfunctions or failures.
Benefits of Properly Installed Security Lights
A well-installed security light system provides peace of mind and enhances the safety and security of your property. With proper illumination, you can deter intruders and ensure visibility in dark areas, reducing the risk of accidents or incidents.
Safety Considerations
Throughout the installation process, prioritize safety by following all relevant safety guidelines and regulations. Ensure the power is turned off before working on electrical components, and use appropriate personal protective equipment to minimize the risk of injury.
Cost Considerations
While the initial cost of installing security lights may vary depending on factors such as the number of lights and complexity of the installation, the long-term benefits outweigh the investment. Consider it a worthwhile investment in the safety and security of your home and loved ones.
Environmental Impact
Minimize the environmental impact of your security light installation by opting for energy-efficient LED lights and proper disposal of old fixtures. Additionally, consider using solar-powered lights to reduce energy consumption and reliance on traditional power sources.
Conclusion
Properly installing security lights involves more than just mounting fixtures; it requires careful planning and meticulous attention to detail. By following the steps outlined in this guide, you can ensure a safe, effective, and long-lasting security light system that provides peace of mind and enhances the security of your home.
FAQs (Frequently Asked Questions)
Installing security lights can typically be completed within a few hours, depending on the complexity of the installation and the number of lights being installed.
While basic installations can be DIY projects, complex installations or those involving electrical wiring may require the assistance of a qualified electrician.
With the proper tools, materials, and guidance, it’s possible for homeowners to install security lights themselves, but caution and adherence to safety protocols are essential.
If your security lights malfunction, first check the power source and connections. If the issue persists, consult the manufacturer’s instructions or seek professional assistance.
Solar-powered security lights can be an effective and environmentally friendly option, providing illumination without relying on traditional power sources. However, their effectiveness may vary depending on factors such as sunlight exposure and battery capacity.


