Carpet installation can be a challenging project, but with the right tools and expert tips, you can easily tackle it yourself. This guide will provide you with step-by-step instructions on how to measure your room, gather the necessary materials, prepare the room, install tack strips and carpet underlay, cut and lay the carpet, and stretch the carpet for a secure installation.
Key Takeaways:
- Follow the step-by-step instructions to achieve a flawless carpet installation.
- Accurately measure your room and calculate the square footage to determine the amount of carpet and materials needed.
- Prepare the room by removing old flooring and checking the subfloor for any issues.
- Install tack strips along the walls, making sure they are angled towards the wall for proper grip.
- Lay the carpet underlay perpendicular to the direction of installation and secure it to the floor using a staple gun or adhesive.
Measure Your Room and Gather Your Materials
Before you begin your carpet installation project, it’s crucial to accurately measure your room to ensure you have the right amount of carpet and materials. Follow these steps to measure your room:
- Measure the length and width of your room using a tape measure. Start from one corner and measure to the opposite corner, and then repeat for the other side. Write down both measurements in feet or inches.
- Add extra inches to the length and width measurements to account for trimming. This extra allowance will ensure that you have enough carpet to cover the entire floor space without any gaps.
- Calculate the square footage of your room by multiplying the length by the width. For example, if your room measures 12 feet by 10 feet, the square footage will be 120 square feet.
- Add 10-20% to your square footage to account for any mistakes during installation or pattern matching. This additional percentage will give you some leeway and prevent you from running short of carpet.
Once you have the measurements, it’s time to gather the materials you’ll need for the installation. Here are some essential tools and supplies:
- Tack strips: These strips are used to hold the carpet in place along the edges of the room.
- Staple gun: A staple gun is used to secure the carpet and underlay to the floor.
- Utility knife: This tool is essential for cutting the carpet to the right size and shape.
- Knee pads: Protect your knees from discomfort and injury during the installation process.
- Knee kicker: A knee kicker is used to stretch the carpet and ensure a tight fit.
- Carpet underlay: This padding provides extra comfort and support for your carpet.
- Seaming tape and seaming iron: These tools are necessary for joining carpet pieces together.
- Carpet roller: A carpet roller helps to press down on the seams and ensure a smooth finish.
By accurately measuring your room and gathering the necessary materials, you’ll be well-prepared to start your carpet installation project with confidence.

Prep the Room
Before laying the carpet, it’s crucial to properly prepare the room to ensure a successful installation. Whether you’re replacing existing flooring or working with a bare subfloor, taking the time to complete these essential steps will ensure a smooth and long-lasting carpet installation.
If you are removing old flooring, such as carpet, laminate, or vinyl, start by thoroughly removing it from the room. Use a utility knife or other appropriate tools to carefully cut and lift away the old flooring. Dispose of the removed materials responsibly, following local regulations.
Once the old flooring is removed, it’s essential to check the condition of the subfloor. Inspect it for any signs of damage, such as sunken spots, rot, or loose floorboards. Address any issues or concerns before proceeding with the carpet installation.
Pro Tip: If you notice any subfloor damage, it’s important to repair or replace the affected areas before proceeding. Failing to address subfloor issues can lead to future carpet damage or an uneven, unstable installation.
If the subfloor is in good condition, you can proceed with cleaning it thoroughly. Remove any residue, dust, or debris from the subfloor using a broom, vacuum, or appropriate cleaning methods. A clean subfloor provides a smooth surface for the carpet underlay and helps ensure a secure installation.
Pro Tip: Consider removing baseboards before installing the carpet for a seamless, professional-looking finish. This step allows the carpet to be tucked neatly under the baseboards, creating a clean and cohesive appearance.
To summarize, prepping the room involves:
- Removing old flooring
- Checking the condition of the subfloor
- Repairing or replacing damaged subfloor areas
- Cleaning the subfloor from any residue or debris
- [Optional] Removing baseboards for a flush carpet installation
By taking the time to properly prep the room, you’ll create a solid foundation for your carpet installation, ensuring the longevity and beauty of your new flooring.

“Preparing the room is a crucial step in a successful carpet installation. By removing old flooring, checking the subfloor, and cleaning the room thoroughly, you’ll create an optimal environment for your new carpet.” – Jane Armstrong, Home Renovation Expert
Install Tack Strip
Tack strips are an essential component of any carpet installation project. They play a crucial role in holding the carpet in place, ensuring a secure and professional finish. Installing tack strips correctly is vital to achieving a long-lasting and visually appealing result. Here, we will guide you through the process of tack strip installation, discussing the different types of tack strips available and the best practices for ensuring a successful installation.
When installing tack strips, it is important to follow these steps:
- Step 1: Begin by preparing the area. Clear the room of any furniture or obstacles that may hinder the installation process.
- Step 2: Measure the length of each wall and cut the tack strips accordingly, ensuring they fit snugly.
- Step 3: Position the tack strips along the walls, leaving a small gap between the strip and the wall. This gap allows for any necessary adjustments and ensures that the carpet does not come into direct contact with the wall.
- Step 4: Angle the tacks on the strip towards the wall. This angled position will provide a firm grip on the carpet and prevent it from shifting or coming loose.
- Step 5: Secure the tack strips to the floor using the appropriate method for your specific subfloor. For wooden subfloors, use nails to attach the strips. For concrete subfloors, consider using construction adhesive and masonry nails.
When it comes to tack strip options, there are different types available to suit various installation scenarios. These include:
“Tackless tack strips: This type of tack strip is the most commonly used. It features prongs or tacks that grip the carpet, holding it securely in place. Tackless tack strips are suitable for both residential and commercial installations.”
“Self-stick tack strips: These tack strips come with a pre-applied adhesive, eliminating the need for nails or other securing methods. Self-stick tack strips are convenient and time-saving options, particularly for DIY installations.”
“Bent-leg tack strips: Bent-leg tack strips are designed for curved or irregularly shaped areas. These special tack strips are flexible and can be maneuvered to fit the contours of the space, ensuring a secure carpet installation.”
Install the Carpet Underlay
A padded underlay is essential for a comfortable and secure carpet installation. It provides cushioning, prevents the carpet from rippling or bunching, and enhances its lifespan. To ensure a successful carpet underlay installation, follow these steps:
Lay the Underlay Perpendicular to the Carpet Installation
Start by laying the underlay perpendicular to the direction in which the carpet will be installed. This helps to provide uniform support and stability across the entire carpeted area. Take care to align the underlay edges with the walls, ensuring a snug fit.
Secure the Underlay to the Floor
Depending on the type of subfloor you have, there are two methods to secure the underlay: using a staple gun or adhesive. For wooden subfloors, a staple gun is typically used, while adhesive is suitable for concrete subfloors. Ensure the underlay is smoothly and securely fastened, eliminating any wrinkles or loose areas.
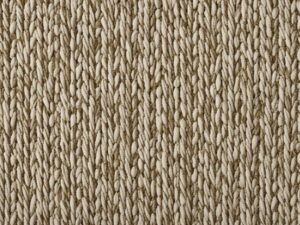
Choose the Right Type of Underlay
When selecting a carpet underlay, consider the type of flooring you have. Different types of underlay offer specific benefits:
Synthetic fiber underlay: This type of underlay is ideal for concrete floors. It helps to prevent condensation from forming, providing a moisture-resistant barrier.
By selecting the appropriate underlay for your flooring type, you can maximize the longevity and performance of your carpet.
Ensure Proper Positioning
When installing the underlay, make sure it is positioned to butt up against the tack strips along the perimeter of the room. This allows the carpet to be securely stretched and attached to the strips while preventing the underlay from overlapping them, which could cause unevenness.
To visualize the carpet underlay installation process, refer to the following diagram:
| Step | Instructions |
|---|---|
| 1 | Lay the underlay perpendicular to the carpet installation direction. |
| 2 | Secure the underlay using a staple gun or adhesive. |
| 3 | Position the underlay against the tack strips, ensuring a flush fit. |
Now that you’ve installed the carpet underlay, you’re ready to proceed with the next step: cutting and laying the carpet. This will be covered in detail in the next section.

Cut and Lay the Carpet
Before laying the carpet, it’s essential to cut each strip to the right size. Leave an additional 6 inches for trimming to ensure a perfect fit. Start by positioning the first strip flush against the wall and pull it across the room. To guide your cutting, use a chalk line to mark where the carpet meets the wall, and carefully trim away the excess with a utility knife.
As you progress, lay the next strip, overlapping the previous one by about 2 inches. This overlapping technique will help hide any seams and create a seamless appearance. Once the strips are aligned, cut through both layers of carpet simultaneously to facilitate a neat and precise fit.
To ensure a secure and durable carpet installation, it’s crucial to seal the seams. Apply seaming tape along the edge of the first strip, then use a seaming iron to activate the adhesive and bond the two pieces of carpet together. Press firmly along the seams to ensure a tight seal.
When laying the carpet, make sure to align the pile direction of each strip. This step is essential to maintain a uniform appearance and achieve a professional finish. Take your time to ensure that the fibers flow smoothly and don’t create any visible transitions.
Sample Carpet Laying Table
| Step | Description |
|---|---|
| 1 | Measure and cut the first strip of carpet, leaving an extra 6 inches for trimming. |
| 2 | Position the first strip flush against the wall and pull it across the room. |
| 3 | Use a chalk line to mark where the carpet meets the wall and cut away the excess. |
| 4 | Lay the next strip, overlapping the previous one by about 2 inches. |
| 5 | Cut through both layers of carpet to ensure a precise fit. |
| 6 | Seal the seams using seaming tape and a seaming iron. |
| 7 | Ensure the pile direction of each strip aligns for a uniform appearance. |
Stretch the Carpet
Once you’ve laid the carpet in place, it’s important to properly stretch it for a secure and professional installation. By stretching the carpet, you’ll eliminate any wrinkles or sagging, ensuring a smooth and long-lasting finish. Follow these steps to stretch your carpet effectively:
- Start from the center: Begin stretching the carpet from the center of each wall and move towards the opposite wall. This will help distribute the tension evenly and avoid unequal stretching.
- Use a knee kicker: A knee kicker is a handy tool that allows you to kick and stretch the carpet into place. Position the knee kicker about six inches away from the wall and use your knee to forcefully strike the padded end. Repeat this process along the entire wall until the carpet is pulled taut.
- Utilize a power stretcher: If you’re working with a larger area, consider using a power stretcher for added leverage and control. This tool allows you to apply more force, ensuring a tighter and more secure stretch.
- Trim the excess carpet: After stretching the carpet, you’ll likely have excess material along the edges. Trim this excess using a sharp utility knife, making sure to leave about an inch for carpet trimming and tucking.
- Tuck the carpet under baseboards: To create a clean and finished look, use a stair tool to tuck the trimmed carpet under the baseboards. This will hide the edges and give your installation a polished appearance.
- Create openings for floor vents: If your room has floor vents, carefully cut openings in the carpet to allow for proper airflow. Use a utility knife to make precise cuts around the vent openings.
- Ensure a secure installation: Once the stretching, trimming, and tucking are complete, it’s important to secure the carpet in place. Use a carpet roller to press down on the seams, ensuring they are firmly adhered to the underlying carpet padding and creating a seamless transition.
By following these steps, you’ll achieve a professionally stretched carpet that not only looks great but also withstands everyday wear and tear. Now that your carpet is securely in place, it’s time to enjoy the comfort and beauty it adds to your space.
Conclusion
Embarking on a DIY carpet installation project can be a rewarding experience that saves you money and brings a personal touch to your home. By following the step-by-step guide provided in this article and utilizing the right tools and techniques, you can achieve a flawless and secure carpet installation.
Accurate measurements, proper preparation of the room, and the correct installation of tack strips and underlay are crucial for a successful carpet installation. Cutting and laying the carpet with precision, ensuring proper seaming, and stretching it for a snug fit are all important steps in creating a beautiful and comfortable carpeted floor.
With these detailed instructions and your commitment to attention to detail, you’ll transform your living space into a cozy haven. Enjoy the warmth and comfort that a well-installed carpet provides and take pride in your DIY accomplishment.

