Introduction
Are you planning to renovate your home or build a new one with 10-foot walls? Hanging drywall can be a daunting task, especially when dealing with taller walls. In this comprehensive guide, we will walk you through the process of hanging drywall on 10-foot walls, providing you with all the information and tips you need to ensure a successful and professional-looking outcome.
Materials and Tools You’ll Need
Before we dive into the process, let’s start by gathering the essential materials and tools required for this project:
Materials:
- 4×8-foot drywall sheets
- Drywall screws
- Drywall joint compound
- Drywall joint tape
- Corner beads
- Drywall primer
- Paint (optional)
Tools:
- Tape measure
- Utility knife
- Drywall saw
- Screwdriver or drywall screw gun
- T-square
- Joint compound applicator or putty knife
- Sandpaper
- Safety gear (goggles, dust mask, and gloves)
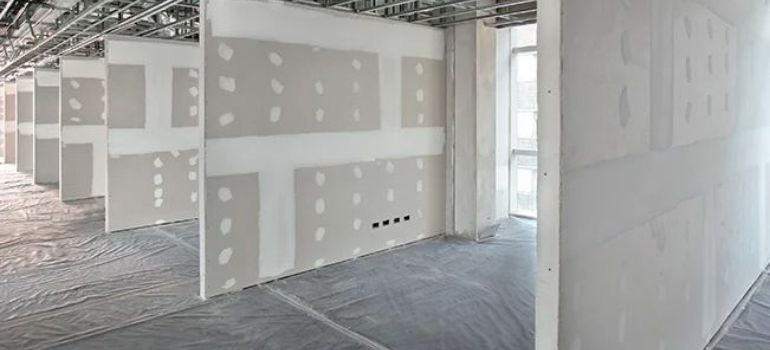
Step 1: Measure and Cut Drywall Sheets
Start by measuring the height of your 10-foot walls and cutting the drywall sheets accordingly. Use a tape measure to get precise measurements and a T-square to mark straight lines. Use a utility knife or drywall saw to cut the sheets to the desired size.
Step 2: Install the Bottom Row
Begin at the bottom of the wall and position the first drywall sheet against the studs. Make sure the tapered edges are facing each other, and leave a small gap at the bottom for expansion. Secure the drywall sheet to the studs using drywall screws.
Step 3: Continue with the Second Row
Place the second drywall sheet above the first one, ensuring the tapered edges are joined tightly. Stagger the seams between sheets to improve stability and reduce the chances of cracks. Secure the second sheet to the studs with screws.
Step 4: Cut Openings for Outlets and Switches
If you have electrical outlets or switches on the wall, measure their positions accurately and use a utility knife or drywall saw to cut openings in the drywall sheets. Be precise to ensure a snug fit for the outlets or switches.
Step 5: Apply Joint Tape and Compound
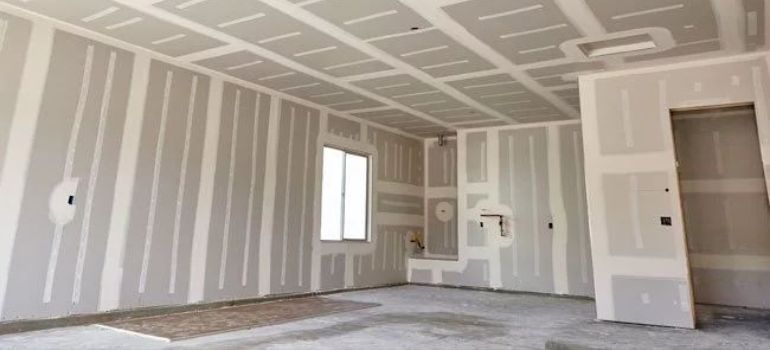
Now, it’s time to cover the seams between drywall sheets. Apply drywall joint tape over the seams and use a joint compound applicator or putty knife to spread a thin layer of joint compound over the tape. Smooth it out, feathering the edges to create a seamless finish.
Step 6: Install Corner Beads
For the corners of the walls, install corner beads to protect and reinforce the edges. Secure them with drywall screws, and apply joint compound over them as well. Feather the compound for a smooth appearance.
Step 7: Sand and Repeat
Once the joint compound is dry, sand it down to achieve a smooth surface. You may need to repeat the joint compound application and sanding process a few times to achieve a flawless finish.
Step 8: Prime and Paint (Optional)
If you plan to paint the drywall, apply a coat of drywall primer first. Once it dries, you can proceed with painting the walls in your desired color.
Additional Tips for a Successful Drywall Installation
While you now have a comprehensive guide on how to hang drywall on 10-foot walls, here are some additional tips to ensure your project goes smoothly:
Check for Studs and Plumbing
Before attaching drywall, it’s crucial to locate the wall studs and any plumbing or electrical elements within the wall. Marking their positions will help you avoid drilling into them while securing the drywall.
Use Proper Screw Spacing
When attaching drywall to studs, ensure that you space the screws evenly, approximately every 12 inches along the edges and every 16 inches in the field. This spacing ensures a secure and stable installation.
Invest in a Drywall Lift
For ceiling installations or if you’re working alone, consider investing in a drywall lift. These devices can hold drywall sheets in place, making it easier to secure them to the ceiling without assistance.
Consider Drywall Adhesive
Applying a thin layer of drywall adhesive to the studs before attaching the drywall sheets can provide extra adhesion and reduce the risk of future cracks.
Practice Safe Handling
Drywall can be heavy and unwieldy, especially larger sheets. Always practice safe lifting techniques, and if the sheets are too heavy, seek assistance to avoid injury.
Protect Floors and Furniture
Cover floors and furniture in the room with drop cloths or plastic sheets to prevent dust and debris from damaging or soiling your belongings during the installation and sanding process.
Apply Multiple Thin Coats of Joint Compound
When applying joint compound to seams and corners, it’s better to use multiple thin coats rather than one thick layer. Thin coats are easier to work with and result in a smoother finish.
Test Paint Colors
If you’re planning to paint the drywall, consider testing paint colors on a small section of the wall first to ensure you’re satisfied with the color before painting the entire surface.
Maintain Proper Ventilation
During the sanding and painting stages, ensure the room is well-ventilated to disperse dust and fumes. Open windows and use fans if necessary.
Clean Up Thoroughly
After completing the project, clean up the workspace diligently. Dispose of any drywall scraps and debris responsibly, and return tools to their proper places.
Conclusion
Hanging drywall on 10-foot walls may seem like a challenging task, but with the right tools and techniques, you can achieve professional results. Remember to measure carefully, secure the sheets properly, and apply joint compound meticulously for a seamless finish. Whether you’re renovating your home or working on a new construction project, this guide should help you get the job done.
Frequently Asked Questions (FAQs)
Applying primer before painting is not mandatory but highly recommended. It helps the paint adhere better and provides a smoother finish.
While it’s possible to hang drywall on your own, having someone to assist you can make the process smoother and more efficient, especially with taller walls.
If you come across uneven or damaged drywall seams, you can sand them down and reapply joint compound to achieve a smooth surface.
The drying time for joint compound depends on various factors like humidity and thickness. On average, it can take anywhere from 24 to 48 hours.
Yes, a drywall screw gun or power screwdriver is recommended for faster and more efficient installation of drywall sheets.

