Soldering is a common technique used in plumbing and various other industries to join metal components together. Whether you’re a DIY enthusiast or a professional plumber, understanding the right time to turn water back on after soldering is crucial. In this article, we will explore the factors that influence this waiting period and provide you with valuable insights to ensure the safety and integrity of your plumbing projects.
The Importance of Proper Soldering
Before diving into the specifics of when you can turn water on after soldering, it’s essential to grasp the significance of proper soldering. Soldering is a method of connecting pipes or fittings by melting a filler metal, often called solder, to create a secure and watertight joint. This process is vital for preventing leaks and ensuring the longevity of your plumbing system.
Factors Affecting the Waiting Time
Several factors come into play when determining how long you should wait before turning water on after soldering. These factors include:
1. Type of Solder Used
The type of solder you choose can significantly impact the waiting time. Lead-based solders, which are less common due to health concerns, typically require more cooling time compared to lead-free alternatives.
2. Pipe Material
Different pipe materials conduct heat differently. Copper pipes, for instance, disperse heat more effectively than steel pipes. This affects the cooldown time after soldering.
3. Pipe Size
The size of the pipes you are working with can also influence the waiting period. Larger pipes tend to retain heat longer and will require a more extended cooling time.
4. Ambient Temperature
The temperature of your workspace matters. Soldering in a hot environment may require less waiting time compared to soldering in colder conditions.
5. Flux and Cleanliness
Using flux and ensuring clean pipe surfaces are essential for successful soldering. Properly cleaned pipes with the right flux will allow for quicker cooling and a stronger joint.
6. Soldering Technique
Soldering is a precise process that requires attention to detail to achieve strong and reliable joints. The quality of your soldering technique directly impacts the integrity of the connection. Here are the key steps and tips for mastering the soldering technique:
1. Gather Your Tools and Materials
Before you begin soldering, ensure you have all the necessary tools and materials ready:
- Soldering Iron or Torch: Select the appropriate soldering tool for your project. A propane torch or soldering iron with adjustable temperature settings is commonly used.
- Solder: Choose the right type of solder for your application. Lead-free solder is the preferred choice due to health and environmental considerations.
- Flux: Flux is essential for cleaning and preparing the surfaces to be soldered. It promotes solder flow and ensures a strong bond.
- Safety Gear: Wear safety glasses and heat-resistant gloves to protect yourself from potential hazards.
2. Clean and Prepare the Surfaces
Proper preparation is crucial for successful soldering. Follow these steps:
- Use a wire brush or emery cloth to clean the pipe and fitting surfaces thoroughly. Remove any dirt, oxidation, or debris.
- Apply flux to both the pipe and fitting. The flux will help prevent oxidation during the soldering process and ensure a clean surface for solder adhesion.
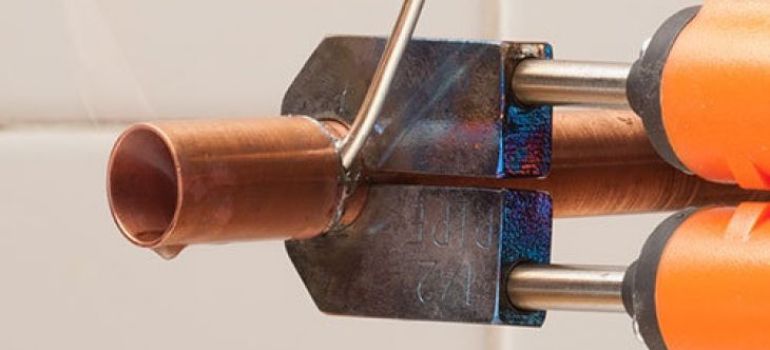
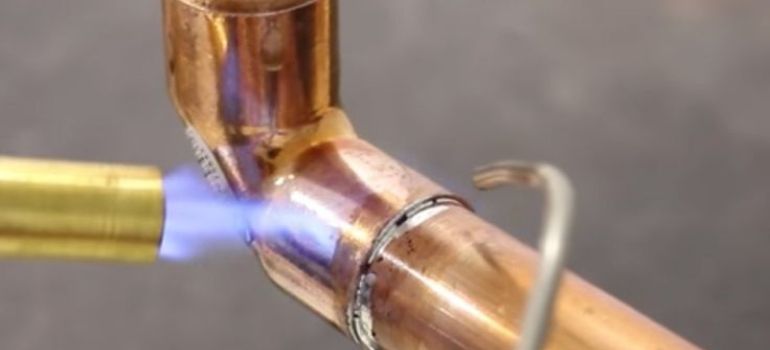
3. Heat the Joint
Properly heating the joint is critical to create a strong bond. Here’s how to do it:
- Position the soldering iron or torch so that the flame or tip is evenly distributed around the joint.
- Apply heat evenly to both the pipe and fitting, ensuring that they reach the correct temperature for solder to flow.
- Heat the joint for a sufficient amount of time to allow the surfaces to become hot enough to melt the solder.
4. Apply the Solder
Once the joint is adequately heated, it’s time to apply the solder:
- Hold the solder wire against the joint and allow it to melt and flow into the joint. The solder will be drawn into the joint through capillary action.
- Apply just enough solder to create a solid, watertight seal. Avoid excessive solder, as it can lead to drips and a messy joint.
- Make sure the solder flows evenly around the entire joint, creating a uniform connection.
5. Allow for Proper Cooling
After applying the solder, remove the heat source and allow the joint to cool naturally. Here are some additional tips:
- Avoid moving or disturbing the joint during the cooling process, as this can weaken the bond.
- The joint should cool to room temperature before you consider it fully solidified.
- Be patient during this phase, as rushing the cooling process can result in a flawed joint.
6. Inspect the Joint
Before proceeding, visually inspect the joint to ensure it meets the necessary standards:
- A properly soldered joint will have a shiny appearance, indicating a good bond.
- If the joint appears dull, uneven, or has visible gaps, it may need to be resoldered. Reheat the joint and apply additional solder if necessary.
General Guidelines
While the waiting time can vary based on the factors mentioned above, here are some general guidelines to follow:
- For most soldering jobs, it’s advisable to wait at least 30 minutes before turning the water back on.
- If you’ve used lead-free solder, you may be able to reduce the waiting time to 15-20 minutes.
- In colder conditions or for larger pipe sizes, consider waiting up to 45 minutes to ensure the joint has fully cooled and solidified.
Safety Precautions
Safety should always be a priority when working with soldering equipment. Here are some safety precautions to keep in mind:
- Wear appropriate safety gear, including safety glasses and heat-resistant gloves.
- Ensure proper ventilation to avoid inhaling soldering fumes.
- Keep a fire extinguisher nearby in case of any unexpected accidents.
- Double-check your soldering work to confirm the joint is secure before turning the water on.
Additional Tips for Successful Soldering
To ensure a successful soldering job and minimize the waiting time, consider these additional tips:
- Proper Preparation: Clean the surfaces of the pipes thoroughly before soldering. Use a wire brush or emery cloth to remove any oxidation or debris.
- Flux Application: Apply flux generously to both the pipe and fitting. Flux helps facilitate the soldering process and ensures a strong bond.
- Even Heat Distribution: Use a propane torch or soldering iron with an adjustable flame to ensure even heat distribution. This prevents overheating and potential damage to the pipe.
- Soldering Technique: Heat the joint evenly and apply the solder to the opposite side of the heat source. Allow the solder to flow into the joint by capillary action, ensuring a watertight seal.
- Inspect Your Work: After soldering, visually inspect the joint. It should have a shiny appearance, indicating a proper bond. If it looks dull or uneven, reheat and add more solder if needed.
- Cooling Aid: You can use a wet cloth or a heat-resistant spray to speed up the cooling process slightly. Be cautious not to cool it too rapidly, as this can cause stress on the joint.
Conclusion
In conclusion, the waiting time after soldering before turning water on can vary based on several factors. It’s crucial to consider the type of solder, pipe material, size, ambient temperature, cleanliness, and your soldering technique. Following these guidelines and safety precautions will help ensure the success and safety of your plumbing projects.
FAQs
No, it is not safe to turn water on immediately after soldering. You should wait for the joint to cool and solidify, typically for at least 30 minutes, before turning the water back on.
Yes, using lead-free solder may allow you to reduce the waiting time to 15-20 minutes in most cases.
Turning water on too soon can lead to leaks and a weak joint. It’s essential to allow sufficient time for the solder joint to cool and solidify to prevent these issues.
While you should never rush the cooling process, you can use a wet cloth or cold water to cool the soldered area slightly faster. However, exercise caution to avoid disrupting the joint.
Soldering in cold conditions may require a longer waiting period for the joint to cool. It’s essential to factor in ambient temperature when determining the waiting time.

