Azaleas are beautiful flowering plants that can add a burst of color to any garden or landscape. However, there may come a time when you need to remove them for various reasons, such as overgrowth, disease, or a change in your garden’s design. In this article, we will provide you with a step-by-step guide on how to effectively and permanently kill azaleas. Please note that this should be done responsibly and only when necessary.
Understanding Azaleas
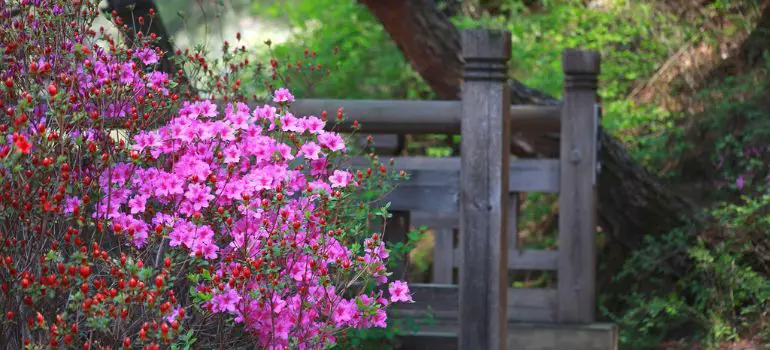
Before we dive into the methods of eliminating azaleas, it’s crucial to understand these plants better. Azaleas are part of the rhododendron family and are known for their vibrant blooms. They thrive in acidic soil and are commonly found in gardens across the world.
Why Remove Azaleas?
- Overgrowth
- Diseased Plants
- Garden Redesign
- Pest Infestation
Preparing for Azalea Removal
Before you start the removal process, you’ll need to gather some essential tools and materials. Here’s a list of what you’ll need:
Tools and Materials
- Gardening Gloves: Sturdy gloves to protect your hands from thorns, debris, and potential irritants.
- Pruning Shears: Sharp pruning shears for trimming the azalea bushes, removing branches, leaves, and flowers.
- Shovel: A durable shovel for digging around the base of the azalea bushes and extracting the root system.
- Plastic Bags: Strong plastic bags to collect and dispose of the trimmed branches, leaves, and any plant material.
- Herbicide (optional): If you opt for the herbicide method, you will need a suitable herbicide designed for woody plants. Make sure to follow the manufacturer’s instructions for safe and effective use.
Step-by-Step Azalea Removal
Now that you’re prepared, let’s proceed with the removal process:
Assess the Situation
Begin by examining the azalea bushes you intend to remove. Determine the size and extent of the plants to plan your removal strategy accordingly.
Pruning
Trim the azaleas back to their stumps, removing any flowers, leaves, and branches. Dispose of the trimmings in plastic bags.
Digging
Using a shovel, start digging around the base of the azalea bushes. Dig deep and wide to access the root system.
Remove Roots
Carefully extract the azalea roots from the ground. This may require some effort, as azaleas can have extensive root systems.
Disposal
Dispose of the removed azalea plants and roots properly. You can compost them if they are disease-free, or take them to a local green waste disposal site.
Alternative Method: Using Herbicide
If you prefer a more effective and long-lasting method for eliminating azaleas, you can consider using herbicide. Herbicides are chemical substances specifically designed to control or kill unwanted plants, including woody shrubs like azaleas. Here’s a step-by-step guide on how to use herbicide to remove azaleas:
Protective Gear
Safety is paramount when working with herbicides. Before you begin, make sure you have the following protective gear:
- Gloves: Wear chemical-resistant gloves to protect your hands from contact with the herbicide.
- Eyewear: Safety goggles or protective glasses will shield your eyes from any accidental splashes.
- Long-sleeved Clothing: Wear long-sleeved clothing to minimize skin exposure.
- Face Mask: Consider wearing a face mask or respirator to avoid inhaling any herbicide fumes.
Herbicide Selection
Choose a herbicide that is specifically formulated for woody plants or brush control. Look for products that contain active ingredients like glyphosate or triclopyr, which are effective against azaleas.
Dilution
Follow the manufacturer’s instructions on the herbicide label to dilute it to the appropriate concentration. Herbicides come in various strengths, so it’s essential to mix them correctly for optimal results.
Application
Apply the herbicide to the freshly cut stumps of the azalea bushes. The best time to do this is immediately after pruning the azaleas. Use a paintbrush or sprayer to ensure even coverage of the herbicide on the exposed surfaces of the stumps.
Monitoring
After applying the herbicide, closely monitor the azaleas’ progress over several weeks. You should begin to see signs of wilting and yellowing in the leaves. This indicates that the herbicide is taking effect and the azaleas are dying.
Removal
Once the azaleas have completely withered and died, it’s time to remove them from your garden. Follow the same disposal methods mentioned earlier to ensure proper disposal of the dead plants and roots.
Using herbicide can be an efficient way to permanently eliminate azaleas, as it targets the root system and prevents regrowth. However, it’s essential to exercise caution when handling herbicides, follow safety guidelines, and be mindful of the potential environmental impact. Always use herbicides responsibly and in accordance with local regulations.
Additional Tips for Azalea Removal

Soil Testing
Before replanting in the same area, consider conducting a soil test. Azaleas thrive in acidic soil, so if your soil is not naturally acidic, you may need to amend it to accommodate other plants.
Replanting
After removing the azaleas, you have a blank canvas to redesign your garden. Choose new plants that complement your landscape and thrive in your soil conditions.
Pest Prevention
To prevent future pest infestations, practice good garden hygiene and regularly inspect your plants for signs of trouble. Address any issues promptly to avoid a repeat of the situation.
Consulting an Expert
If you’re unsure about the best approach to removing azaleas or have concerns about the health of your garden, consider consulting a gardening or landscaping expert. They can provide personalized advice and recommendations.
Disposal Regulations
Be aware of local regulations regarding the disposal of plant materials. Some areas may have specific guidelines for green waste disposal, so check with your local authorities for guidance.
Conclusion
Removing azaleas from your garden can be a necessary step for maintaining a healthy and aesthetically pleasing landscape. By following the steps outlined in this guide, you can effectively kill azaleas and ensure they do not regrow. Remember to dispose of the plants responsibly and consider alternative methods like herbicides for a more permanent solution.
FAQs
Azaleas can have extensive root systems, making them challenging to remove. However, with the right tools and techniques, it can be done effectively.
Yes, you can use the trimmings for compost as long as the plants are disease-free. Composting can be an eco-friendly way to dispose of them.
The time it takes for herbicide to kill azaleas can vary, but you should start to see results within a few weeks of application.
Yes, you can replant in the same spot after removing azaleas. Just make sure to amend the soil if needed to create optimal growing conditions for your new plants.
The best time to remove azaleas is typically in the late fall or early spring when the plants are not actively growing. This minimizes stress on the plants and allows for easier removal.

