Introduction
In our fast-paced world, road safety is of paramount importance. Speed bumps are an effective way to control vehicle speed and ensure the safety of pedestrians and motorists alike. While there are various types of speed bumps available, concrete speed bumps are known for their durability and effectiveness. In this article, we will guide you through the process of making a concrete speed bump, ensuring that it meets all the necessary standards for safety and functionality.
Understanding the Basics
Gather the Necessary Materials
Before you start constructing a concrete speed bump, you’ll need to gather the following materials:
- Concrete mix
- Reinforcement bars (rebar)
- Shovel
- Wheelbarrow
- Wooden forms
- Screed board
- Level
- Tamping tool
- Float
- Safety gear (gloves, goggles, and mask)
Selecting the Location
Choose the location for your speed bump carefully. It should be strategically placed to slow down traffic where it’s needed most. Consider factors such as traffic volume, speed limits, and pedestrian safety.
Designing the Speed Bump
Designing a concrete speed bump is a critical step in ensuring its effectiveness and safety. The design should take into account various factors, including traffic volume, speed limits, and the specific location where the speed bump will be installed. Here’s a step-by-step guide to help you design a well-planned speed bump:
Assessing the Location
- Begin by assessing the location where you intend to install the speed bump.
- Consider the purpose of the speed bump—whether it’s for slowing down traffic near a school, residential area, or any other high-traffic zone.
- Take note of the current traffic conditions, including the average speed of vehicles passing through the area.
Determining the Ideal Height
- The height of your speed bump is a crucial factor. It should be high enough to slow down vehicles effectively but not so high that it becomes a nuisance or hazard.
- Refer to local traffic regulations or guidelines to determine the recommended height for speed bumps in your area.
Calculating the Length
- The length of the speed bump plays a significant role in its effectiveness. A longer speed bump generally provides a smoother ride for vehicles while still achieving the desired speed reduction.
- Calculate the length based on the recommended height, taking into account the slope on both sides.
Slope and Shape

- Design the slope of the speed bump carefully. It should have gradual inclines on both sides to ensure a smooth transition for vehicles.
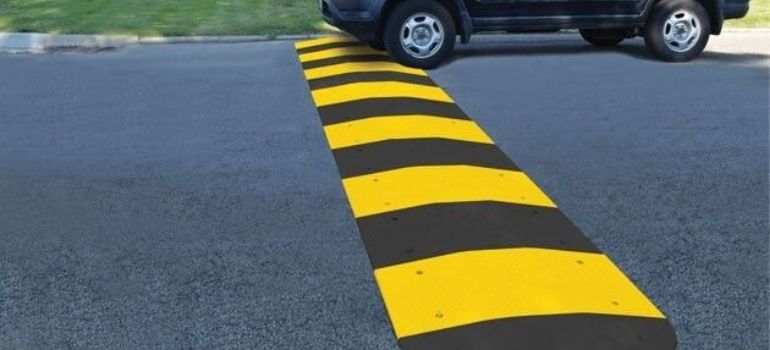
- Consider the shape of the speed bump. Typically, it is a rounded hump with sloping sides to minimize the impact on vehicles.
Spacing and Placement
- Determine the ideal spacing between speed bumps if you plan to install multiple bumps in a row. The spacing should be sufficient to allow vehicles to recover between each bump.
- Mark the exact placement of the speed bump on the road, ensuring it aligns with your initial assessment of traffic flow.
Compliance with Regulations
- Check local regulations and standards to ensure that your speed bump design complies with all necessary requirements.
- Some areas may have specific rules regarding the dimensions, signage, and markings for speed bumps.
Seek Professional Advice
- If you are uncertain about any aspect of the design, consider seeking advice from a traffic engineer or a professional experienced in road design.
- Their expertise can help ensure that your speed bump design is safe and effective.
Construction Process
Preparation
- Begin by marking the area where the speed bump will be installed.
- Dig a trench according to the design dimensions. This trench will accommodate the concrete and rebar.
Installing Rebar
- Place the reinforcement bars (rebar) within the trench, ensuring they are evenly spaced.
- Use wire ties to secure the rebar in place. This will provide added strength to the speed bump.
Creating the Formwork
- Build wooden forms around the trench to shape the concrete. Make sure the forms are level and secure.
- The forms should match the design of the speed bump, including its height and slope.
Mixing and Pouring Concrete
- Follow the manufacturer’s instructions to mix the concrete thoroughly in a wheelbarrow.
- Pour the concrete into the formwork, starting from one end and working your way to the other.
- Use a screed board to level the concrete surface.
- Tamp the concrete to remove air bubbles and ensure a smooth finish.
- Use a float to further smooth the surface and create a consistent texture.
Finishing Touches
Curing
- Cover the newly poured concrete with plastic sheeting to keep it moist.
- Allow the concrete to cure for at least 48 hours before removing the forms.
Painting and Marking
- Once the concrete is fully cured, paint the speed bump with bright, reflective paint.
- Add proper road markings and signage to alert drivers to the presence of the speed bump.
Maintenance and Longevity
Regular Inspection
- To ensure the longevity of your concrete speed bump, conduct regular inspections.
- Look for cracks, signs of wear, or damage caused by heavy vehicles.
Repairs
- If you notice any damage, address it promptly by repairing the affected areas.
- Small cracks can be filled with concrete filler, while larger damage may require professional repairs.
Benefits of Concrete Speed Bumps
Effective Speed Reduction
- Concrete speed bumps effectively reduce vehicle speeds, enhancing safety in high-traffic areas.
- They force drivers to slow down, reducing the risk of accidents.
Durability
- Concrete speed bumps are highly durable and can withstand years of use without significant wear and tear.
- They require minimal maintenance, making them cost-effective in the long run.
Customization
- Concrete speed bumps can be customized to fit specific design requirements, including size and shape.
- This flexibility allows for tailored traffic calming solutions.
Environmental Considerations
Eco-Friendly
- Concrete is an eco-friendly choice for speed bumps as it can be recycled.
- It has a lower environmental impact compared to some other materials.
Conclusion
Creating a concrete speed bump is a meticulous process that requires careful planning and execution. By following the steps outlined in this article, you can ensure the construction of a durable and effective speed bump that enhances road safety. Remember to adhere to local regulations and standards to create a speed bump that serves its purpose effectively.
FAQs
Concrete speed bumps are often more effective due to their durability and ability to withstand heavy traffic.
The construction time can vary, but it typically takes a few days from preparation to curing.
Yes, local regulations may dictate the height, length, and slope of speed bumps. Always check with your local authorities.
Yes, you can install a concrete speed bump on private property, but it’s essential to follow safety guidelines.
Yes, alternatives include asphalt and rubber, but concrete is preferred for its longevity and effectiveness.


