Understanding the Purpose of a Retaining Wall
Before you start building, it’s crucial to understand why you need a retaining wall. These walls are primarily designed to hold back soil on sloped terrain, preventing erosion and creating level surfaces for landscaping or construction.
Planning and Designing Your Retaining Wall
Begin by determining the wall’s height, length, and shape. Create a design that suits your landscape and meets your functional needs. Consider factors like drainage, soil type, and local building codes.
Gathering the Necessary Materials and Tools
Before you can start pouring your concrete retaining wall, it’s crucial to have all the required materials and tools at your disposal. Here’s a list of what you’ll need:
Materials:
- Concrete Mix: Choose a high-quality concrete mix suitable for your project. The type of mix may vary depending on factors like wall height and local climate.
- Reinforcement (Rebar or Mesh): Reinforce your retaining wall for added strength and durability. Rebar (reinforcing steel bars) or mesh will help prevent cracks and maintain the wall’s integrity.
- Form Boards: You’ll need sturdy form boards to create the shape of your retaining wall. These boards will hold the concrete in place while it sets.
- Gravel: Use gravel to create a well-draining foundation beneath the retaining wall. This is essential for preventing water buildup behind the wall.
- Plastic Sheeting or Wet Burlap: For the curing process, you’ll need plastic sheeting or wet burlap to cover the freshly poured concrete. This keeps it moist during the curing period.
Tools:
- Wheelbarrow: A wheelbarrow will be helpful for mixing and transporting concrete to the forms.
- Shovel: You’ll need a shovel for various tasks, such as excavating the foundation and distributing concrete.
- Level: A level is essential for ensuring that your forms are straight and level during construction.
- Trowel: This tool will be used for finishing and smoothing the concrete surface after pouring.
- Concrete Mixer (Optional): If you’re working on a larger project, a concrete mixer can save you time and effort in mixing the concrete.
- Saw (for Cutting Form Boards): If your retaining wall has specific angles or curves, a saw may be necessary to cut form boards to the desired shape.
- Measuring Tape: You’ll need accurate measurements for proper planning and construction.
- Safety Gear: Don’t forget safety equipment, including gloves, safety glasses, and appropriate clothing.
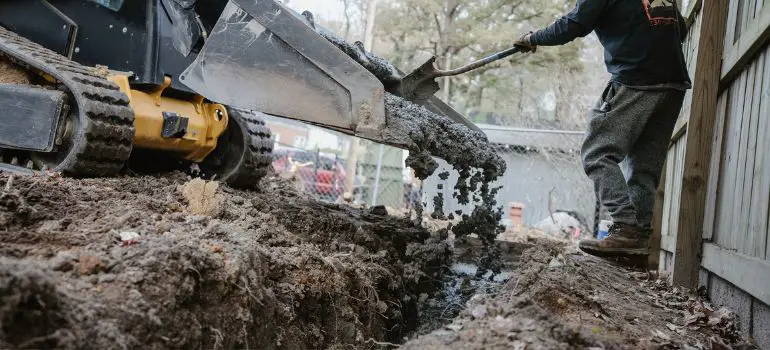
Preparing the Foundation
A strong and stable foundation is essential for the longevity and structural integrity of your concrete retaining wall. Here are the steps to prepare the foundation properly:
- Excavation: Start by excavating the area where your retaining wall will be located. The depth and width of the excavation will depend on the height and length of your wall. Use a shovel or excavator to remove soil and create a trench.
- Leveling and Compaction: Once you’ve excavated the area, ensure that the base is level and compacted. Use a plate compactor or hand tamper to compact the soil thoroughly. This step is crucial to prevent settling over time.
- Gravel Layer: To improve drainage and provide a stable base, add a layer of gravel to the excavated area. The thickness of the gravel layer will vary depending on your specific project requirements. Typically, a few inches of gravel will suffice. Use a rake to spread the gravel evenly.
- Compact the Gravel: After adding the gravel, compact it using the same plate compactor or hand tamper. This step helps create a solid and well-draining foundation for your retaining wall.
- Check for Level: Use a level to ensure that the gravel base is perfectly level. Any slopes or unevenness at this stage can lead to problems with your retaining wall’s alignment and stability.
- Measure and Mark: Mark the layout of your retaining wall on the compacted gravel base. Use string lines and stakes to establish the wall’s exact position, ensuring it follows the planned design.
- Prepare the First Row: If your retaining wall requires a first row of blocks or stones, lay them down on the compacted gravel according to your design. This row serves as the initial anchor for the wall.
Building the Concrete Forms
Construct sturdy wooden forms that match your wall’s design. Make sure they are securely anchored and level to create a precise shape for the concrete.
Mixing the Concrete
Mixing concrete correctly is crucial for the strength and durability of your retaining wall. Here’s how to do it:
Materials and Tools You’ll Need:
- Concrete Mix: Use a high-quality concrete mix suitable for your project’s requirements. The packaging typically provides guidelines for the water-to-mix ratio.
- Water: Clean and fresh water is essential for the concrete mix.
- Concrete Mixer or Wheelbarrow: You can use a concrete mixer for larger projects, but for smaller ones, a wheelbarrow and a mixing hoe will suffice.
Instructions:
- Safety First: Before you begin, put on safety gear, including gloves and safety glasses, to protect yourself from concrete splatter.
- Measure Water: Start by measuring the amount of water needed for the concrete mix. Follow the instructions on the concrete mix packaging for the correct water-to-mix ratio. This ratio is crucial for achieving the desired strength and consistency.
- Add Concrete Mix: If you’re using a wheelbarrow, place it on a level surface. Then, add the concrete mix to the wheelbarrow or concrete mixer. Make a small well in the center of the dry mix to hold the water.
- Pour Water: Gradually pour the measured water into the well in the dry mix. Use a mixing hoe or shovel to blend the water and dry mix together. Start in the center and work your way out, gradually incorporating the dry mix into the water.
- Mix Thoroughly: Continue to mix the concrete thoroughly until you achieve a consistent, lump-free blend. This process may take a few minutes, and it’s essential to ensure that all the dry mix is wetted uniformly.
- Check Consistency: As you mix, periodically check the consistency of the concrete. It should have the texture of thick oatmeal or cake batter. If it’s too dry, add small amounts of water and remix. Conversely, if it’s too wet, add more dry mix.
- Avoid Overmixing: Be careful not to overmix the concrete, as this can weaken it. Stop mixing as soon as you achieve a uniform consistency.
- Use the Concrete Promptly: Concrete has a limited working time before it begins to set. Once you’ve mixed it to the right consistency, use it promptly to pour into the forms for your retaining wall.
- Clean Your Tools: After you’ve finished mixing and pouring the concrete, clean your tools and equipment immediately. Dried concrete can be challenging to remove once it hardens.
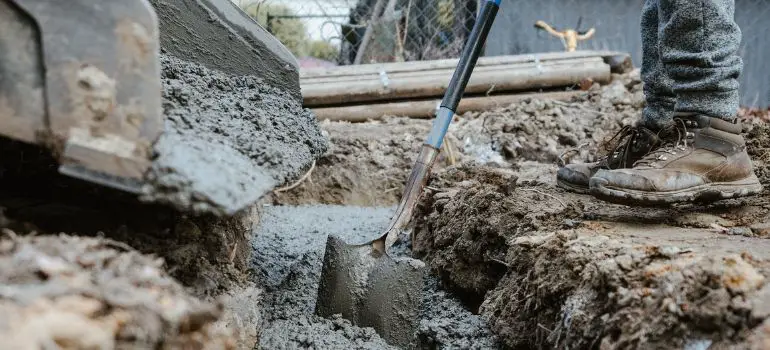
Pouring the Concrete
Pouring the concrete is a critical step in building your retaining wall. Proper technique ensures that the concrete fills the forms evenly and without voids. Here’s how to do it:
Materials and Tools You’ll Need:
- Mixed Concrete: Prepare the concrete mix as outlined in the previous step.
- Shovel or Concrete Bucket: Use a shovel or a concrete bucket to transport the mixed concrete to the forms.
- Wheelbarrow (Optional): If you’ve mixed the concrete in a wheelbarrow, you can use it to transport the concrete to the pouring area.
- Tamping Rod or Vibrator (Optional): A tamping rod or concrete vibrator can help remove air bubbles and ensure proper consolidation of the concrete within the forms.
Instructions:
- Position Forms: Ensure that the wooden forms for your retaining wall are securely in place, level, and properly anchored. Double-check the alignment and height of the forms to match your design.
- Start Pouring: Begin pouring the mixed concrete into the forms, starting from one end and working your way to the other. If you’re using a wheelbarrow, carefully scoop and dump the concrete into the forms. If you have a concrete bucket, pour the concrete evenly along the length of the wall.
- Distribute the Concrete: Use a shovel or a concrete rake to distribute the concrete evenly within the forms. Fill the forms to the top, but avoid overfilling or spilling excess concrete outside the forms.
- Consolidate the Concrete: To remove air pockets and ensure that the concrete settles uniformly, you can use a tamping rod or a concrete vibrator. Insert the rod or vibrator into the concrete at various points along the wall’s length and gently tap or vibrate it. This helps achieve a solid and void-free structure.
- Smooth the Surface: After filling the forms, use a trowel to smooth the surface of the concrete. This step ensures that the face of your retaining wall will have an even and finished appearance. Pay attention to detail, as the finish will be visible.
- Check for Proper Alignment: Periodically check the alignment and height of the concrete as you pour and smooth. Adjust as needed to maintain the wall’s intended design and dimensions.
- Continue in Sections: If your retaining wall is particularly long or complex, consider pouring it in sections, allowing each section to set before pouring the next. This can help maintain uniformity and prevent issues with setting.
- Avoid Overworking: Be cautious not to overwork the concrete by excessive troweling or manipulation. Once you’ve achieved a smooth surface, avoid unnecessary disturbances.
- Cure the Concrete: After pouring and smoothing, cover the fresh concrete with plastic sheeting or wet burlap to keep it moist during the curing process. Proper curing is crucial for the concrete’s strength and durability.
Finishing and Smoothing the Surface
After pouring the concrete into the forms, the next critical step is to finish and smooth the surface. A well-finished surface not only enhances the wall’s appearance but also ensures its long-term durability. Here’s how to do it:
Materials and Tools You’ll Need:
- Concrete Trowel: A concrete trowel with a flat, smooth surface is essential for finishing and smoothing the concrete.
- Edging Tool (Optional): An edging tool can be used to create rounded or beveled edges on the face of the retaining wall for aesthetic purposes.
- Safety Gear: Always wear safety gear, including gloves and safety glasses, when working with concrete.
Instructions:
- Wait for the Right Time: Timing is crucial when finishing the concrete surface. You should begin the finishing process when the concrete has set to the point where it can support your weight but is still somewhat soft. This is typically a few hours after pouring, but it may vary depending on weather conditions and the concrete mix used.
- Start at One End: Begin the finishing process at one end of the retaining wall and work your way to the other. It’s essential to maintain a consistent approach to achieve a uniform surface.
- Use the Trowel: Hold the concrete trowel at a slight angle and press it into the surface of the concrete. Push the trowel forward while applying gentle pressure. This will help level the surface and remove any imperfections or excess concrete.
- Smooth in Straight Lines: When smoothing the surface, move the trowel in straight lines along the length of the wall. Overlap each pass slightly to ensure a smooth and even finish. Use a consistent pressure to avoid creating uneven depressions.
- Round or Bevel Edges (Optional): If you desire rounded or beveled edges on your retaining wall, use an edging tool to create the desired shape. Run the edging tool along the edges of the wall, shaping them as desired.
- Avoid Overworking: Be cautious not to overwork the concrete. Once you’ve achieved a smooth and even surface, avoid unnecessary troweling or manipulation, as this can lead to surface imperfections.
- Pay Attention to Details: Keep an eye out for any voids or blemishes on the surface. Address these promptly by adding a small amount of fresh concrete and smoothing it with the trowel.
- Inspect the Finish: Periodically step back and inspect the finish for uniformity and overall quality. Make any necessary adjustments as you go along.
- Curing Continues: As you finish and smooth the surface, remember that the curing process continues. Keep the concrete moist by covering it with plastic sheeting or wet burlap during and after finishing.
- Clean Tools: After you’ve finished smoothing the surface, clean your concrete trowel and any other tools immediately. Dried concrete can be challenging to remove once it hardens.
Curing the Retaining Wall
Curing is a critical step in the concrete retaining wall construction process. It involves maintaining the right moisture and temperature conditions to ensure that the concrete cures and hardens properly. Here’s how to do it:
Materials and Tools You’ll Need:
- Plastic Sheeting or Wet Burlap: You’ll need plastic sheeting or wet burlap to cover the freshly poured concrete and keep it moist during the curing period.
- Stakes and Weights: To secure the plastic sheeting or wet burlap in place.
- Water Source: Ensure you have a water source nearby to wet the burlap or plastic sheeting.
Instructions:
- Timing is Crucial: Curing should begin as soon as you’ve finished and smoothed the concrete surface. Start the curing process while the concrete is still damp but not excessively wet, typically a few hours after pouring.
- Cover the Surface: Lay plastic sheeting or wet burlap over the entire surface of the retaining wall. Ensure it completely covers the concrete and extends beyond the edges of the wall.
- Secure the Covering: Use stakes or weights to secure the plastic sheeting or wet burlap in place. This prevents it from blowing away or shifting during the curing period.
- Keep Moist: The goal of curing is to keep the concrete moist for an extended period, typically at least 48 hours. Check the covering periodically to ensure it remains damp. If it dries out, lightly spray or sprinkle water over it to maintain moisture.
- Avoid Direct Sunlight: Protect the curing concrete from direct sunlight, especially during hot and sunny weather. Use additional coverings or shade if necessary to prevent rapid drying, which can lead to surface cracking.
- Monitor Temperature: Ideally, keep the concrete within a moderate temperature range, around 50-85°F (10-30°C). Extreme temperature fluctuations can affect curing, so take precautions in very hot or cold weather.
- Extend Curing Time: For the best results, consider extending the curing period beyond the minimum 48 hours. A longer curing time, up to seven days, can significantly improve the concrete’s strength and durability.
- Don’t Disturb the Concrete: While the concrete is curing, avoid walking on it or placing heavy objects on it. Any disturbances can disrupt the curing process and affect the final strength of the retaining wall.
- Inspect for Cracks: Periodically inspect the curing concrete for any signs of cracks or damage. If you notice any issues, address them promptly to prevent further damage.
- Complete Curing: Once the curing period is complete, carefully remove the plastic sheeting or wet burlap. The retaining wall will continue to harden and gain strength over time.
Removing the Forms
After the curing period, carefully remove the wooden forms. Be gentle to prevent damaging the newly formed retaining wall.
Adding Drainage
Install drainage behind the wall to prevent water buildup. Use gravel or perforated pipe to ensure proper drainage.
Backfilling and Compacting
Backfill the space behind the wall with soil, compacting it in layers to prevent settling. Ensure proper compaction to maintain wall stability.
Sealing the Wall
Consider applying a concrete sealer to protect your retaining wall from moisture and the elements. This will prolong its lifespan and appearance.
Landscaping and Final Touches
Complete your landscaping project by adding plants, mulch, or decorative stones around your new concrete retaining wall. This step adds beauty and functionality to your outdoor space.
Maintenance Tips for Your Concrete Retaining Wall
To ensure your retaining wall stands the test of time, regularly inspect it for cracks or damage. Clean the surface as needed and address any issues promptly.
Conclusion
Building a concrete retaining wall may seem like a challenging task, but with careful planning and attention to detail, it can be a rewarding DIY project. Not only will it enhance the aesthetics of your landscape, but it will also serve a vital functional purpose in preventing soil erosion. Follow the steps outlined in this guide, and you’ll be well on your way to a successful retaining wall project.
FAQs
The time required depends on the wall’s size and complexity, but it typically takes several days to complete all the steps.
While DIY is possible, hiring a professional may be necessary for larger or more complex projects to ensure structural integrity.
Costs vary widely based on materials, size, and location, but budget for concrete, rebar, and formwork, among other expenses.
In many areas, you’ll need a permit for retaining walls exceeding a certain height. Check local building codes for specific requirements.
Proper curing, reinforcement with rebar, and adequate drainage are essential for minimizing the risk of cracks in your retaining wall.


