Introduction
Backstabbed wires can be a source of frustration and even danger if not handled correctly. These wires are often used in electrical outlets and switches and are notorious for their unreliable connections. In this article, we will walk you through the process of safely removing and replacing backstabbed wires to ensure the safety and reliability of your electrical system.
What Are Backstabbed Wires?
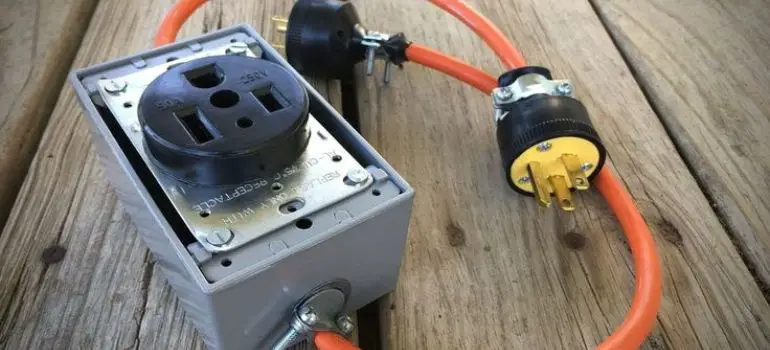
Backstabbed wires, also known as “back-wired” or “stab-in” connections, are a quick and convenient method used by electricians and homeowners to connect wires to outlets and switches. Instead of wrapping the wire around terminal screws, they are inserted into small holes in the back of the device. While this method may save time during installation, it can lead to loose connections, overheating, and potential electrical hazards over time.
Tools and Materials You’ll Need
Before you begin, gather the following tools and materials:
- Screwdriver (Phillips and flathead)
- Needle-nose pliers
- Wire stripper
- Voltage tester
- New electrical device (outlet or switch)
- Wire connectors
- Electrical tape
- Safety goggles
- Gloves
Safety Precautions
- Turn off the power: Before you begin any electrical work, locate your home’s main circuit breaker and turn off the power to the circuit you’ll be working on. If you’re unsure which breaker controls the circuit, it’s best to turn off the main power supply.
- Use a voltage tester: Even after turning off the power, use a voltage tester to confirm that the circuit is de-energized. This additional step ensures your safety by verifying that no electrical current is present.
- Wear safety goggles: Protect your eyes by wearing safety goggles when working with electrical systems. Accidents can happen, and flying debris or sparks can cause eye injuries.
- Wear gloves: Wear gloves designed for electrical work to protect your hands from potential electrical hazards and to provide a secure grip on tools and wires.
- Avoid wet conditions: Do not work on electrical systems in wet or damp conditions. Water and electricity do not mix, and wet environments increase the risk of electric shock.
- Use the right tools: Always use tools and equipment that are in good condition and appropriate for the job. Using damaged or incorrect tools can lead to accidents.
- Stay organized: Keep your workspace organized and free from clutter. This helps prevent tripping hazards and ensures that you can access your tools and materials easily.
- Work in a well-lit area: Adequate lighting is essential to see what you’re doing and to identify wire colors and connections correctly.
- Disconnect power sources: Ensure that all power sources, including backup generators or secondary power supplies, are disconnected before starting any electrical work.
- Work methodically: Follow a step-by-step approach, and don’t rush the job. Take your time to make safe and secure connections.
Now that we’ve covered the basics, let’s get into the step-by-step process of removing backstabbed wires safely and effectively.
Step 1: Turn Off the Power
The first step is crucial for your safety. Locate your home’s main circuit breaker and turn off the power to the circuit you’ll be working on. If you’re unsure which breaker controls the circuit, it’s best to turn off the main power supply.
Step 2: Remove the Cover Plate
Using a screwdriver, remove the cover plate of the electrical outlet or switch to expose the inner wiring. This will give you access to the wires and backstabbed connections.
Step 3: Identify the Backstabbed Wires
Carefully identify the backstabbed wires connected to the device. They will be inserted into small holes on the back. Take note of their positions and colors as you will need this information later.
Step 4: Release the Wires
Using needle-nose pliers, gently pull the backstabbed wires out of the holes. Be cautious not to damage the wires in the process. If the wires are stuck, you may need to use a screwdriver to release them.
Step 5: Inspect and Prepare the Wires
Once the wires are removed, inspect them for any signs of damage or wear. Trim the ends if necessary and strip about 1/2 inch of insulation from the wire ends using a wire stripper.
Step 6: Attach the New Device
Attach the wires to the new electrical device, either by wrapping them around the terminal screws or using wire connectors, depending on the device’s design and your preference. Make sure the connections are secure.
Step 7: Reinstall the Cover Plate
Carefully tuck the wires back into the electrical box and reattach the cover plate using the screwdriver.
Step 8: Turn the Power Back On
Return to the main circuit breaker and switch the power back on to the circuit. Test the new device to ensure it’s functioning correctly.
Common Mistakes to Avoid
- Not turning off the power: Always disconnect the power source before working with electrical wiring. Failing to do so can result in electric shocks or even electrocution.
- Overlooking wire identification: Keep track of wire colors and positions when removing backstabbed wires. Proper identification ensures that you reconnect them correctly when installing a new device.
- Using damaged wires: Inspect wires for any signs of damage, fraying, or wear. Using damaged wires can compromise the integrity of your electrical connections, leading to potential hazards. Replace any damaged wires as needed.
- Neglecting safety gear: Safety goggles and gloves are essential when working with electricity. Failure to wear proper safety gear can expose you to unnecessary risks, including eye injuries or burns.
- Rushing the job: Take your time when removing and replacing backstabbed wires. Rushing through the process can lead to mistakes and unsafe connections. Follow each step carefully and methodically to ensure a secure and reliable electrical setup.
Frequently Asked Questions (FAQs)
It’s not recommended to reuse backstabbed wires, as they may have been compromised during removal. It’s best to use new wires for a secure connection.
In most cases, you can replace just the backstabbed wires and continue using the existing device. However, if the device is damaged or outdated, it’s a good opportunity to upgrade it.
Backstabbed wires can loosen over time, leading to poor connections and potential fire hazards. It’s safer to use traditional screw terminals or wire connectors.
If you’re not experienced with electrical work, it’s best to hire a licensed electrician to ensure safety and compliance with electrical codes.
Regular inspections are essential. Check your electrical outlets and switches annually for signs of wear, damage, or loose connections.
Conclusion
Removing backstabbed wires is a manageable DIY task that can enhance the safety and reliability of your electrical system. By following the steps outlined in this guide and prioritizing safety, you can confidently tackle this common electrical issue. Remember to turn off the power, identify wires correctly, and use the right tools for the job. With these precautions in place, you can maintain a secure electrical system in your home.


