Installing commercial carpet can be a cost-effective and straightforward way to enhance the look of your office space. In this easy-to-follow guide, we will provide you with step-by-step instructions on how to install commercial carpet yourself. By following these tips and techniques, you can achieve a professional finish without the need to hire expensive floor service providers. We will cover everything from the tools you’ll need to the installation process itself.
Key Takeaways:
- Learn how to install commercial carpet with this step-by-step guide.
- Save money by doing it yourself instead of hiring professionals.
- Discover the essential tools and materials needed for the installation.
- Follow expert tips for a successful commercial carpet installation.
- Explore the benefits of using commercial carpet tiles in your office space.
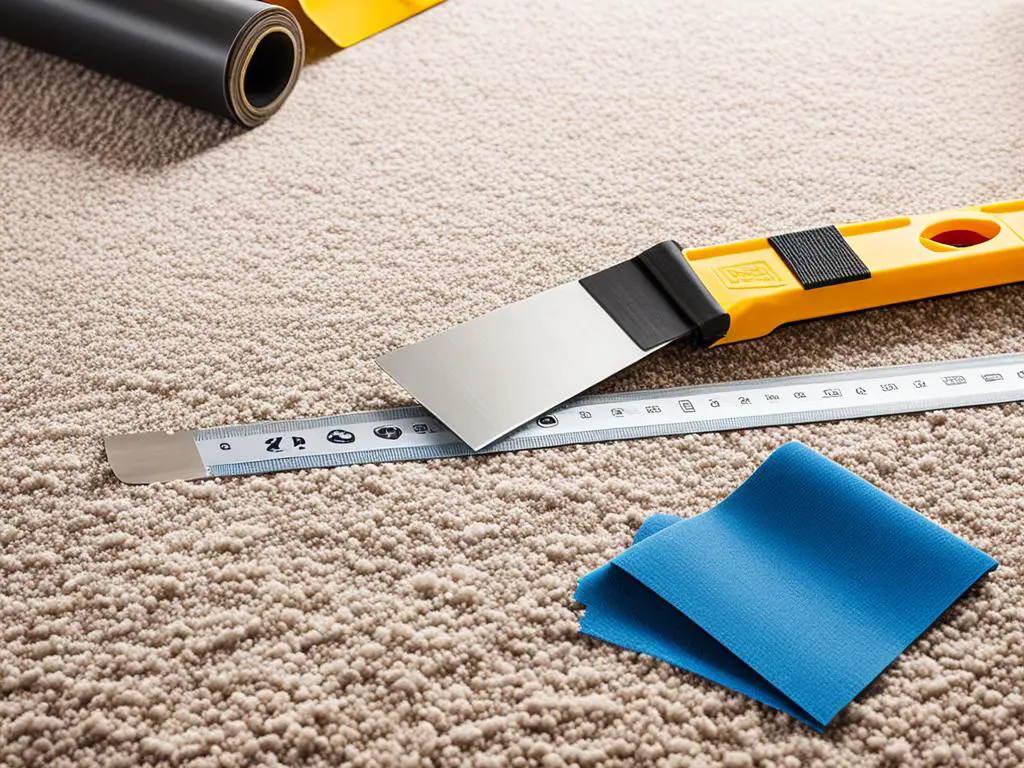
Tools and Materials Needed for Commercial Carpet Installation
To install commercial carpet, you will need a few essential tools and materials. These include:
- Carpet knife: Used to cut the carpet accurately.
- Measuring tape: Essential for measuring the dimensions of the area to be carpeted.
- Screwdriver: Needed for removing any existing baseboards or trim.
- Chalk line: Used to create precise guidelines for lining up the carpet.
- Trowel: Required for applying adhesive to the subfloor.
- Carpet glue/adhesive: Used to secure the carpet to the subfloor.
- Row cutter: Necessary for cutting carpet rows to size.
- Hammer/seal roller: Used to ensure proper adhesion of the carpet to the subfloor.
- Seam sealer: Essential for sealing any seams in the carpet.
Having all the necessary tools on hand before starting the installation process is crucial for a smooth workflow. These tools will help you measure, cut, and install the carpet pieces accurately, ensuring a professional-looking finish.
Step-by-Step Guide to Installing Commercial Carpet
Installing commercial carpet requires careful planning and attention to detail. By following the right techniques and best practices, you can achieve a professional finish that will enhance the aesthetics and functionality of your commercial space. Here is a step-by-step guide to help you through the commercial carpet installation process:
Gather the Necessary Tools and Materials
Before you begin installing the commercial carpet, ensure that you have all the required tools and materials at hand. This includes:
- Carpet knife
- Measuring tape
- Screwdriver
- Chalk line
- Trowel
- Carpet glue/adhesive
- Row cutter
- Hammer/seal roller
- Seam sealer
Measure and Prepare the Area
Start by accurately measuring the area where the carpet will be installed. This will help you determine the amount of carpet you need to purchase. Once you have the measurements, prepare the area by removing any existing flooring and ensuring the subfloor is clean, dry, and free of debris.
Lay the Carpet Pad
Next, roll out the carpet pad and secure it to the subfloor using adhesive or staples. Make sure the pad is smooth and free of wrinkles or creases.
Cut and Install the Carpet
Now it’s time to cut the carpet according to the measurements you took earlier. Use a carpet knife to make precise cuts, ensuring a proper fit. Once the carpet is cut, roll it out over the padded area, leaving a few inches of excess material along the walls.
Secure the Carpet in Place
Using a row cutter or similar tool, trim the excess carpet along the walls, leaving a clean and flush edge. Secure the carpet in place by applying carpet glue or adhesive along the edges and seams. Use a hammer or seal roller to ensure a strong bond.
Finishing Touches
Finally, make any necessary adjustments to ensure the carpet is properly aligned and smooth. Trim any excess carpet around obstacles such as vents or doorways. Vacuum the carpet to remove any debris and give it a clean and polished appearance.
By following these step-by-step instructions and using the right techniques, you can achieve a professional and seamless commercial carpet installation. Remember to take your time, double-check measurements, and seek expert advice if needed.
| Step | Description |
|---|---|
| 1 | Gather the necessary tools and materials |
| 2 | Measure and prepare the area |
| 3 | Lay the carpet pad |
| 4 | Cut and install the carpet |
| 5 | Secure the carpet in place |
| 6 | Finishing touches |

Tips for a Successful Commercial Carpet Installation
When it comes to DIY commercial carpet installation, following the right techniques can save you time and money. Here are some valuable tips to ensure a successful installation:
- Properly prepare the subfloor: Before installing the carpet, make sure the subfloor is clean, dry, and level. Remove any existing flooring material and repair any imperfections to ensure a smooth surface for installation.
- Accurate measurements are key: Take precise measurements of the room to determine the amount of carpet you’ll need. Remember to add a few extra inches to account for cutting and fitting.
- Invest in quality tools and materials: Using the right tools and materials can make a significant difference in the outcome of your installation. Quality carpet adhesive, a sharp carpet knife, and a sturdy trowel will help you achieve professional results.
- Use proper installation techniques: Start by rolling out the carpet and allowing it to acclimate to the room temperature for at least 24 hours. Use a chalk line to mark guidelines for straight cuts and work in small sections, applying adhesive and smoothing out the carpet as you go.
- Seamless seams: For a seamless appearance, use a seam sealer and follow the manufacturer’s instructions to join the carpet pieces securely. Ensure that the seams are properly aligned and tightly pressed together.
- Allow for curing time: Once the carpet is installed, allow sufficient time for the adhesive to cure before moving furniture or heavy traffic onto the newly installed carpet. This will ensure its long-term durability and performance.
Following these tips will help you achieve a DIY commercial carpet installation that is not only cost-effective but also professional-looking. Take the time to plan and prepare properly, and you’ll enjoy the benefits of a beautiful and functional commercial space.

Note: Professional installation may be required for specific commercial applications or larger areas. Consult a flooring specialist for expert advice and recommendations.
Benefits of Installing Commercial Carpet Tiles
When it comes to commercial flooring options, carpet tiles have gained popularity for their numerous benefits. Whether you’re looking to enhance the aesthetics of your office space or improve functionality, commercial carpet tiles offer advantages that make them a worthwhile investment.
Easy Installation and Flexibility
One of the key benefits of commercial carpet tiles is their easy installation process. Unlike traditional carpets that require professional installation, carpet tiles can be installed by anyone with basic DIY skills. This not only saves you time and money but also gives you the freedom to customize your flooring layout.
Durability and Maintenance
Commercial carpet tiles are designed to withstand heavy foot traffic and high wear and tear. Made from durable materials, these tiles are resistant to stains, fading, and damage, ensuring a long-lasting flooring solution. Additionally, maintenance is a breeze with carpet tiles, as individual tiles can be easily replaced in the case of spills or damage, without the need for extensive repairs or replacement of the entire carpet.
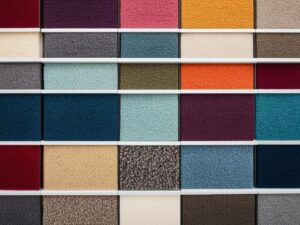
Versatility and Design Options

With commercial carpet tiles, you have a wide range of design options to choose from. From colors and patterns to textures and shapes, carpet tiles provide versatility in creating the perfect aesthetic for your office space. You can mix and match different tiles to create unique patterns and designs, allowing you to showcase your creativity while maintaining a professional look.
Improved Indoor Air Quality
Commercial carpet tiles often have built-in features that promote better indoor air quality. Many carpet tiles are made from low VOC (volatile organic compound) materials, which reduces the emission of harmful chemicals into the atmosphere. Additionally, carpet tiles can act as a filter, trapping allergens and dust particles and improving the overall air quality in your office.
Overall, the benefits of commercial carpet tiles make them an ideal choice for any office environment. Their easy installation, durability, design versatility, and improved indoor air quality make them a practical and cost-effective flooring solution. With a wide range of options available, you can find the perfect commercial carpet tiles to enhance the style and functionality of your office space.
Conclusion
Embarking on a DIY commercial carpet installation project can be a cost-effective and rewarding endeavor. With the step-by-step guide provided in this article, you can confidently tackle the installation process and achieve professional-looking results. By following the right techniques, utilizing the appropriate tools, and employing commercial carpet tiles, you can transform your office space into a beautiful and functional environment.
One of the key advantages of commercial carpet tiles is their versatility. These tiles come in a wide range of colors, patterns, and textures, allowing you to create a customized look that suits your aesthetic preferences. Additionally, commercial carpet tiles are highly durable, making them suitable for high-traffic areas. They can withstand heavy foot traffic, resist stains, and maintain their appearance for years to come.
Another benefit of commercial carpet tiles is their easy maintenance. In case of spills or stains, you can simply replace the affected tile without having to replace the entire carpet. This saves you time and money, as well as ensures that your office space remains clean and presentable at all times.
Now is the perfect time to start your DIY commercial carpet installation project. With the comprehensive step-by-step guide provided in this article and the advantages of commercial carpet tiles, you can create a new, professional look for your office space without breaking the bank. So, gather your tools, roll up your sleeves, and get ready to enjoy the benefits of a beautiful and functional office environment.

